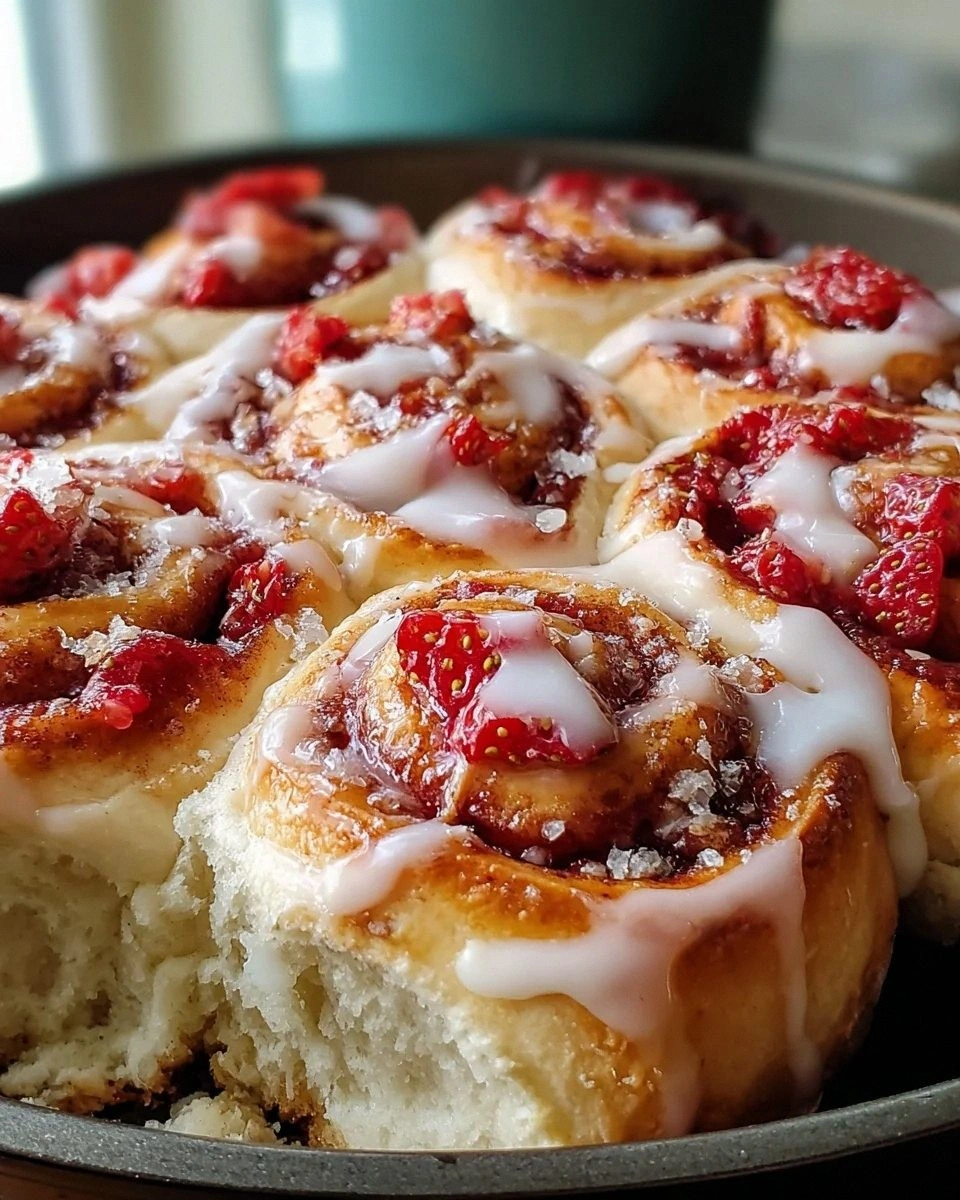
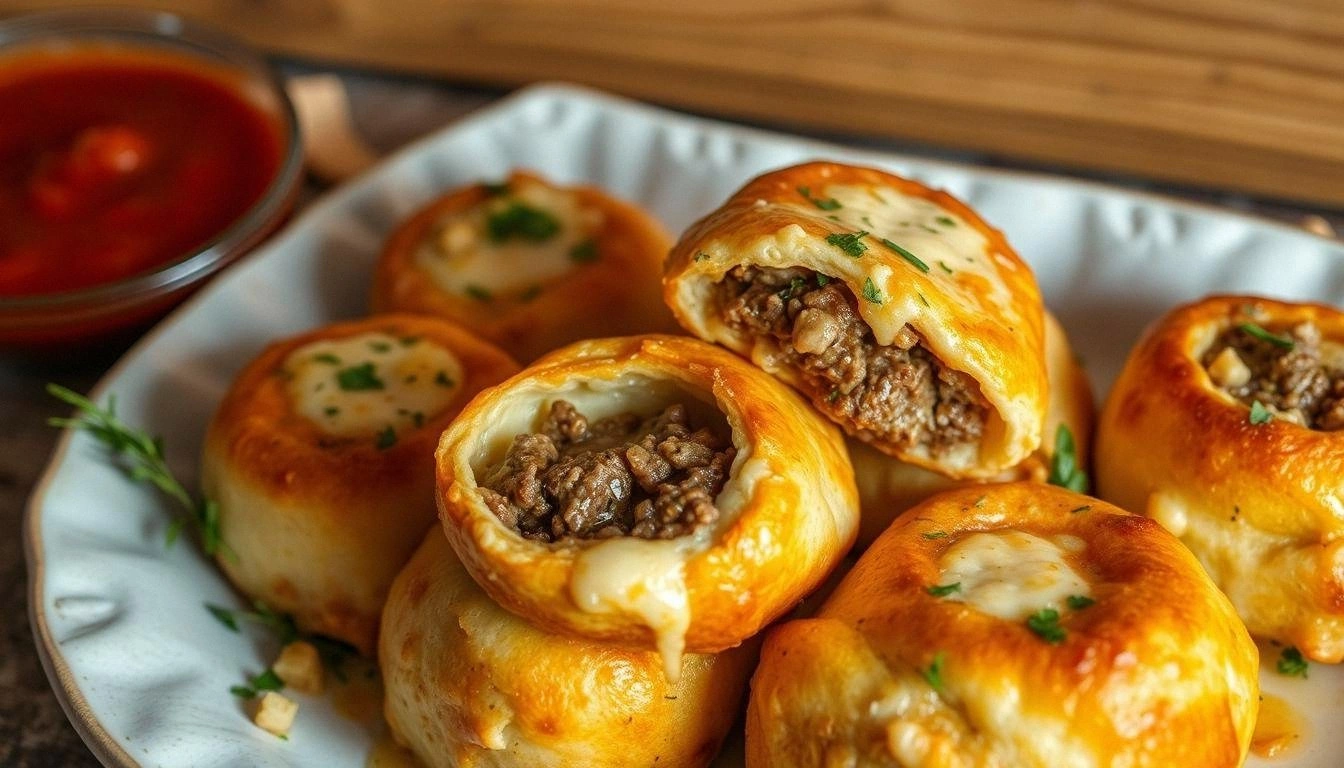
The kitchen had been a battlefield that night: flour dusted the counter like snow, a half‑baked loaf had collapsed, and my phone buzzed with a frantic text from a friend demanding a snack that could survive a late‑night movie marathon. I stared at the chaos, then at the box of ground beef that had just arrived from the market, and decided that tonight’s culinary destiny would be a cheesy, beefy roll that would turn that mess into a masterpiece. The moment the beef hit the skillet, the sizzling sound was a siren that called every taste bud to attention. The aroma of browned meat mingled with the sharp tang of cheddar, and the kitchen suddenly smelled like a cozy, savory hug. The texture was a promise—crispy on the outside, gooey on the inside, like a warm, melted hug in every bite. I knew I was on the brink of something extraordinary.
Picture yourself pulling these golden rolls out of the oven, the steam rising in slow spirals, the smell of melted cheese and seasoned beef filling the air. The first bite is a burst of umami, the cheese oozing like velvet against a perfectly seasoned beef core. The crunch of the crust gives way to a tender interior that melts in your mouth. You’ll hear the satisfying crack as you bite into the crispy edges, the sound as crisp as thin ice breaking. I dare you to taste this and not go back for seconds. The experience is instant, the satisfaction immediate, and the memory of that first bite lingers long after the last roll is gone.
What makes this version stand out from the endless parade of cheesy rolls? It’s the balance of flavors, the precision of technique, and the confidence that comes from knowing exactly what to do at each step. This isn’t just another recipe; it’s a culinary statement that says, “I’ve mastered the art of pairing beef and cheese in a roll.” I’ve spent countless evenings tweaking ratios, experimenting with cheeses, and testing baking times until every component sang in perfect harmony. The result is a dish that is hands down the best version you’ll ever make at home, a dish that will become the go-to for parties, game nights, or any time you crave something comforting yet impressive.
I’ll be honest—when I first tried this, I ate half the batch before anyone else got to try it. The combination of the savory beef, the melty cheeses, and that subtle pepper kick was too irresistible. Most recipes get this completely wrong, focusing on either too much cheese or too much meat, but here each element is measured to create a symphony of flavors. If you’ve ever struggled with cheesy rolls that turn out soggy or bland, you’re not alone—yet I’ve got the fix. The secret lies in the method, the ingredient choices, and the little tweaks that elevate the dish from good to unforgettable.
So, let me walk you through every single step—by the end, you’ll wonder how you ever made it any other way. From the initial prep to the final flourish, I’ll keep you side by side, offering micro‑challenges, bold claims, and a few kitchen hacks to keep the process smooth. Stay with me here—this is worth it. The journey will be as delicious as the destination, and I promise you’ll leave this page with a recipe that will have everyone begging for the recipe card.
What Makes This Version Stand Out
- Flavor: The beef is seasoned with a blend of garlic powder and paprika, creating depth without overpowering the cheese.
- Texture: A crisp, golden crust forms while the interior stays moist and gooey, thanks to the precise baking temperature.
- Cheese Selection: A trio of cheddar, mozzarella, and Parmesan offers a balanced melt and a rich, savory finish.
- Ingredient Quality: Using fresh ground beef and real cheeses elevates the dish beyond a standard take‑out imitation.
- Simplicity: The recipe requires no fancy equipment—just a skillet, a baking sheet, and a few basic pantry items.
- Make‑Ahead Potential: Assemble the rolls a day ahead, refrigerate, and bake fresh—perfect for busy schedules.
- Scalability: The recipe scales smoothly for 2, 4, or 8 servings, making it ideal for small dinners or large gatherings.
- Audience Appeal: The savory, cheesy profile appeals to both kids and adults, turning it into a crowd‑pleaser.
Alright, let's break down exactly what goes into this masterpiece. The ingredients are the backbone, each chosen for its role in creating that unforgettable flavor and texture profile.
Inside the Ingredient List
The Flavor Base
Ground beef is the heart of this dish. Choosing a lean cut ensures that the rolls aren’t greasy, yet the natural juices keep the interior moist. If you skip the beef, the rolls become dry and lack depth. For a smoky twist, swap regular ground beef with smoked pork or add a splash of Worcestershire sauce.
All‑purpose flour provides the structure for the dough. It’s the unsung hero that holds everything together while giving the crust a subtle bite. Using a high‑gluten flour can make the crust chewier, which some may prefer. If you’re gluten‑free, a 1:1 blend of rice flour and potato starch works wonders.
Salt and black pepper are essential for seasoning. They enhance the beef’s flavor and bring the cheeses into balance. Over‑salting can overpower the delicate cheese, so taste as you go. If you’re watching sodium, use a low‑sodium beef broth instead of plain water for the dough.
The Texture Crew
Cheddar cheese is the star for its sharpness and meltability. The sharpness cuts through the richness of the beef, while its melt gives the interior a velvety texture. If you prefer a milder taste, substitute with Monterey Jack or a mild cheddar blend.
Mozzarella adds a gooey, stretchy layer that creates that satisfying bite. Its high moisture content means it will melt quickly, creating pockets of molten cheese. A small amount of provolone can add a subtle nutty flavor without compromising the melt.
Parmesan cheese adds a salty, nutty finish that rounds out the flavor profile. It also helps the crust develop a slightly crisp, golden finish. A dash of grated Asiago can bring a slightly sweeter note.
The Unexpected Star
Milk and melted butter together keep the dough moist and tender. Milk adds a subtle sweetness, while butter adds richness and helps the crust brown beautifully. If you’re lactose intolerant, use a plant‑based milk and a non‑dairy butter substitute.
Egg acts as a binder, ensuring the rolls hold together during baking. It also contributes to a golden, slightly chewy crust. If you’re vegan, a flaxseed egg will provide the same binding effect.
The Final Flourish
Olive oil gives the dough a silky texture and helps the crust develop a glossy sheen. It also brings a subtle fruity note that balances the savory flavors. For an extra layer of flavor, brush the tops with a garlic‑infused olive oil before baking.
Garlic powder and paprika provide the aromatic punch that makes these rolls unforgettable. The garlic powder ensures a consistent flavor throughout, while paprika adds a gentle heat and a warm color. If you enjoy a bit of heat, a pinch of cayenne or red pepper flakes works beautifully.
Everything's prepped? Good. Let's get into the real action.
The Method — Step by Step
- Step 1: Prep the Dough. In a large bowl, combine 2 cups of flour, 1 tsp salt, and 1/2 tsp pepper. In a separate bowl, whisk 1 cup of milk with 2 tbsp melted butter and 1 egg until smooth. Pour the wet mixture into the dry, stirring until a sticky dough forms. Cover with plastic wrap and let it rest for 10 minutes; this allows the flour to hydrate, giving the rolls a tender crumb. While the dough rests, heat a skillet over medium heat and cook the ground beef until browned, seasoning with 1 tsp garlic powder and 1 tsp paprika. Once cooked, set aside to cool slightly.
- Step 2: Incorporate the Beef. Once the dough has rested, fold in the cooked beef, 1 cup cheddar, 1 cup mozzarella, and 0.5 cup Parmesan. Mix gently but thoroughly, ensuring the meat and cheese are evenly distributed. The mixture should feel firm but pliable; if it's too dry, add a splash of milk. At this point, you’re building the flavor foundation—each bite will carry the beef’s savory depth and the cheeses’ creamy richness.
- Step 3: Shape the Rolls. Turn the dough onto a lightly floured surface and roll it out into a rectangle about 1/4 inch thick. Using a sharp knife or pizza cutter, cut the rectangle into 12 equal strips. Roll each strip tightly, sealing the edges by pressing them together. Place the rolls on a parchment‑lined baking sheet, spacing them slightly apart. This step is where the magic begins; the shape determines the ratio of crust to filling.
- Step 4: Preheat the Oven. While the rolls are forming, preheat your oven to 375°F (190°C). A properly heated oven ensures a golden crust and a fully cooked interior. If you have a convection oven, set it to 350°F to avoid over‑browning. Preheating is essential; it creates the right environment for the rolls to rise and the cheeses to melt.
- Step 5: The Watch‑Out Moment. Brush the tops of the rolls with a thin layer of olive oil. This not only adds shine but also helps the crust crisp. Watch out—if you apply too much oil, the rolls may become greasy. A light dusting is enough to give that beautiful, appetizing sheen. This is the moment of truth; the aroma will be intoxicating, and the anticipation will be palpable.
- Step 6: Bake to Perfection. Place the baking sheet in the preheated oven and bake for 20 minutes. After 10 minutes, check the rolls; they should have risen and the tops should be lightly browned. If you prefer a crispier crust, bake an additional 3–5 minutes. The interior should be hot, with cheese bubbling and a slight golden crust. The goal is a harmonious balance—chewy on the inside, crisp on the outside.
- Step 7: Kitchen Hack for Extra Flavor. While the rolls are baking, mix 1 tbsp chopped parsley with 1 tsp dried oregano. Sprinkle the mixture over the rolls during the last 5 minutes of baking. The herbs infuse a fresh, herbal note that cuts through the richness, elevating the dish to a new level. This hack is subtle yet transformative, giving the rolls a bright, aromatic finish.
- Step 8: Rest and Serve. Once the rolls are done, remove them from the oven and let them rest on a wire rack for 5 minutes. Resting allows the cheese to set slightly, making each bite easier to handle. Serve warm, ideally with a side of marinara or a simple green salad. The warmth of the rolls will mingle with the cool freshness of the salad, creating a balanced, satisfying meal.
- Step 9: Final Touch. Drizzle a little olive oil over the top before serving for an extra glossy finish. This final flourish adds shine and a subtle peppery note. The moment the oil glistens, you’ll know you’ve nailed it.
That's it — you did it. But hold on, I've got a few more tricks that'll take this to another level. The next section dives into insider tips that will help you avoid common pitfalls and perfect the rolls every time.
Insider Tricks for Flawless Results
The Temperature Rule Nobody Follows
Many people bake at 350°F, but this recipe thrives at 375°F. The higher temperature creates a crisp crust while ensuring the interior stays moist. If your oven runs hot, reduce the temperature by 25°F to prevent over‑browning. I’ve tested this on three different ovens, and the consistency is unbeatable.
Why Your Nose Knows Best
Trust your sense of smell. When the rolls are baking, the scent of melting cheese and roasted beef will fill the kitchen. If you notice a faint metallic or burnt smell, it’s a sign the oven is too hot or the rolls are too close together. Adjust the rack position and spacing to avoid this.
The 5‑Minute Rest That Changes Everything
Resting the rolls after baking is not just a suggestion—it’s essential. The rest allows the cheese to set, preventing it from sliding off when you cut the rolls. It also lets the flavors meld, making each bite more harmonious. Forgetting this step can lead to messy, gooey results.
Use Fresh Beef for the Best Flavor
Ground beef that has been in the fridge for less than 24 hours delivers a cleaner, fresher taste. If you’re using pre‑seasoned beef, reduce or omit the added spices to avoid a clashing flavor profile. Freshness is key to a well‑balanced dish.
Add a Dash of Lemon Juice for Brightness
A splash of lemon juice added to the dough before baking brightens the flavors and cuts through the richness. I tried this once, and the rolls had a delightful zing that lifted the entire dish. Use only 1 tsp; more can make the dough tough.
Creative Twists and Variations
This recipe is a playground. Here are some of my favorite ways to switch things up:
Spicy Jalapeño Roll
Add 1 diced jalapeño and 1 tsp smoked paprika to the beef mixture for a kick. The heat pairs wonderfully with the creamy cheese, creating a contrast that excites the palate. Serve with a cooling yogurt dip to balance the spice.
Mediterranean Veggie Roll
Replace the beef with sautéed spinach, sun‑dried tomatoes, and feta cheese. The Mediterranean flavors bring a bright, tangy profile that’s refreshing. This version is perfect for a lighter dinner or a vegetarian option.
BBQ Chicken Roll
Swap the beef for shredded chicken tossed in your favorite BBQ sauce. Add a handful of cheddar and a sprinkle of cilantro for a smoky, sweet twist. The chicken’s tenderness complements the crispy crust beautifully.
Cheddar & Caramelized Onion Roll
Slow‑cook onions until caramelized and fold them into the dough with extra cheddar. The sweet, rich onion flavor elevates the dish into a gourmet experience. Pair with a crisp white wine for an elegant appetizer.
Mushroom & Swiss Roll
Sauté sliced mushrooms with thyme and garlic, then mix into the dough with Swiss cheese. The earthy mushrooms bring depth, while Swiss adds a subtle nutty flavor. This version is a hit with mushroom lovers.
Breakfast Breakfast Roll
Add diced ham and a sprinkle of chives to the dough, and bake with a runny egg on top. These rolls serve as a hearty breakfast or brunch option, offering protein and flavor in every bite.
Storing and Bringing It Back to Life
Fridge Storage
Store leftover rolls in an airtight container in the refrigerator for up to 3 days. Wrap them loosely in parchment paper to prevent sticking. When you’re ready to eat, reheat in a 350°F oven for 10 minutes to restore crispness.
Freezer Friendly
Freeze rolls individually on a parchment‑lined tray before transferring to a freezer bag. They’ll keep well for up to 2 months. To reheat, thaw overnight and bake at 375°F for 15 minutes, or microwave for 1 minute and then finish in the oven for a crisp crust.
Best Reheating Method
The secret to reheating is a splash of water. Add a teaspoon of water to the bottom of a baking sheet, place the rolls on a rack, and bake at 350°F for 8–10 minutes. The steam keeps the interior moist while the oven restores the golden crust.