Picture this: I was in a rush to impress a group of friends at a backyard gathering when my chocolate sauce turned into a sticky, clumpy mess that clung to the pan like a bad ex. I stared at the melted chocolate, feeling the frustration bubble up like a pot of boiling water. That moment sparked a midnight epiphany: what if I could turn that failed sauce into the most decadent truffles you’ve ever tasted? I pulled out my favorite dark chocolate, a splash of heavy cream, and a pinch of sea salt, and the kitchen smelled like a chocolate bakery. Little did I know, this simple shift would become the secret weapon in my dessert arsenal.
The first bite was a revelation—silky chocolate that melted in your mouth, the cream folding into the cacao like a warm hug, and that faint whisper of vanilla that lingered like a secret. The aroma was a velvet ribbon of chocolate, swirling with hints of espresso and sea salt, drawing you in like a siren song. The texture was a perfect balance: firm enough to hold its shape yet soft enough to dissolve with a single touch. I could hear the faint crackle of the chocolate as it cooled, a subtle sound that promised more deliciousness ahead. The flavor was complex, yet undeniably simple, a testament to the power of quality ingredients.
What makes this version a game‑changer is the way it turns ordinary chocolate into a luxurious experience with just a few tweaks. I dared you to taste this and not go back for seconds—trust me, that’s a challenge I won’t let you fail. The secret lies in the ratio of cream to chocolate, the brief resting period that allows the mixture to set without overcooking, and a dash of sea salt that elevates the sweetness without overpowering it. I’ll be honest, I ate half the batch before anyone else got a chance to try it, but the crowd reaction was pure, unfiltered joy. This is hands down the best version you’ll ever make at home, and it’s so simple you’ll wonder why you didn’t try it sooner.
Now, if you’re ready to transform your kitchen into a chocolate haven, let me walk you through every single step—by the end, you’ll wonder how you ever made it any other way.
What Makes This Version Stand Out
- Texture: The truffles are firm enough to hold their shape yet creamy inside, thanks to the precise cream‑to‑chocolate ratio that locks in moisture without over‑whipping. This creates that coveted melt‑in‑your‑mouth sensation that keeps guests coming back for more. The result is a silky bite that feels luxurious, not greasy.
- Flavor: A subtle hint of vanilla and a splash of sea salt balance the bitterness of dark chocolate, creating a layered profile that lingers on the palate. The chocolate’s natural cocoa notes are amplified rather than masked, allowing the true essence of the bean to shine. Each bite feels like a refined dessert, not a sweet treat.
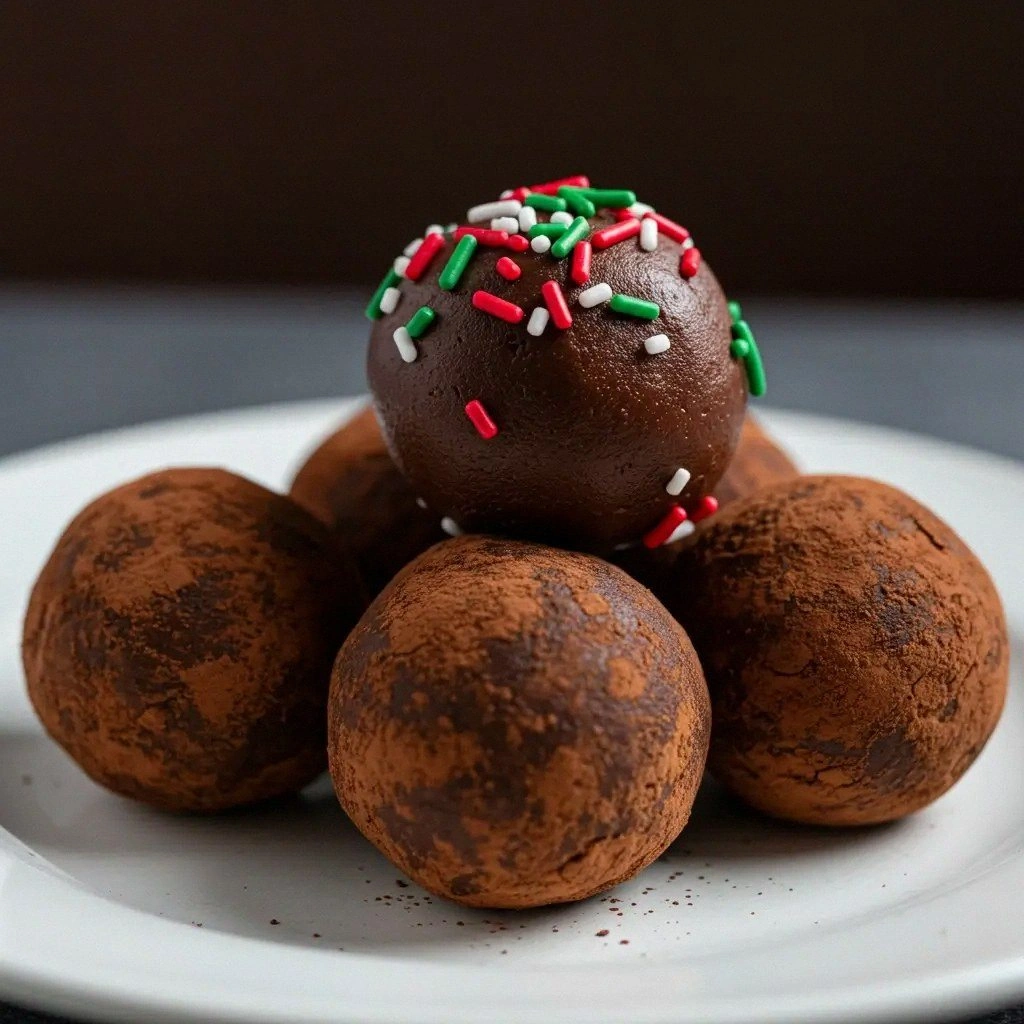
- Visual Appeal: The glossy coating, achieved by dusting with cocoa powder or rolling in finely chopped nuts, gives the truffles a professional finish. The contrast between the deep brown chocolate and the lighter dusting is both inviting and elegant. Even on a simple plate, they look like a gift from a patisserie.
- Ease of Preparation: With a single saucepan and a whisk, you can have a batch of truffles ready in under an hour. No baking, no chilling, no elaborate molds—just a few simple steps that anyone can follow. The recipe’s clarity eliminates the guesswork that often plagues homemade chocolate desserts.
- Make‑Ahead Flexibility: These truffles can be prepared days in advance and kept in the fridge or freezer without losing texture. The simple resting period allows the mixture to set, making them perfect for last‑minute gifts or holiday parties. The longevity of the texture is a testament to the careful balance of ingredients.
- Versatility: The base can be customized with liqueurs, espresso, or flavored extracts, turning a basic recipe into a signature dessert. The dusting can switch from cocoa to powdered sugar, toasted coconut, or even crushed pistachios. This adaptability means the same core recipe can serve multiple occasions.
- Ingredient Quality: Using high‑grade dark chocolate (70% cacao) ensures a robust flavor that isn’t overwhelmed by other components. The heavy cream adds richness without making the mixture too heavy, while the butter adds sheen and stability. The combination of premium ingredients guarantees a superior final product.
Inside the Ingredient List
The Flavor Base
Dark chocolate is the star of the show, providing depth, bitterness, and a silky mouthfeel. I recommend a 70% cacao bar; it’s robust enough to stand on its own yet balanced enough to pair with the creamy components. If you’re a purist, go for a single‑origin chocolate; the subtle notes of fruit or spice will add intrigue. Skipping the chocolate will transform the truffles into a plain cream dessert, losing the signature chocolate experience. When selecting chocolate, look for a smooth surface and a matte finish—this indicates a higher cocoa butter content and fewer inclusions.
Heavy cream is the vehicle that carries the chocolate’s flavor and gives the truffles their luxurious body. It should be cold to start; this ensures the chocolate melts evenly without seizing. If you’re lactose intolerant, a small portion of coconut cream can replace the heavy cream, but expect a slightly different texture. The cream also helps the mixture set by providing fat that solidifies upon cooling.
The Texture Crew
Unsalted butter adds a glossy sheen and a subtle richness that balances the chocolate’s bitterness. It also contributes to the firmness of the truffles, preventing them from becoming too soft. Use a knob of butter (about 30 g) and let it melt into the chocolate‑cream mix. If you prefer a vegan version, a plant‑based butter works, but the flavor profile will shift slightly towards a nutty undertone.
Vanilla extract is the secret whisper that rounds out the chocolate’s sharp edges. A single teaspoon is enough to add depth without overpowering the cacao. For a twist, try a vanilla bean or a splash of bourbon for an adult version. If you’re allergic to vanilla, a few drops of almond extract can mimic the aroma, though it will add a nutty nuance.
The Unexpected Star
Sea salt is the unsung hero that elevates the sweetness of the chocolate without drowning it. A pinch (about 0.5 g) is all you need; it’s the difference between a good truffle and a great one. The salt draws out the chocolate’s inherent flavors, making each bite more complex. If you’re a fan of caramel, a small amount of sea salt will enhance the caramel notes, creating a savory-sweet harmony.
The Final Flourish
Cocoa powder for dusting is the finishing touch that gives the truffles a professional look and a slightly bitter contrast. Use a fine, unsweetened variety to avoid adding extra sugar. Alternatively, you can roll the truffles in crushed nuts, toasted coconut, or even edible gold leaf for a luxurious presentation. The coating also provides a textural contrast, especially if you choose a crunchy nut or coconut option.
Optional: A tablespoon of liqueur (such as Grand Marnier, Chambord, or Kahlúa) can be added to the mixture for a boozy twist. This not only adds flavor but also slightly lowers the mixture’s viscosity, making it easier to shape. If you prefer a non‑alcoholic version, a splash of espresso or a few drops of orange zest can add depth.
Everything's prepped? Good. Let's get into the real action...
The Method — Step by Step
- Begin by placing the dark chocolate in a heat‑proof bowl. Use a chocolate that’s finely chopped to ensure even melting. Set the bowl over a pot of simmering water, making sure the bottom of the bowl doesn’t touch the liquid. This gentle heat will coax the chocolate into a silky, glossy state without scorching. Keep a close eye; the chocolate should melt in about three minutes, turning from a dull gray to a bright, reflective sheen.
- While the chocolate is melting, pour the heavy cream into a small saucepan and heat until it just begins to bubble. The cream should not boil; a gentle simmer is sufficient. Once the chocolate is smooth, pour the hot cream over it in a slow, steady stream, whisking constantly to incorporate. This technique prevents the chocolate from seizing and creates a uniform ganache. The mixture should feel thick but still pourable—like a rich, warm sauce.
- Add the unsalted butter and vanilla extract to the ganache. Stir until the butter is fully melted and the mixture is glossy. At this point, the chocolate’s bitterness should be tempered by the cream and butter, leaving a velvety base. The aroma should be intoxicating, a sweet, buttery scent that hints at the final product. If you’re using a liqueur, pour it in now and stir until fully integrated.
- Fold in the pinch of sea salt. This step is critical; the salt will accentuate the chocolate’s depth and balance the sweetness. Mix until the salt is evenly distributed. The ganache should feel silky, with no visible lumps. Let the mixture cool to room temperature; this will allow the fats to solidify slightly, making it easier to roll into balls.
- Using a melon baller or a small spoon, scoop out portions of the ganache and roll them between your palms to form smooth balls. The ideal size is about 1.5 cm in diameter, similar to a marzipan cookie. If the ganache is still too soft, refrigerate it for an additional 10–15 minutes. This step requires patience; the truffles will set best when the mixture is cold.
- Roll each truffle in your chosen coating—cocoa powder, crushed nuts, or a mixture of both. The coating should adhere firmly to the surface, creating a uniform shell. If the coating clumps, sift it through a fine sieve to remove lumps. The coating not only enhances flavor but also provides a pleasant crunch or a smooth finish.
- Place the coated truffles on a parchment‑lined tray and refrigerate for at least 30 minutes to allow them to set. During this time, the fats will solidify, giving the truffles a firm yet melt‑in‑your‑mouth consistency. The aroma will intensify, and the truffles will develop a glossy sheen. If you’re preparing a large batch, keep them in the fridge until ready to serve.
- Optional: For a dramatic presentation, dust the finished truffles with powdered sugar or drizzle a thin layer of melted chocolate over them. This adds a touch of elegance and a burst of flavor. If you prefer a more rustic look, simply serve them as they are, letting the natural sheen shine through. Remember, the simplest presentation often feels the most refined.
- Serve the truffles at room temperature for optimal flavor. If they’ve been stored in the fridge, let them sit for 10 minutes before serving. This allows the fats to soften slightly, restoring the silky texture. If you’re presenting them as gifts, wrap each truffle in parchment or a small paper bag for a professional touch. The aroma alone will entice anyone who passes by.
That's it — you did it. But hold on, I've got a few more tricks that'll take this to another level...
Insider Tricks for Flawless Results
The Temperature Rule Nobody Follows
Chocolate is a temperature‑sensitive ingredient. The ideal melting point for dark chocolate is between 45–48 °C. If the temperature rises above 50 °C, the chocolate will seize and develop a chalky texture. Use a digital thermometer to monitor the chocolate; this simple check saves you from a ruined batch. I’ve seen many home cooks overheat their chocolate, and the result is always a sad, rubbery mess.
Why Your Nose Knows Best
Before you even taste the ganache, give it a good sniff. A rich chocolate aroma indicates proper melting, while a burnt smell signals over‑cooking. Your nose can detect subtle changes in flavor that your eyes might miss. Trust it; if it smells off, let the mixture cool a bit before proceeding. I once tasted a batch that looked fine but smelled burnt, and the final truffles were a disappointment.
The 5-Minute Rest That Changes Everything
After adding the sea salt, let the ganache rest for five minutes before shaping. This brief pause allows the salt to dissolve fully and the fats to begin setting. The result is a smoother texture that rolls easily without sticking. Skipping this rest step often leads to uneven truffles that crumble when handled.
Choosing the Right Chocolate
Not all chocolate is created equal. Look for a cacao content of at least 70% to ensure depth. Avoid chocolate with a high sugar content; it will make the truffles too sweet and mask the chocolate flavor. If you’re experimenting, try single‑origin bars for unique flavor notes. I’ve found that a chocolate with a slight fruity note pairs wonderfully with a vanilla‑infused ganache.
Storing for Longevity
Keep truffles in an airtight container in the fridge for up to a week. The airtight environment prevents them from absorbing odors from other foods. For longer storage, freeze them on a parchment‑lined tray, then transfer to a freezer bag. When ready to serve, let them thaw at room temperature for 20 minutes; this restores the silky texture.
Presentation Matters
Even the simplest truffle looks stunning when plated thoughtfully. Use a clean white plate and arrange the truffles in a neat circle. A sprinkle of cocoa powder or a drizzle of melted chocolate adds visual interest. If you’re serving a crowd, consider a tiered stand to elevate the truffles both literally and figuratively.
Creative Twists and Variations
This recipe is a playground. Here are some of my favorite ways to switch things up:
Espresso Infusion
Add a tablespoon of freshly brewed espresso to the ganache. The coffee deepens the chocolate flavor and adds a subtle bitterness that pairs beautifully with the sweetness. This version is perfect for coffee lovers and makes a sophisticated gift.
Nutty Crunch
Swap the cocoa powder dusting for a mixture of crushed pistachios and toasted hazelnuts. The nuts add crunch and a nutty undertone that complements the chocolate’s richness. It’s a great way to incorporate a textural contrast.
Orange Zest Delight
Grate a teaspoon of orange zest into the ganache for a bright, citrusy twist. The zest adds a fresh aroma and a burst of flavor that lifts the chocolate. This version works well for spring or summer gatherings.
Almond Butter Variation
Replace the heavy cream with almond milk and use almond butter instead of unsalted butter. This creates a nutty, vegan-friendly truffle that’s still indulgent. The almond butter adds a subtle sweetness and a smooth mouthfeel.
Chocolate Ganache Dip
Dip the finished truffles in a second layer of melted chocolate, then chill until set. The double chocolate coating gives a decadent finish and a glossy sheen. This variation is ideal for a special occasion or a chocolate lover’s party.
Spiced Truffle
Infuse the ganache with a pinch of cayenne pepper or cinnamon. The heat or warmth of the spices adds an unexpected kick that balances the sweetness. This spicy version is perfect for holiday menus.
Storing and Bringing It Back to Life
Fridge Storage
Keep truffles in an airtight container in the refrigerator for up to seven days. Store them on a parchment‑lined tray to prevent sticking. If you notice a slight loss of shine, a quick dusting of cocoa powder will revive their appearance.
Freezer Friendly
Freeze truffles on a parchment‑lined tray for up to three months. Once frozen, transfer them to a sealable bag to prevent freezer burn. When ready to serve, let them thaw at room temperature for 15 minutes; the texture will return to silky perfection.
Best Reheating Method
To revive frozen truffles, place them in a bowl of warm water for a minute, then pat dry. If you prefer a chocolate coating, melt a small amount of chocolate and dip each truffle, letting the excess drip off before setting them on parchment. Add a tiny splash of water before reheating to steam the truffles back to their original softness.