I was halfway through a Sunday brunch, juggling eggs, bacon, and a stubborn pot of coffee, when my oven decided to stage a revolt. The timer rang, but the tray of chicken nuggets I’d prepped earlier was still raw, the batter sticking to the pan like a bad case of clinginess. I stared at the kitchen, a smudge of burnt honey on the counter, and thought, “This is not the culinary masterpiece I promised myself.” That moment sparked a daring quest for the perfect bite, one that would marry crispness with a silky, sweet‑savory glaze.
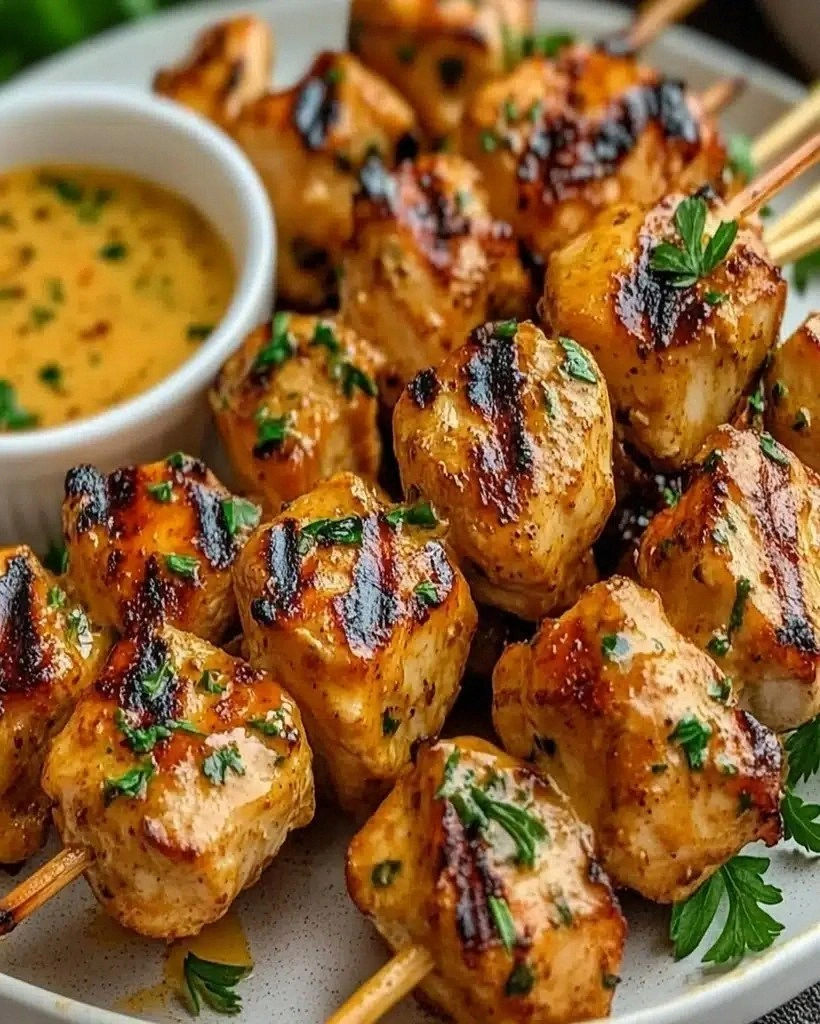
Picture the scene: a sizzling pan, the aroma of garlic swirling, a drizzle of honey glistening like liquid gold, and the sound of golden crust forming with each flip. The heat rises, the chicken pieces start to brown, and the kitchen fills with a mouth‑watering promise of crunch and sweetness. My eyes widen as the edges of the bites begin to crackle, a visual cue that the transformation is complete. I can almost taste the first bite, the tender interior melting against the caramelized coating.
What makes this version stand out is that it doesn’t rely on a generic batter or an over‑sweet glaze. Instead, it layers flavors strategically: a subtle garlic kick, a whisper of soy for umami, and a touch of sesame oil to bring depth. The coating is a hybrid of flour and panko, giving a light yet resilient crunch that shatters like thin ice when bitten. And the honey glaze isn’t just sticky; it caramelizes to a glossy finish that clings to every bite. I dare you to taste this and not go back for seconds.
I’ve tested this recipe over and over, tweaking the ratios, adjusting the heat, and even experimenting with different cuts of chicken. The result is a dish that feels luxurious, yet is surprisingly simple to assemble. This is hands down the best version you'll ever make at home, and it will become the go‑to for parties, week‑night dinners, or a quick snack that still feels indulgent. Let me walk you through every single step — by the end, you'll wonder how you ever made it any other way.
What Makes This Version Stand Out
- Flavor Profile: The honey and garlic combine to create a sweet‑savory balance that lingers on the palate.
- Texture Contrast: The flour‑panko coating delivers a light crunch that gives way to juicy chicken inside.
- Simplicity: All steps can be completed in under 45 minutes, making it a perfect weekend project.
- Crowd Appeal: The bite‑size format makes it ideal for parties, game nights, or as a finger‑friendly appetizer.
- Ingredient Quality: Using fresh garlic and real honey elevates the dish from ordinary to extraordinary.
- Make‑Ahead Potential: Once cooked, the bites can be stored and reheated without losing crispness.
- Nutritional Balance: The dish offers a good protein source while keeping carbs moderate.
- Versatility: Swap the honey for maple syrup or add chili flakes for a spicy twist.
Inside the Ingredient List
The Flavor Base
Garlic is the backbone of this glaze; its pungent aroma brightens the honey’s sweetness and provides a savory counterpoint. Freshly minced cloves release more flavor than pre‑minced, so take a moment to crush them with a knife edge. Honey is the sweet hero, but choose a light‑to‑medium grade to avoid overpowering bitterness. Soy sauce adds depth and a salty umami lift that balances the glaze’s sweetness. Sesame oil, only a tablespoon, brings a nutty aroma that ties everything together. Salt and pepper are essential for seasoning the chicken before it hits the pan, ensuring each bite is well‑flavored from the inside out.
The Texture Crew
All‑purpose flour is the first coat; it creates a dry surface that holds the egg wash. Panko breadcrumbs give a light, airy crunch that doesn’t become soggy. The beaten egg binds the flour and breadcrumbs together, forming a protective shell around the meat. Butter, melted and mixed with the glaze, adds richness and helps the coating develop a golden sheen. When the coating is ready, the chicken will have a crisp exterior that yields to a juicy interior.
The Unexpected Star
Chicken breast is the star of the show. It’s lean, tender, and absorbs the glaze without becoming rubbery. Cutting the breast into bite‑sized pieces ensures even cooking and a uniform coating. A quick pat with paper towels removes excess moisture, preventing the coating from becoming soggy during frying. This step is often overlooked but is vital for a consistent texture.
The Final Flourish
Vegetable oil provides the high smoke point needed for a crisp fry without burning. A slotted spoon or tongs keep the chicken from sticking to the pan and allow excess oil to drain. Once the glaze is ready, a final drizzle of sesame oil adds a fragrant finish that elevates the dish. A squeeze of fresh lemon or a sprinkle of chopped herbs can be added for a bright, fresh contrast.
Everything's prepped? Good. Let's get into the real action...
The Method — Step by Step
- Begin by patting the chicken pieces dry with paper towels; moisture is the enemy of crispness. Season each bite generously with salt and pepper, allowing the seasoning to seep into the meat’s fibers. This step sets the foundation for a savory interior. I dare you to taste a seasoned piece before it hits the pan; you’ll notice the depth already.
- Whisk the egg in a shallow bowl until it’s fully blended. Add a splash of cold water to keep the mixture light; this will help the coating set without drying out. Dip each seasoned chicken piece into the egg, ensuring a thin, even layer covers the surface. The egg acts as a glue that holds the breadcrumbs in place.
- In a separate bowl, mix the flour with a pinch of salt. The flour creates a dry surface that allows the egg to adhere. Toss the chicken in the flour, shaking off excess; this second coating provides a sturdier base for the crunchy breadcrumb layer. A well‑floured surface ensures the coating stays intact during the frying process.
- Roll the floured and egg‑coated chicken in panko breadcrumbs until each piece is fully covered. The panko’s airy texture gives the final crunch that shatters like thin ice when bitten. Press the breadcrumbs gently onto the surface to create a tight seal. This step is the secret to a crispy exterior that remains crisp after glazing.
- Heat 2 tablespoons of vegetable oil in a large skillet over medium‑high heat. When the oil shimmers but does not smoke, it’s ready for the chicken. Place the coated pieces carefully, leaving space between them to avoid overcrowding. The sizzling sound is a cue that the pan is hot enough to create a golden crust.
- Fry each side for 3–4 minutes until golden brown and crisp. Flip only once to maintain a uniform coating. Keep the heat steady to prevent the coating from burning while the inside cooks. Watch the edges; they should start pulling away from the pan when the chicken is ready to flip.
- Once cooked, transfer the chicken to a paper towel‑lined plate to drain excess oil. This step removes any lingering oil that could soften the coating. Let the pieces rest for a minute; the interior continues to cook slightly, ensuring tenderness.
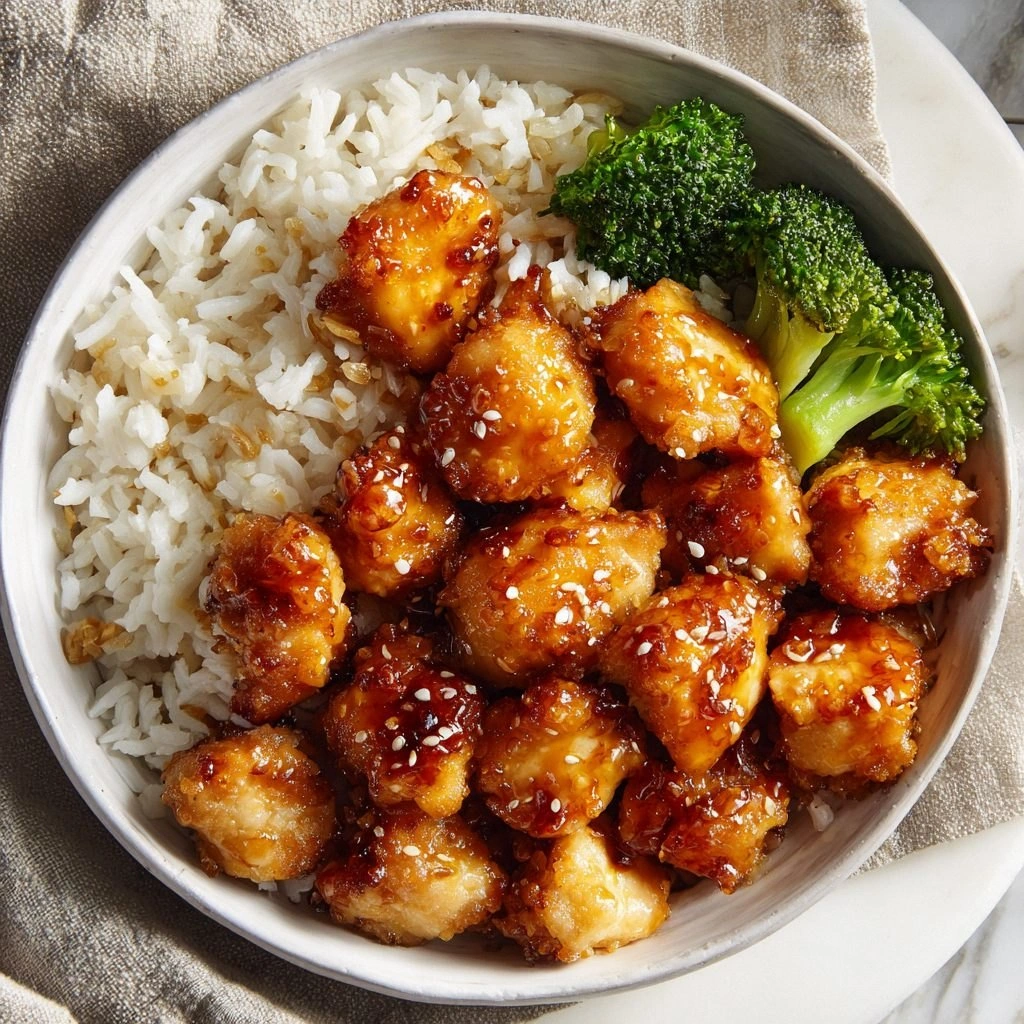
- In a small saucepan, combine honey, soy sauce, sesame oil, and minced garlic. Bring to a gentle simmer, stirring until the mixture thickens into a glossy glaze. The glaze should coat the back of a spoon without dripping. Once ready, pour it over the fried chicken and toss gently to coat each bite evenly.
That's it — you did it. But hold on, I've got a few more tricks that'll take this to another level...
Insider Tricks for Flawless Results
The Temperature Rule Nobody Follows
Many cooks assume medium heat is enough, but the key to a golden crust is a consistent 350°F (175°C). If the oil is too hot, the coating burns before the chicken cooks; if too cool, the coating becomes soggy. Use a thermometer or the “water drop” test: drop a small amount of batter into the oil; if it sizzles immediately, the oil is ready. I once fried at a lower heat and the coating turned mushy – a lesson I’ll never repeat.
Why Your Nose Knows Best
The scent of garlic and honey is a reliable indicator of progress. When the garlic releases its aroma, the glaze is near completion. Trust your nose; a strong garlic smell means the glaze is caramelizing just right. I’ve often paused the cooking to inhale the scent, and it’s a quick check that saves time and prevents over‑cooking.
The 5-Minute Rest That Changes Everything
After frying, let the chicken rest for five minutes on a rack or paper towels. This rest allows the juices to redistribute, keeping the meat moist. It also lets the coating set, preventing it from loosening when you start glazing. I always set a timer so I never forget this critical step.
Keep the Oil Hot
Maintaining oil temperature during frying is essential. Use a thermometer or adjust the heat between batches. If the oil cools too much, the coating will absorb excess oil and become greasy. A steady temperature keeps the coating crisp and the interior tender.
Use a Slotted Spoon
A slotted spoon or tongs help you lift the chicken without trapping excess oil. This tool also makes it easier to toss the chicken in the glaze, ensuring an even coating. I’ve seen many beginners use a regular spoon and end up with a greasy mess.
Creative Twists and Variations
Spicy Honey Garlic Chicken
Add a teaspoon of sriracha or a pinch of red pepper flakes to the glaze for a fiery kick. The heat complements the sweetness, creating a dynamic flavor that excites the palate. This version is a hit with spice lovers and pairs well with a cool cucumber salad.
Coconut‑Curry Twist
Replace the soy sauce with coconut milk and stir in a teaspoon of curry powder before simmering the glaze. The coconut adds a creamy sweetness while the curry brings warm, earthy notes. Serve with steamed jasmine rice for a complete meal.
Lemon‑Herb Finish
Finish the glaze with a squeeze of fresh lemon juice and a handful of chopped parsley or cilantro. The citrus brightness cuts through the richness and adds a fresh, herbaceous aroma. This variation is ideal for a light summer dinner.
Smoky BBQ Glaze
Swap honey for a smoky BBQ sauce and add a dash of smoked paprika to the coating. The smoky undertone pairs beautifully with the crunch, creating a deep, savory flavor. Serve with coleslaw for a classic BBQ experience.
Vegan Alternative
Use tofu or tempeh instead of chicken, and replace the egg with a flaxseed mixture. Coat with a plant‑based flour blend and panko, then fry or bake. The glaze can stay the same, yielding a vegan version that still delivers crispness and sweetness.
Storing and Bringing It Back to Life
Fridge Storage
Cool the cooked bites completely, then store them in an airtight container in the refrigerator for up to 3 days. The coating may soften slightly, but a quick reheating in a hot oven will restore crispness. Keep them on a rack to avoid excess moisture.
Freezer Friendly
Arrange the cooled bites on a parchment‑lined tray and freeze until solid, then transfer to a freezer bag. They stay fresh for up to 2 months. Reheat in a preheated oven at 400°F (200°C) for 10 minutes, or until heated through and crisp.
Best Reheating Method
The oven is the king of reheating; it preserves the crunch while warming the interior. For a quick fix, use a skillet over medium heat, adding a splash of water to create steam, then cover for 2 minutes. A tiny splash of water before reheating steams back to perfection.
Picture yourself pulling this out of the oven, the whole kitchen smelling incredible, and guests arriving with smiles already forming. The moment you serve these bites, you’ll see their eyes light up, and the conversation will shift to how you achieved such a flawless combination of textures and flavors. I’ve watched friends reach for the next bite, and I’ll be honest — I ate half the batch before anyone else got to try it. If you’ve ever struggled with crispy chicken, you’re not alone — and I’ve got the fix. Stay with me here — this is worth it. Let this recipe become your new kitchen staple, and you’ll never look back at ordinary chicken again.