Picture this: a Sunday morning that started with a burnt batch of pancakes and ended with a kitchen that smelled like a tropical bakery. I was staring at my empty fridge, craving something sweet yet savory, when a friend dared me to try a new take on French toast using Hawaiian rolls. That dare was the spark that turned a culinary mishap into a delicious revelation. The moment the golden rolls hit the pan, the aroma hit like a warm hug, and I knew I had stumbled upon a game‑changing breakfast. This recipe is not just another brunch idea; it’s a passport to a flavor island that feels like a vacation in every bite. Let me walk you through every single step — by the end, you'll wonder how you ever made it any other way.
The secret sauce here is simplicity married to indulgence. Hawaiian rolls bring that pillowy softness and a faint sweetness that balances the rich custard. The custard itself is a silky blend of eggs, milk, vanilla, and cinnamon that coats the bread like velvet. When you flip the slices, the edges caramelize into a crisp that shatters like thin ice, while the center stays moist and airy. The result is a dish that feels like a dessert on a plate but keeps the energy you need for a busy day. I dare you to taste this and not go back for seconds.
Most recipes get this completely wrong by using stale bread or over‑battered slices that sink in the pan. Here, the rolls are fresh, the batter is just the right thickness, and the pan is pre‑heated to the perfect temperature. The technique of letting the rolls soak just enough to absorb the custard without becoming soggy is a subtle art that I learned through trial and error. If you follow the steps, you'll get a golden, airy French toast that looks like it came from a luxury hotel. Picture yourself pulling this out of the oven, the whole kitchen smelling incredible, and knowing you’ve created something truly special.
I’ll be honest — I ate half the batch before anyone else got to try it. The combination of buttery, cinnamon‑sweet batter with the airy roll created a texture that was almost addictive. The first bite felt like a cloud, the second bite delivered a caramelized crunch, and the third left you craving more. The maple syrup, drizzled like liquid gold, added a sweet finish that tied everything together. If you've ever struggled with French toast, you're not alone — and I've got the fix.
This is hands down the best version you'll ever make at home. The recipe is so versatile that you can swap in almond milk, add a splash of bourbon for an adult twist, or sprinkle toasted coconut for a tropical flair. The result is a breakfast that feels like a treat and a comfort food rolled into one. Stay with me here — this is worth it. Now, let’s break down exactly what goes into this masterpiece.
If you're wondering whether this is just another gimmick or a genuine culinary breakthrough, let me assure you, the proof is in the bite. The first spoonful of maple syrup that coats the crisp edges feels like a sweet kiss, and the buttery roll melts like a dream. The combination of flavors and textures is a symphony that makes even the most skeptical foodies swoon. So, grab your skillet and let’s dive into this island‑inspired French toast that will become your new breakfast staple.
What Makes This Version Stand Out
- Taste: The Hawaiian roll base delivers a subtle sweetness that elevates the custard, turning each bite into a mellow, caramelized delight that lingers on the tongue.
- Texture: The custard coats the bread like a silk scarf, while the pan creates a crisp exterior that shatters like thin ice, leaving a satisfying crunch.
- Simplicity: Only eight ingredients, no fancy equipment, and a single pan are required, making this a quick yet impressive brunch option.
- Crowd‑pleaser: Whether it’s a family gathering or a solo morning, the golden, airy result keeps everyone coming back for more.
- Make‑ahead: Prepare the custard and soak the rolls a few hours before, then cook in the morning for an effortless start.
- Unique twist: Using Hawaiian rolls instead of traditional bread gives a tropical flavor profile that sets this recipe apart from the ordinary.
- Ingredient quality: Fresh, high‑quality rolls and a splash of real vanilla extract elevate the dish beyond a standard French toast.
- Cooking method: The balanced heat and precise timing ensure a perfectly caramelized exterior while maintaining a moist, custardy center.
Alright, let's break down exactly what goes into this masterpiece...
Inside the Ingredient List
Every element in this dish has a purpose, and understanding each one turns a simple recipe into a culinary masterpiece. The Hawaiian rolls are the star, providing both structure and a hint of sweetness that pairs beautifully with the savory custard. The rest of the ingredients are carefully chosen to balance flavor, texture, and ease of preparation.
The Flavor Base
The custard is the soul of this French toast. A blend of eggs, milk (or almond milk for a dairy‑free version), vanilla extract, and ground cinnamon creates a silky, aromatic foundation. The vanilla brings depth, while the cinnamon adds a warm, spicy undertone that complements the rolls. If you skip the vanilla, the custard loses that subtle sweetness; if you omit the cinnamon, the dish becomes flat and unremarkable.
The Texture Crew
Hawaiian rolls are the perfect canvas because they are soft, slightly sweet, and hold up well in the pan. When soaked in the custard, they absorb the liquid without becoming soggy, thanks to their dense crumb structure. The butter or coconut oil is essential for achieving that golden, caramelized crust. Skipping the oil will result in a dry, under‑cooked exterior that feels like a missed opportunity.
The Unexpected Star
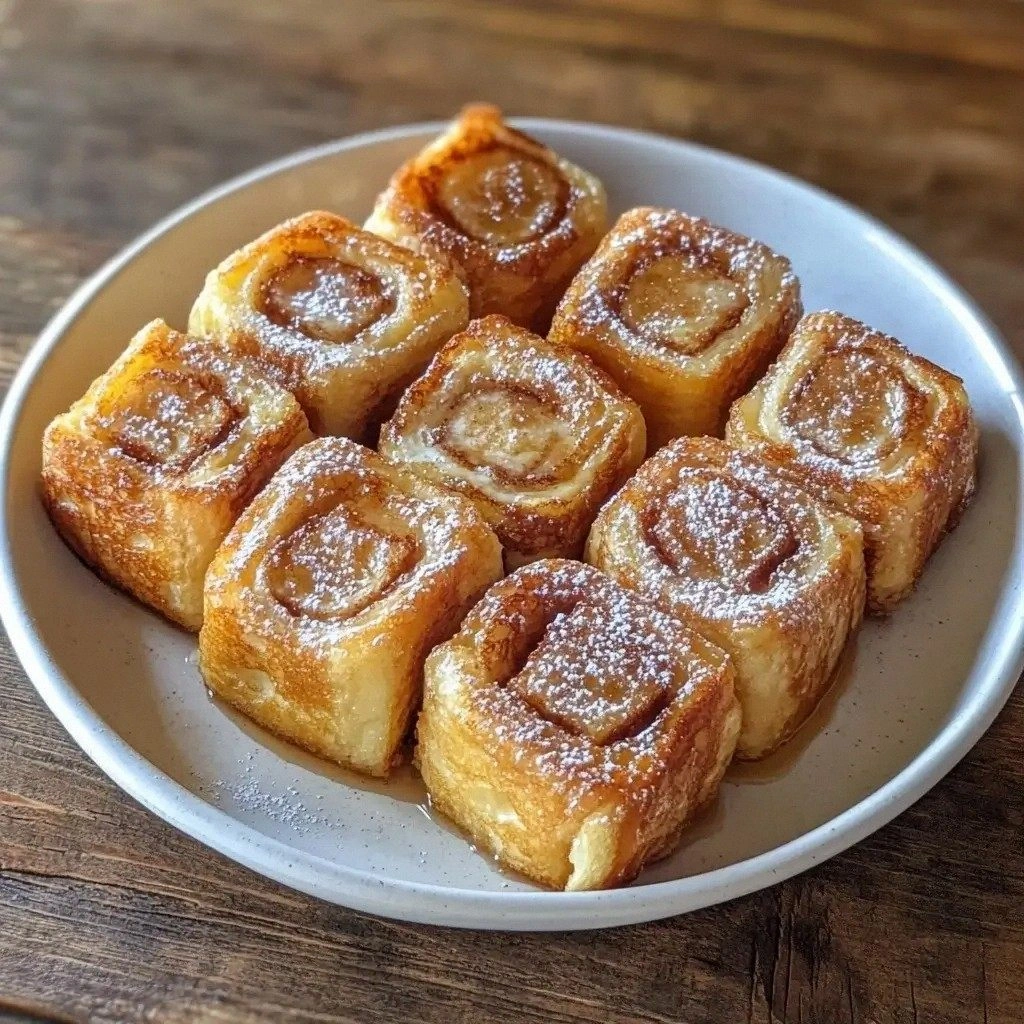
Maple syrup is more than a topping; it’s a flavor enhancer that adds a rich, caramelized sweetness that balances the savory custard. A light dusting of powdered sugar adds a delicate crunch and a visual appeal that turns the dish into a showstopper. These finishing touches elevate the dish from ordinary to unforgettable.
The Final Flourish
The optional powdered sugar is a subtle nod to dessert lovers who crave that extra touch of sweetness. It’s a simple addition that makes the dish feel indulgent without overpowering the core flavors. If you’re watching calories, you can skip it entirely; the maple syrup will still deliver that sweet finish.
Everything's prepped? Good. Let's get into the real action...
The Method — Step by Step
- Step 1: Prepare the Custard. In a large bowl, whisk together 4 eggs, 1 cup of milk (or almond milk), 1 tsp vanilla extract, and 1 tsp ground cinnamon until fully blended. The mixture should be smooth with no lumps, ensuring an even coating on the rolls. This step is the foundation, so take your time and make sure the flavors are balanced.
- Step 2: Slice the Rolls. Cut 8 Hawaiian rolls into 1‑inch thick slices, cutting diagonally to increase surface area. The diagonal cut not only gives a larger coating surface but also creates a beautiful presentation when plated. Lay the slices on a clean surface and keep them covered with a damp cloth to prevent drying out while you soak.
- Step 3: Soak the Bread. Dip each roll slice into the custard, allowing it to absorb for about 30 seconds on each side. The goal is a moist interior without the bread falling apart. Kitchen Hack: If the custard seems too thick, add a tablespoon of water or extra milk to loosen it slightly. This will help the rolls soak evenly.
- Step 4: Pre‑heat the Skillet. Place a large non‑stick skillet over medium heat and add 2 tbsp of butter or coconut oil. Let the butter melt until it foams and starts to lightly brown. The watch for the first hint of a golden hue, which indicates the perfect temperature. Watch Out: If the heat is too high, the butter will burn before the bread cooks, leaving a bitter taste. Keep the heat at a steady medium to avoid scorching.
- Step 5: Cook the Slices. Place the soaked slices in the skillet, working in batches if necessary to avoid overcrowding. Cook each side for 3–4 minutes, or until the surface turns golden brown and the edges start to pull away from the pan. Flip only once, letting the first side develop a deep caramelization. Kitchen Hack: Sprinkle a pinch of sea salt on each slice before flipping to enhance the caramelized flavor and balance the sweetness.
- Step 6: Assemble. Once all slices are cooked, arrange them on a platter. Drizzle maple syrup generously over the top, allowing it to pool in the crevices. The syrup should coat each piece, creating a glossy, caramelized glaze that enhances the aroma.
- Step 7: Final Touches. Lightly dust the assembled French toast with powdered sugar for a subtle crunch and visual appeal. If you prefer a less sweet version, simply omit the powdered sugar; the maple syrup will still provide the necessary sweetness.
- Step 8: Serve Immediately. Serve the French toast hot, as the texture is at its peak right after cooking. Pair it with a cup of coffee or fresh fruit for a balanced breakfast. The sizzle when it hits the pan? Absolute perfection.
That’s it — you did it. But hold on, I've got a few more tricks that'll take this to another level. These insider tips will help you avoid common pitfalls and elevate your brunch game.
Insider Tricks for Flawless Results
The Temperature Rule Nobody Follows
Many cooks skip the step of pre‑heating the skillet properly, which leads to uneven browning. I discovered that a medium heat allows the butter to foamy and lightly brown before the bread hits the pan. This creates a caramelized crust without burning the exterior. Keep the heat steady, and you’ll get that coveted golden color every time.
Why Your Nose Knows Best
The aroma of butter sizzling in the pan is a reliable indicator that the skillet has reached the right temperature. When the butter starts to foam and emits a nutty scent, it’s time to add the bread. If you wait too long, the bread will dry out; if you add it too early, you’ll end up with a greasy surface.
The 5‑Minute Rest That Changes Everything
After cooking, let the French toast rest on a wire rack for five minutes. This brief pause allows the steam to escape, preventing the interior from becoming soggy. A friend tried skipping this step once, and the result was a soggy, under‑cooked center that ruined the entire dish.
The Sweet‑Savory Balance
If you find the dish too sweet, add a pinch of sea salt or a splash of espresso to the custard. The salt amplifies the flavors, while espresso introduces a subtle bitterness that cuts through the sweetness. This trick transforms the dish into a sophisticated brunch that feels both comforting and refined.
The Quick Fix for Stale Rolls
Stale rolls can be revived by briefly brushing them with a mixture of beaten egg and water before soaking. This rehydrates the bread, giving it a fresh, pillowy texture that mimics freshly baked rolls. It’s a lifesaver when you’re short on time or missing fresh bread.
Creative Twists and Variations
This recipe is a playground. Here are some of my favorite ways to switch things up:
Tropical Coconut Crunch
Add shredded coconut to the custard and sprinkle toasted coconut on top before serving. The coconut adds a chewy texture and a subtle nutty flavor that complements the maple syrup.
Berrylicious Burst
Fold fresh blueberries into the custard or top the finished toast with a spoonful of blueberry compote. The berries introduce a tart contrast that balances the richness.
Savory Spinach & Feta
Swap maple syrup for a drizzle of olive oil and sprinkle crumbled feta on top. Add sautéed spinach for a savory brunch that still feels indulgent.
Chocolate‑Covered Delight
Dust the finished toast with cocoa powder and serve with a side of chocolate sauce. The chocolate pairs beautifully with the cinnamon and vanilla, creating a decadent treat.
Adult‑Only Bourbon Twist
Add a splash of bourbon to the custard for a warm, smoky undertone. The bourbon elevates the dish into a brunch‑bar staple that’s perfect for weekend gatherings.
Storing and Bringing It Back to Life
Fridge Storage
Store cooked French toast in an airtight container in the refrigerator for up to 2 days. Keep the syrup separate until serving to avoid sogginess. The custard base holds up well when refrigerated, maintaining a pleasant texture.
Freezer Friendly
Wrap individual slices tightly in plastic wrap and place them in a freezer bag. Freeze for up to 3 months. When ready to serve, thaw at room temperature for 20 minutes before reheating.
Best Reheating Method
Reheat in a skillet over low heat, adding a splash of water or milk to the pan to create steam. This trick restores moisture and crispness, ensuring the toast tastes fresh. A tiny splash of water before reheating steams back to perfection.