Why you'll love this recipe
- Crowd-pleaser: vibrant cherry meets buttery crumb in every bite
- Make-ahead: bars keep well, perfect for holiday prep
- Kid-approved: sweet tart flavor wins over picky eaters
- 30-minute: bake time under an hour, no fuss
- Freezer-friendly: freeze leftovers for quick dessert
The first time I baked these bars, the kitchen was flooded with the scent of butter and cherries as my teenage son watched the batter rise. I remember the moment the glaze hit the warm bars, creating a glossy sheen that made his eyes light up—he declared them "the best holiday treat ever." A few weeks later, my grandma, who lives two states away, called to say she could taste the cherries through the phone and begged for the recipe. Now they’re a staple at every family gathering, and I still hear the same delighted gasp when the platter arrives. One winter evening, after a long day of work, I whisked the batter while the house was quiet, the only sound the soft hum of the oven. The golden edges reminded me of the first snow of the season, and the sweet‑tart cherry center felt like a hidden gift. It’s become my little ritual: bake, glaze, and share the joy with anyone who walks through the door.
The story
The kitchen fills with the buttery aroma of melted sugar as the batter puffs and the cherry filling bubbles, promising a burst of sweet‑tart sunshine in every bite. A golden crust forms at the edges, cracking ever so slightly under the glaze. You can almost hear the faint sigh of the pan as it releases the bars onto the cooling rack.
I first discovered these bars at my sister’s holiday brunch, where the scent of cherry and butter drifted through the living room while we argued over who got the last piece. I watched her toss the batter together with a whisk, then spoon the glossy cherry filling like a secret treasure. That moment made me realize I needed a dessert that was both show‑stopping and simple enough for a bustling kitchen.
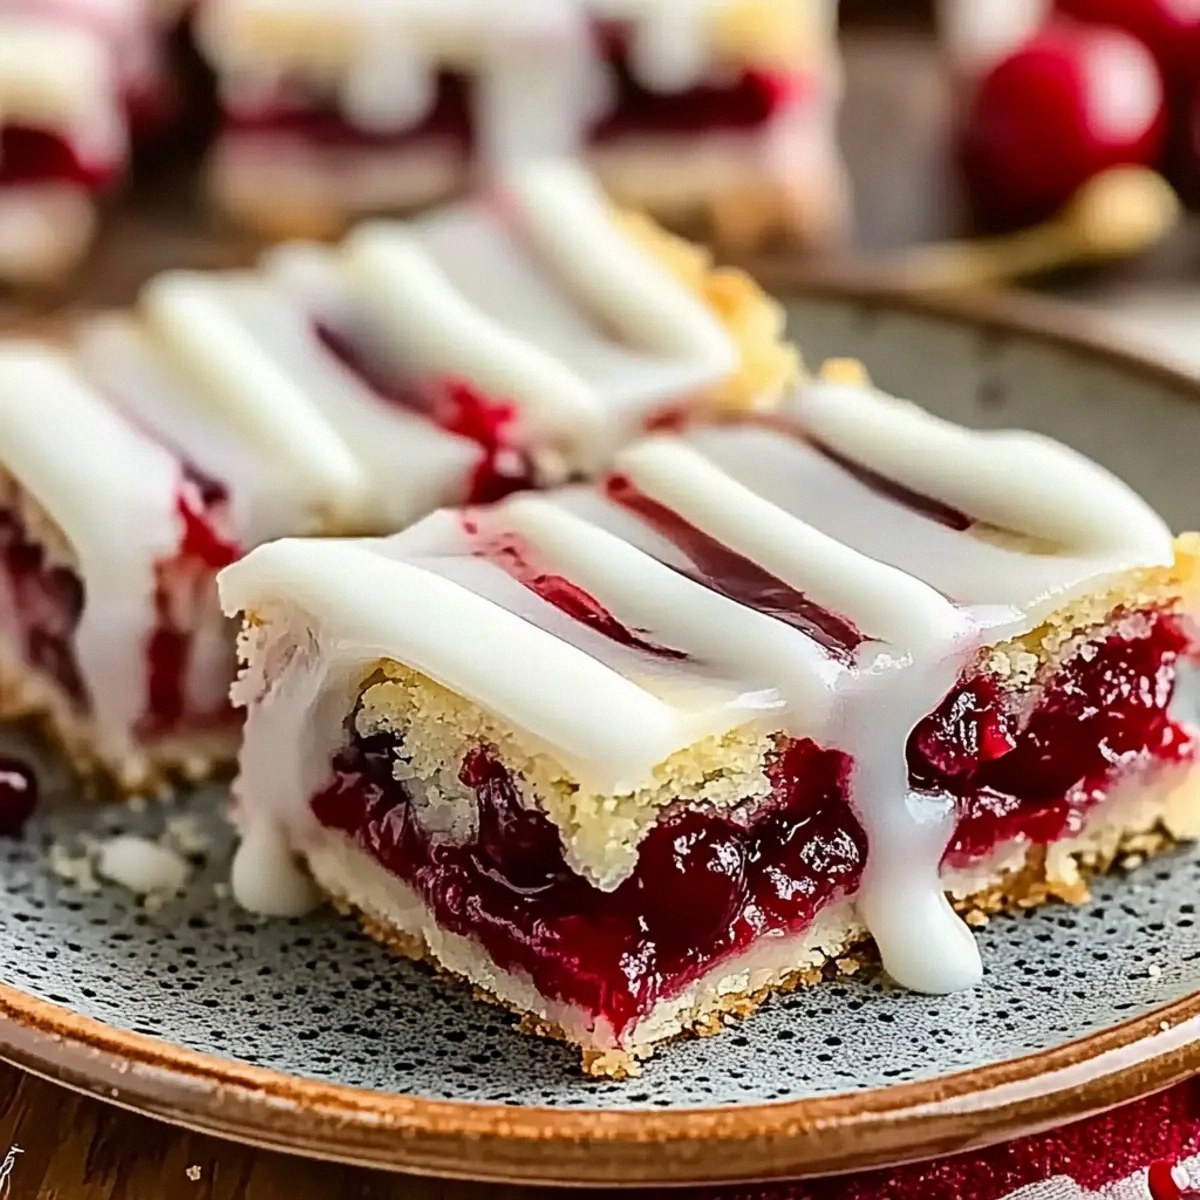
What sets this version apart is the two‑layer batter technique: a base, a dollop of cherry, then a topping that seals in moisture while creating a tender crumb. Most recipes fold the filling into the batter, but we sandwich it, giving each forkful a distinct textural contrast. A quick vanilla‑almond glaze adds a glossy finish that most store‑bought bars lack.
On the palate, you first taste the buttery, slightly crisp base, then the bright, slightly tart cherry that cuts through the richness. A subtle vanilla‑almond note lingers, while the powdered‑sugar glaze adds a silky, sweet sheen that melts into the crumb. The result is a harmonious dance of sweet, tart, and buttery flavors with a hint of nutty depth.
These bars shine at holiday gatherings, tucked onto a platter beside cheese and charcuterie, or as a sweet finale after a hearty dinner. They also double as a quick weekday treat—just slice and serve with a scoop of vanilla ice cream. Their portable size makes them perfect for potlucks, office snack tables, or a make‑ahead dessert you can pull from the fridge.
Don’t let the layered batter intimidate you; it’s simply a matter of spreading the first third, adding the filling, then topping with the rest. The bake time stays under an hour, and the glaze comes together in minutes with just three ingredients. With a little pre‑heat and a steady hand, you’ll have bakery‑quality bars without any fancy equipment.
I’ve baked this recipe four times this season—my kids have devoured three servings each, and my mother swears the cherry glaze reminds her of a family recipe from the 1970s. The consistency of the crumb and the glossy finish have become my go‑to benchmark for any bar dessert. Ready to give it a try? Let’s get baking.
Why This Recipe Works
- Layered batter creates a tender crumb that stays moist.
- Baking the cherry filling between batters prevents soggy crust.
- Glaze sets as it cools, giving a glossy finish without extra cooking.
Ingredient notes & substitutions
Unsalted Butter
Provides richness and moisture, creating a tender crumb.
Eggs
Bind the batter and add structure.
All-Purpose Flour
Forms the framework of the bars, giving them shape.
Cherry Pie Filling
Delivers sweet‑tart flavor and juicy pockets.
Powdered Sugar
Creates a smooth, glossy glaze that sets quickly.
Equipment you'll need
Ingredients
- 1 cup Unsalted Butter (Adds richness and moisture)
- 1 cup Granulated Sugar (Provides sweetness)
- 2 large Eggs (Essential for binding)
- 1 teaspoon Vanilla Extract (Enhances flavor)
- 1 teaspoon Almond Extract (Optional)
- 2 cups All-Purpose Flour (The cornerstone for structure)
- 1/2 teaspoon Salt (Balances sweetness)
- 1 can Cherry Pie Filling (Provides sweet-tart flavor)
- 1 cup Powdered Sugar (Key for glaze)
- 2 tablespoons Milk or Cream (Adds creaminess to glaze)
- 1/4 cup Cherry Syrup (Optional decorative drizzle)
Before You Start
- Let butter soften at room temperature
- Preheat oven to 350°F
- Line the pan with parchment paper
- Separate eggs and bring to room temp
- Gather all dry ingredients
Instructions
- 1Step 1
Preheat your oven to 350°F (175°C) and grease or line a 9x13-inch baking pan.
- 2Step 2
In a large mixing bowl, cream together unsalted butter and granulated sugar until light and fluffy.
- 3Step 3
Add eggs one at a time, mixing well after each. Stir in vanilla and optional almond extract.
- 4Step 4
In a separate bowl, whisk together the flour and salt. Gradually mix into the wet ingredients.
- 5Step 5
Spread two-thirds of the batter into the prepared pan, spoon cherry pie filling over it, then dollop the remaining batter.
- 6Step 6
Bake for 35-40 minutes until the edges are golden and a toothpick comes out clean.
- 7Step 7
Let cool completely, then whisk together powdered sugar, milk, and vanilla for the glaze.
- 8Step 8
Drizzle the glaze over the cooled bars and optionally drizzle cherry syrup on top.
Pro tips
Soften butter evenly
Leave butter at room temperature for 30 minutes to ensure a smooth cream.
Cream butter and sugar fully
Mix until the mixture is light, pale, and fluffy—about 3–4 minutes.
Room‑temp eggs blend better
Cold eggs can cause the batter to seize; let them sit for 10 minutes.
Don't overmix flour
Add flour until just incorporated to keep the crumb tender.
Watch edge color for doneness
Golden edges signal the bars are ready; a toothpick should come out clean.
Cool bars before glazing
Glaze sets best on completely cooled bars, preventing a runny finish.
Glaze while slightly warm
A warm surface helps the glaze spread evenly and creates a shine.
Use light hand with cherry syrup
Drizzle sparingly; too much can make the top soggy.
Variations to try
Brown Butter Cherry Bars
Swap regular butter for browned butter to add a nutty depth to the crust.
Dairy‑Free Version
Replace butter with coconut oil and use almond milk in the glaze for a vegan twist.
Chocolate Swirl
Stir in half a cup of melted dark chocolate into the batter before baking.
Mini Bar Bites
Press the batter into a greased muffin tin for individual, portable servings.
Serving Suggestions
Troubleshooting
Bars are too dense
Do not overmix flour and ensure butter is fully softened before creaming.
Glaze runs off
Allow bars to cool completely before glazing; thin glaze can be thickened with a touch more powdered sugar.
Cherry filling is watery
Stir in a tablespoon of cornstarch with the filling to thicken during baking.
Edges are undercooked
Increase bake time by 5 minutes and check for golden edges before removing.
Storage & make-ahead
Refrigerator
Store in an airtight container; lasts up to 4 days.
Freezer
Wrap tightly in plastic wrap and foil; freeze up to 2 months. Thaw at room temperature.
Best way to reheat
Warm in a 300°F oven for 10 minutes or microwave 20 seconds; add a splash of milk to revive softness.
Make-ahead
Bake a day ahead and glaze just before serving; avoid glazing before freezing.
Ingredients
- 1 cup Unsalted Butter (Adds richness and moisture)
- 1 cup Granulated Sugar (Provides sweetness)
- 2 large Eggs (Essential for binding)
- 1 teaspoon Vanilla Extract (Enhances flavor)
- 1 teaspoon Almond Extract (Optional)
- 2 cups All-Purpose Flour (The cornerstone for structure)
- 1/2 teaspoon Salt (Balances sweetness)
- 1 can Cherry Pie Filling (Provides sweet-tart flavor)
- 1 cup Powdered Sugar (Key for glaze)
- 2 tablespoons Milk or Cream (Adds creaminess to glaze)
- 1/4 cup Cherry Syrup (Optional decorative drizzle)
Instructions
- 1Preheat your oven to 350°F (175°C) and grease or line a 9x13-inch baking pan.
- 2In a large mixing bowl, cream together unsalted butter and granulated sugar until light and fluffy.
- 3Add eggs one at a time, mixing well after each. Stir in vanilla and optional almond extract.
- 4In a separate bowl, whisk together the flour and salt. Gradually mix into the wet ingredients.
- 5Spread two-thirds of the batter into the prepared pan, spoon cherry pie filling over it, then dollop the remaining batter.
- 6Bake for 35-40 minutes until the edges are golden and a toothpick comes out clean.
- 7Let cool completely, then whisk together powdered sugar, milk, and vanilla for the glaze.
- 8Drizzle the glaze over the cooled bars and optionally drizzle cherry syrup on top.