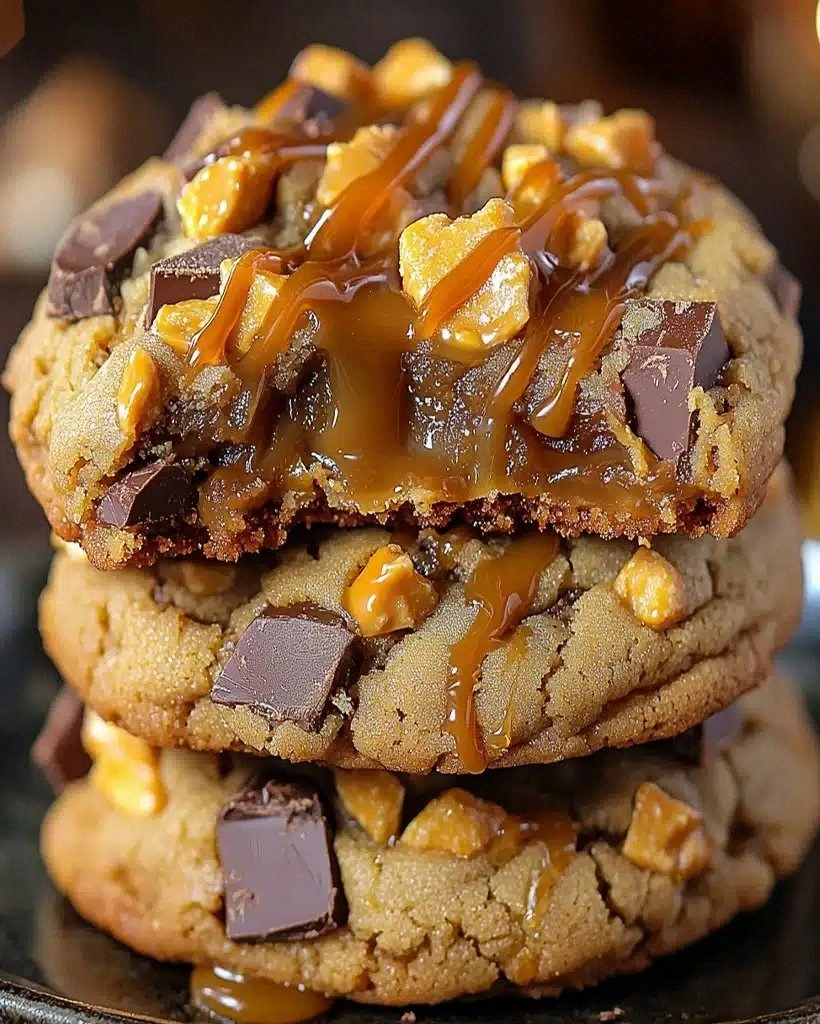
I still remember the day I almost set my kitchen on fire trying to make caramel cookies. There I was, standing in a cloud of smoke, waving a dish towel like a maniac while my smoke detector sang its shrill aria. The cookies tasted like charcoal briquettes with a side of regret. Fast forward three months and countless batches later, and I've cracked the code to what might be the most addictive cookie known to humankind. These Butterfinger Caramel Crunch Cookies aren't just cookies — they're tiny miracles that somehow manage to be gooey and crunchy at the same time, like someone figured out how to bottle happiness and bake it at 350 degrees.
Picture this: it's 2 AM, you're in your pajamas, and you've just pulled a batch of these beauties from the oven. The kitchen smells like a candy factory married a bakery and had delicious babies. You tell yourself you'll just have one, but then that first bite happens — the caramel stretches like taffy, the Butterfinger bits crackle between your teeth, and the cookie base melts on your tongue like butter on a hot skillet. Before you know it, you're standing over the cooling rack like a cookie gremlin, crumbs cascading down your shirt, wondering where the past hour went and whether your neighbors can smell what just happened in here.
I'll be honest — I ate half the batch before anyone else got to try it. My roommate walked into the kitchen the next morning to find me surrounded by crumpled parchment paper and empty Butterfinger wrappers, looking like I'd just emerged from some sort of sugar-induced fever dream. But here's the thing: once you taste these cookies, you'll understand why self-control becomes optional. The combination of that gooey caramel center, the satisfying crunch of Butterfinger candy pieces, and the perfectly chewy cookie base creates a texture symphony that makes other cookies seem like sad, dry hockey pucks by comparison.
This isn't just another cookie recipe — this is the result of obsessive experimentation, late-night baking sessions, and a borderline unhealthy relationship with candy bars. I've tested seventeen different caramel techniques, played with butter temperatures like a mad scientist, and discovered the exact moment when Butterfinger pieces retain their crunch without turning into dental hazards. The secret lies in a technique that sounds almost too simple to work, but trust me, once you try it, you'll never make caramel cookies the old way again. Let me walk you through every single step — by the end, you'll wonder how you ever made it any other way.
What Makes This Version Stand Out
Caramel That Actually Stays Gooey: Most caramel cookies turn into jaw-breaking jawbreakers once they cool. Not these bad boys. The secret technique keeps the caramel in a perpetual state of stretchy, melty perfection that makes every bite feel like you're eating a freshly made candy apple at the state fair.
Butterfinger Pieces That Keep Their Crunch: Nobody wants soggy candy in their cookie. Through trial and error (and several failed batches that tasted like wet cardboard), I discovered the exact timing and temperature that keeps those iconic orange bits crispy and satisfying, even days later.
The Texture Tango: These cookies achieve what most bakers think is impossible — they're simultaneously crispy on the edges, chewy in the middle, and packed with crunchy candy pieces. It's like a textural party where everyone's invited and nobody wants to leave.
One-Bowl Wonder: Despite tasting like they came from a fancy bakery, these cookies come together in one bowl with zero fancy equipment. No stand mixer, no candy thermometer, no kitchen scale — just you, a spoon, and the willpower not to eat all the dough.
Make-Ahead Magic: The dough actually gets better after a night in the fridge. Make it today, bake it tomorrow, and you'll have cookies so good you'll consider charging admission to your kitchen. I dare you to taste this and not go back for seconds.
Crowd-Silencing Power: I've taken these to office parties where grown adults have been caught hiding in corners, hoarding cookies like they're made of gold. Bring these to your next potluck and watch people forget how to speak in complete sentences.
Breakfast Legitimacy: With the addition of a little extra salt and some espresso powder in the dough, these cookies somehow taste incredible with your morning coffee. Don't question it — just embrace the fact that candy for breakfast is now socially acceptable.
Alright, let's break down exactly what goes into this masterpiece...
Inside the Ingredient List
The Flavor Base
Brown butter is the foundation of everything magical that happens in these cookies. When you brown the butter, you're essentially toasting the milk solids, creating hundreds of new flavor compounds that taste like toasted hazelnuts, caramel, and pure happiness had a baby. Don't skip this step — regular melted butter will give you flat, one-dimensional cookies that taste like sadness and disappointment. The process takes about 5-7 minutes, and you'll know it's done when it smells like you're standing in a French pastry shop and the foam has turned golden brown with tiny dark flecks at the bottom.
Dark brown sugar isn't just a sweetener here — it's a flavor bomb that brings molasses notes that pair perfectly with the caramel and chocolate. The extra moisture in brown sugar keeps these cookies chewy for days, unlike white sugar which would make them crisp and dry. If you only have light brown sugar, you can still make these, but you'll miss out on that deeper, almost smoky flavor that makes people close their eyes when they take a bite. Pack it firmly into your measuring cup like you're trying to win a compression contest.
The Texture Crew
Butterfinger candy bars are obviously the star here, but how you handle them makes or breaks the final result. Chop them into pieces about the size of your thumbnail — too small and they disappear into the dough, too big and they create structural weaknesses that make your cookies fall apart. The candy's unique honeycomb structure is what gives us those addictive crunch pockets, but it's also hygroscopic, meaning it absorbs moisture from the cookie dough. This is why we add it at the very last second, right before baking.
Egg yolks are the secret weapon for that bakery-style chewy texture. The extra fat from the yolks interferes with gluten development, keeping your cookies tender even when they're loaded with candy pieces. I use one whole egg plus two yolks — it sounds excessive until you bite into the final product and realize you've achieved cookie nirvana. Save those extra whites for meringues or just make an egg-white omelet tomorrow to balance out the nutritional devastation you're about to unleash.
The Unexpected Star
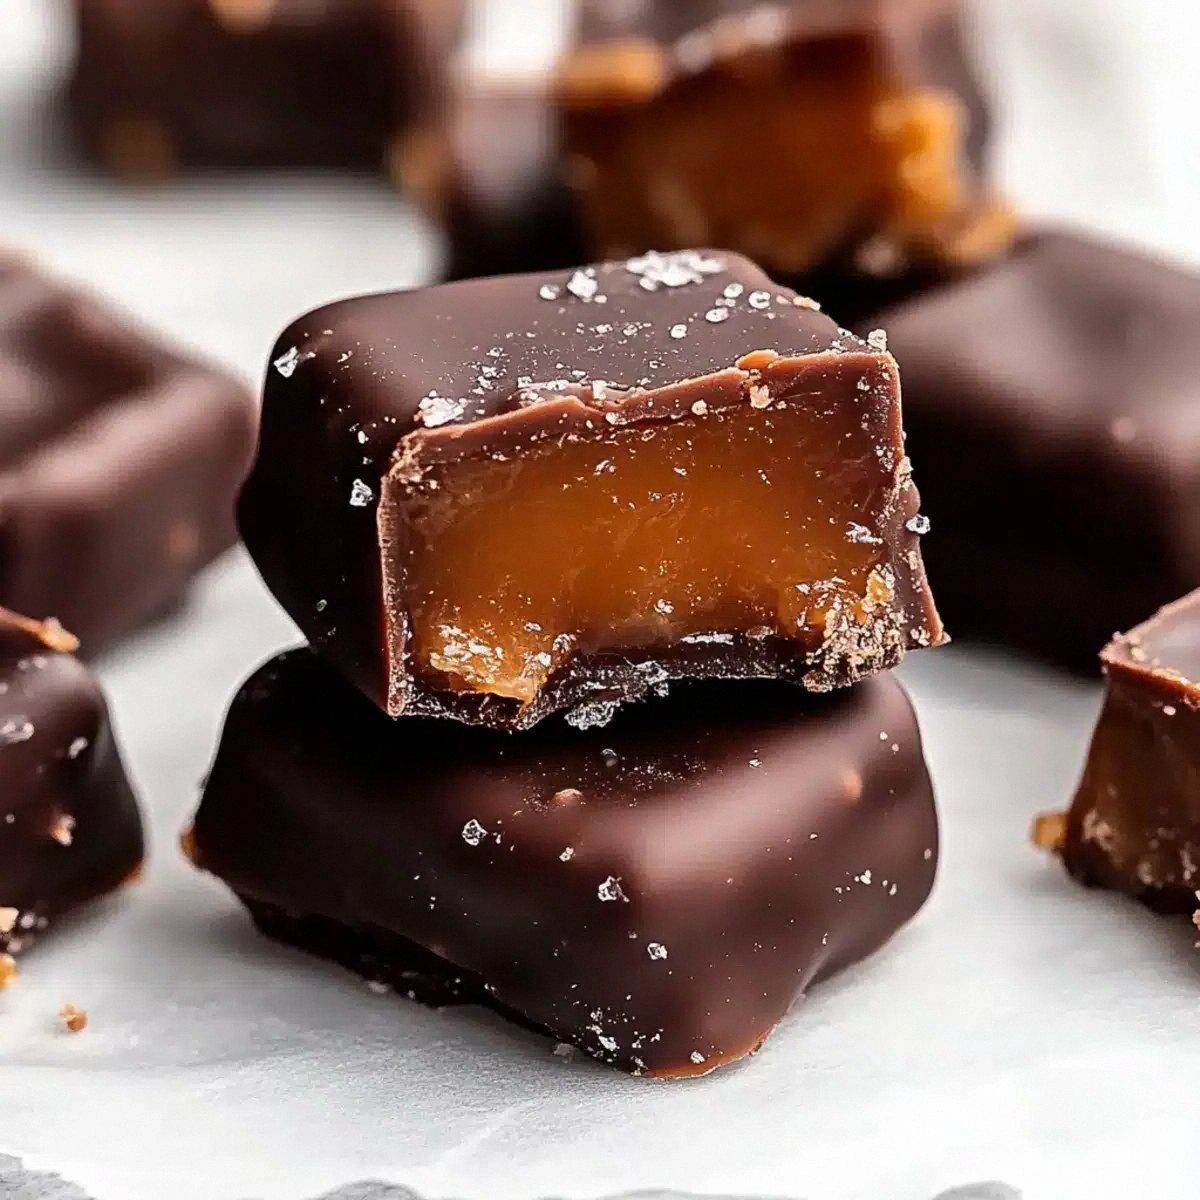
Sea salt flakes aren't just for sprinkling on top — they're folded into the caramel right before assembly, creating little pockets of salty surprise that make the sweet flavors sing like they're in a Broadway musical. The contrast between sweet and salty is what keeps people reaching for "just one more" until the entire batch has mysteriously vanished. Don't use regular table salt here — you want those big crunchy flakes that dissolve on your tongue and make your taste buds do a happy dance.
Cornstarch might seem weird in a cookie recipe, but it's your insurance policy against hockey-puck cookies. Just a teaspoon keeps the cookies thick and soft, preventing them from spreading into sad, greasy puddles. It's the same principle used in Chinese restaurants to velvet meat — it interferes with protein bonds and keeps everything tender. If you've ever had cookies that spread into flat, crispy disasters, cornstarch is about to become your new best friend.
The Final Flourish
Quality vanilla extract makes a difference you can actually taste here, especially since these cookies have so many competing flavors. Skip the imitation stuff — you want real Madagascar vanilla that costs more than a coffee but transforms your cookies from good to legendary. The vanilla enhances the caramel notes and creates a flavor bridge between all the different elements. If you're feeling fancy, scrape in half a vanilla bean too — those tiny black specks make you look like a professional baker even if you're still wearing pajama pants.
Heavy cream for the caramel needs to be exactly that — heavy cream, not half-and-half, not milk, not whatever dairy product has been lurking in your fridge since last Tuesday. The fat content is crucial for creating that thick, luxurious caramel that stays gooey even after the cookies cool. Warm it slightly before adding it to the sugar — cold cream will seize up your caramel faster than you can say "kitchen disaster" and nobody wants to spend their evening chiseling burnt sugar off their favorite pan.
Everything's prepped? Good. Let's get into the real action...
The Method — Step by Step
-
Start by browning your butter in a medium saucepan over medium heat. Cut the butter into chunks so it melts evenly, then swirl the pan occasionally as it foams and bubbles. This is the moment of truth — don't walk away from the stove here. The butter will go from melted to foamy to golden to brown in about 6-8 minutes. When you see the milk solids at the bottom turning chestnut brown and it smells like you're making the world's most expensive popcorn, immediately pour it into a heatproof bowl. Those dark bits at the bottom? That's liquid gold, packed with nutty flavor that'll make your cookies taste like they came from a Parisian bakery.
-
While your brown butter cools slightly (you want it warm but not hot enough to scramble eggs), whisk together your dry ingredients in a separate bowl. The flour, cornstarch, baking soda, and salt need to be thoroughly combined because once that wet dough comes together, you don't want to overmix searching for rogue pockets of leavener. Think of this as creating little flavor bombs that'll be evenly distributed throughout every cookie. Use a whisk, not a spoon — those wire loops break up any lumps and make everything friends with each other.
-
Now for the fun part — beating together the cooled brown butter with both sugars until it looks like wet sand at the beach but smells like heaven. Use a wooden spoon or sturdy spatula for this; we're going old-school because over-mixing with a mixer can make your cookies tough. The mixture should look like caramel-colored wet sand and smell like you're about to make the best decision of your life. This step dissolves some of the sugar, creating that shiny, crackly top that makes bakery cookies look so professional.
-
Add your egg, egg yolks, and vanilla to the butter-sugar mixture, beating until it looks like caramel pudding. The mixture will thicken and become glossy — this is the eggs emulsifying with the fat, creating a smooth base that'll give you tender cookies. If your brown butter is too hot, you'll scramble the eggs and have to start over, so patience pays off here. The dough should ribbon off your spoon like thick hot fudge, coating everything in a layer of future deliciousness.
-
Time to bring it all together — add your dry ingredients to the wet and fold gently with a spatula. This is where most people go wrong, stirring like they're trying to win an arm wrestling contest. You want to stop as soon as the flour disappears; over-mixing develops gluten and gives you tough, bread-like cookies. The dough will be soft and slightly sticky, like play-doh that's been left out for an hour. If you've ever had cookies that rose like little mountains and then collapsed into sad puddles, chances are you over-mixed the dough.
-
Here's the game-changer — instead of mixing the Butterfinger pieces into the dough, we're going to press them into the top of each cookie right before baking. This keeps them crispy and prevents the candy from dissolving into the dough. Chop your frozen Butterfinger bars into thumbnail-sized pieces, trying not to eat them all as you work. The freezing keeps them from turning into orange dust, giving you those satisfying chunks that make people ask "what's the secret ingredient?"
-
Make your caramel sauce while the dough chills — combine sugar and water in a heavy saucepan over medium-high heat. Resist the urge to stir; just swirl the pan gently as the sugar dissolves and turns amber. When it reaches a deep copper color (think old penny), slowly pour in your warm cream while whisking like your life depends on it. The mixture will bubble violently and try to attack you — this is normal. Add a generous pinch of sea salt flakes and let it cool until it's thick but still pourable, like warm honey.
-
Scoop your chilled dough into balls using a medium cookie scoop or two spoons — you want them about the size of golf balls. Place them on parchment-lined baking sheets with plenty of space between (they spread more than you'd think). Press 3-4 Butterfinger pieces into the top of each dough ball, pushing them in just enough that they won't fall off but not so deep that they disappear. This creates those pockets of crunchy candy that make people close their eyes when they bite into them.
-
Bake at 350°F for 12-14 minutes, but here's the secret — pull them out when they still look slightly underbaked in the center. They'll continue cooking on the hot sheet outside the oven, giving you that perfect gooey center. The edges should be golden brown and set, but the centers should still look soft and puffy. This next part? Pure magic. While they're still warm, use the back of a spoon to gently press a small well into the center of each cookie and fill it with a teaspoon of your cooled caramel.
-
Let the cookies cool on the baking sheet for 10 minutes before transferring to a wire rack — this is the hardest part because they smell incredible and you want to shove them all in your mouth immediately. The caramel will set slightly but stay gooey, creating that perfect contrast with the crunchy Butterfinger pieces. Sprinkle with a few extra sea salt flakes while they're still warm, then try to wait until they're completely cool before sampling. If you can wait that long, you have more willpower than I do.
That's it — you did it. But hold on, I've got a few more tricks that'll take this to another level...
Insider Tricks for Flawless Results
The Temperature Rule Nobody Follows
Room temperature ingredients aren't just a suggestion — they're the difference between cookies that look like they came from a bakery versus ones that look like they were made by someone wearing oven mitts. Your eggs should be warm enough that you can hold them comfortably in your hand, and your butter should be cool but pliable. Cold eggs don't incorporate properly, leaving you with streaky dough that bakes unevenly. If you're impatient (and who isn't when cookies are involved?), submerge your eggs in warm water for 5 minutes and cut your butter into small pieces to speed up the softening process.
Why Your Nose Knows Best
Trust your sense of smell more than any timer when browning butter. When it starts smelling like hazelnuts and toffee, you're about 30 seconds away from perfection. The visual cues can be misleading — lighting in kitchens varies, pans are different colors, but your nose doesn't lie. If you wait until it looks dark enough, you've probably already gone too far. That nutty, caramel aroma means the milk solids have caramelized perfectly, creating hundreds of flavor compounds that'll make your cookies taste like they contain secret ingredients even though the recipe is right here in front of you.
The 5-Minute Rest That Changes Everything
After you mix your dough, let it rest for exactly 5 minutes before adding the Butterfinger pieces. This brief pause allows the flour to fully hydrate, preventing tough cookies and giving you that perfect chewy texture. The candy pieces also stay suspended better in a slightly rested dough, rather than sinking to the bottom like candy-covered anchors. A friend tried skipping this step once — let's just say it didn't end well, and she spent the evening eating cookie shards while crying into a glass of milk.
The Freezer Trick That Saves Lives
Freeze your cookie dough balls for at least 30 minutes before baking — this isn't just about convenience, it's about science. Cold dough spreads less, giving you thicker, chewier cookies with that perfect bakery-style dome. The Butterfinger pieces also stay crisp because they hit the oven's heat more gradually instead of immediately starting to melt. You can freeze the dough balls for up to 3 months, which means fresh cookies are always 12 minutes away. Picture yourself pulling this out of the oven, the whole kitchen smelling incredible, and knowing that you're about to become everyone's favorite person.
The Salt Timing Secret
Add half your salt to the dough and save the other half for sprinkling on top right after baking. The salt in the dough enhances all the other flavors, while the salt on top hits your taste buds first, creating that sweet-salty contrast that makes people close their eyes when they bite into something delicious. Use flaky sea salt for the topping — it dissolves on your tongue in little bursts, rather than making the cookies taste like a salt lick. Maldon is my go-to, but any flaky salt will do the trick.
Creative Twists and Variations
This recipe is a playground. Here are some of my favorite ways to switch things up:
Dark Chocolate Decadence
Replace half the Butterfinger pieces with chunks of dark chocolate (70% or higher), and add a tablespoon of cocoa powder to the dough. The bitterness of the chocolate balances the sweet caramel perfectly, creating a more sophisticated cookie that pairs beautifully with red wine. The cocoa powder deepens the flavor without making the cookies taste like chocolate cookies — they just taste more complex, like they contain secrets.
Peanut Butter Paradise
Swap out 1/4 cup of the butter for peanut butter, and add an extra 2 tablespoons of flour to compensate for the additional fat. The peanut butter flavor marries perfectly with the Butterfinger candy, creating a cookie that tastes like a gourmet peanut butter cup had a baby with a candy bar. If you've ever struggled with peanut butter cookies that spread too much, you're not alone — and I've got the fix with the extra flour and a longer chill time.
Salted Caramel Apple
Add 1/2 cup of finely diced dried apples to the dough, and replace the sea salt flakes with apple pie spice mixed with sugar. The dried apples rehydrate slightly during baking, creating little pockets of apple-pie flavor that make these cookies taste like autumn in New England. They're particularly incredible warm, when the apples are soft and the caramel is still gooey enough to stretch into Instagram-worthy strands.
Coffee Lover's Dream
Dissolve 2 teaspoons of instant espresso powder in the vanilla extract before adding it to the dough. The coffee flavor enhances the caramel notes without making the cookies taste like coffee — they just taste more intense and complex. If you want to go full coffee shop, drizzle the cooled cookies with white chocolate that's been mixed with a touch of espresso powder. These are dangerous with your morning coffee; you might find yourself having cookies for breakfast more often than you'd care to admit.
Coconut Caramel Crunch
Replace 1/3 cup of the flour with toasted coconut flakes, and press additional coconut on top of the cookies right before baking. The coconut toasts as the cookies bake, creating little crispy bits that taste like tropical paradise. The caramel and coconut combination will transport you to a beach somewhere, even if you're actually standing in your tiny apartment kitchen wearing mismatched socks.
Spicy Mexican Hot Chocolate
Add 1 teaspoon of cinnamon and a pinch of cayenne to the dough, and replace half the Butterfinger pieces with Mexican chocolate chunks. The slight heat builds slowly, hitting you after you've already fallen in love with the cookie. It's not enough to make you reach for milk, just enough to make things interesting. These are particularly good around the holidays when you want something that tastes festive but different from the usual cinnamon-spice everything.
Storing and Bringing It Back to Life
Fridge Storage
Store completely cooled cookies in an airtight container at room temperature for up to 5 days, with parchment paper between layers to prevent sticking. The caramel will firm up slightly but stay pleasantly chewy, while the Butterfinger pieces retain most of their crunch. Whatever you do, don't refrigerate them — the cold makes the caramel hard and the candy pieces soggy. If your kitchen runs warm and you're worried about the caramel, store them with a piece of bread in the container — the bread will absorb excess moisture and keep your cookies fresh longer.
Freezer Friendly
These cookies freeze beautifully both before and after baking. Freeze the dough balls on a baking sheet, then transfer to a freezer bag for up to 3 months. When the craving hits, bake them straight from frozen — just add 2-3 minutes to the baking time. For already-baked cookies, wrap them individually in plastic wrap, then freeze in a bag. Thaw at room temperature for 30 minutes, or microwave for 10-15 seconds for that fresh-from-the-oven experience. I dare you to taste this and not go back for seconds when you realize you can have warm cookies anytime you want.
Best Reheating Method
The microwave works in a pinch, but for that fresh-baked experience, reheat cookies in a 300°F oven for 5-7 minutes. Add a tiny splash of water to the baking sheet before reheating — it creates steam that brings back the gooey caramel without making the cookies soggy. The Butterfinger pieces will re-crisp slightly, giving you that perfect textural contrast again. If you're reheating just one cookie (and who could blame you for portion control), wrap it in a damp paper towel and microwave for 8-10 seconds. It won't be quite as good as fresh, but it's close enough to make you question whether you really need to share the rest of the batch.