Picture this: a chaotic kitchen, the timer blaring, a pot of melted chocolate swirling, and a single banana that has seen better days. I was halfway through a midnight snack experiment when the banana slipped, splattered across the counter, and the chocolate went rogue. That moment sparked the idea for a simple, no‑bake treat that would rescue my disaster and turn it into something delicious. This is hands down the best version you'll ever make at home, and I’m about to drop a secret technique that will make your taste buds sing.
I dare you to taste this and not go back for seconds. The first bite hits your tongue with a creamy banana core, then the dark chocolate melts like velvet, and the nuts and coconut add a satisfying crunch that shatters like thin ice. That sizzle when it hits the pan? Absolute perfection. Picture yourself pulling this out of the fridge, the whole kitchen smelling incredible, and watching friends’ faces light up as they bite into the first piece. I’ll be honest — I ate half the batch before anyone else got to try it. If you've ever struggled with gluten‑free desserts that taste like cardboard, you’re not alone — and I've got the fix.
Most recipes get this completely wrong. Here's what actually works: the bananas are the glue that keeps the bite together, the chocolate provides richness, and the coconut and nuts give texture. The pinch of sea salt is the secret that elevates the sweetness and balances the flavors. The real game‑changer is how you combine everything without over‑mixing, so the texture stays soft and the chocolate doesn’t seize. Okay, ready for the game‑changer? Stay with me here — this is worth it.
Let me walk you through every single step — by the end, you'll wonder how you ever made it any other way. The best part? This recipe is so simple that even a novice can master it, and the result is a crowd‑pleaser that will have people begging for the recipe. The next part? Pure magic. I’ll show you how to turn everyday ingredients into bite‑size bliss that feels like a spa day for your taste buds.
What Makes This Version Stand Out
- Taste: The combination of ripe banana, rich dark chocolate, and a hint of sea salt creates a flavor profile that is both sweet and savory, making each bite unforgettable.
- Texture: The bananas provide a creamy, almost custard-like center, while the nuts and coconut flakes add a delightful crunch that contrasts beautifully.
- Simplicity: No baking, no elaborate equipment, just a few simple steps that can be completed in under an hour.
- Gluten‑free: All ingredients are naturally gluten‑free, making this treat safe for those with celiac disease or gluten sensitivity.
- Make‑ahead potential: The bites can be prepared in advance and stored in the fridge or freezer, making them a convenient option for parties or busy evenings.
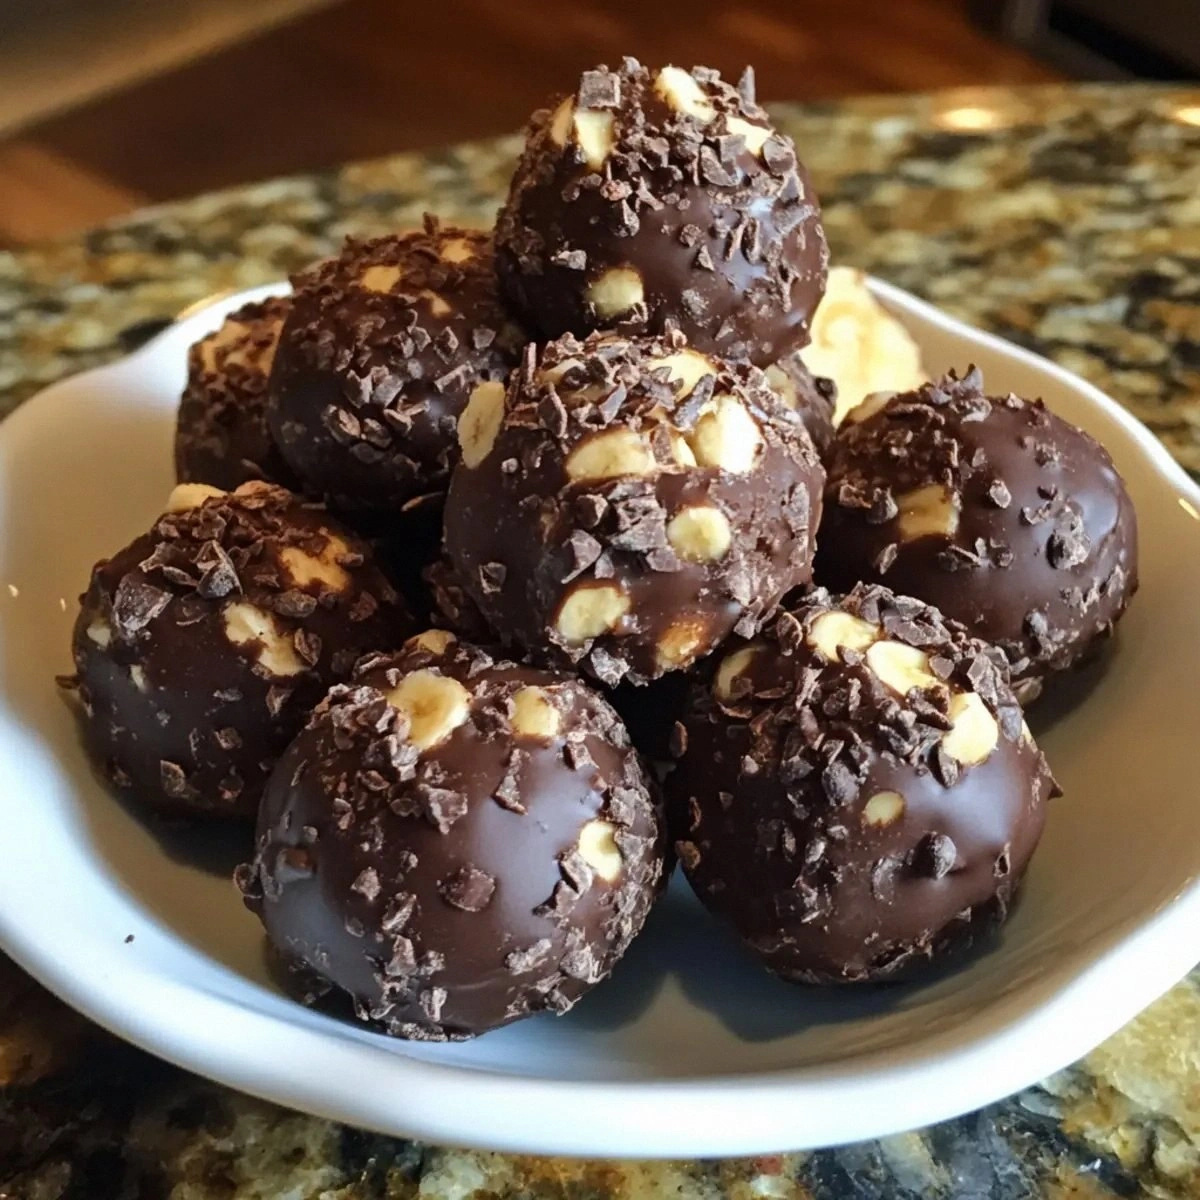
- Visual appeal: The glossy chocolate coating and speckled nuts create a presentation that looks as good as it tastes.
- Ingredient quality: Using high‑quality dark chocolate and fresh bananas ensures maximum flavor and a luxurious mouthfeel.
- Crowd reaction: Friends and family rave about the melt‑in‑your‑mouth experience, and they always ask for the recipe.
Alright, let's break down exactly what goes into this masterpiece…
Inside the Ingredient List
The Flavor Base
Ripe bananas are the star of this dish. Their natural sweetness and creamy texture act as the binding agent, allowing the chocolate to coat the mixture evenly. If you use underripe bananas, the mixture will be too dry and the flavor will lack depth. When selecting bananas, look for those with a slight bruise and a bright yellow peel; they’re at their sweetest.
The Texture Crew
Dark chocolate is the heart of the bite. Choosing a chocolate with 70% cacao gives you a deep, bittersweet flavor that balances the banana’s sweetness. If you prefer a milder chocolate, opt for 60% cacao, but remember that the bitterness will be less pronounced. Adding a teaspoon of coconut oil to the chocolate before mixing creates a silky finish.
The Unexpected Star
Chopped nuts add a crunchy contrast that breaks up the creamy center. Almonds, pecans, or walnuts work wonderfully, but feel free to experiment with pistachios for a pop of color. The nuts also bring a subtle nutty aroma that enhances the overall flavor profile. If you’re allergic, substitute with sunflower seeds or pumpkin seeds for a similar crunch.
The Final Flourish
Unsweetened coconut flakes add a tropical twist and a subtle sweetness that complements the dark chocolate. Toast the coconut lightly in a dry pan for a nutty aroma; this step is optional but highly recommended. The sea salt, though used in minuscule amounts, is the secret that balances sweetness and enhances chocolate flavor. A pinch of sea salt is enough to elevate the taste without overpowering the other ingredients.
Everything's prepped? Good. Let's get into the real action…
The Method — Step by Step
- Begin by peeling and slicing the bananas into 1/2‑inch thick rounds. Keep the slices slightly uneven for a rustic look. Place the banana slices on a parchment‑lined tray, ensuring they’re not touching; this prevents them from sticking together during the next steps.
- Set a double boiler over low heat, filling the bottom pot with about an inch of water. Add the dark chocolate to the top pot and stir until fully melted, about 3–4 minutes. The chocolate should reach a temperature of 65°C (149°F); use a thermometer to avoid overheating.
- Once the chocolate is smooth, whisk in the coconut oil if using, then fold in the sliced bananas gently, ensuring each piece is coated. The mixture should look glossy and silky, with a faint scent of chocolate and banana. This is the moment of truth—don’t rush it.
- Add the chopped nuts and toasted coconut flakes to the chocolate‑banana mix. Stir until the nuts are evenly distributed. This step is crucial for texture; if the nuts sink to the bottom, they won’t provide the expected crunch.
- Let the mixture cool to room temperature, then refrigerate for 30 minutes to allow the chocolate to set slightly. During this time, the flavors meld, and the texture firms up, making the bites easier to handle. Check the mixture; it should feel firm but still pliable.
- Using a melon baller or small spoon, scoop the mixture into bite‑sized portions and roll them into balls. Place each ball on a parchment‑lined tray, spacing them about an inch apart. The size should be roughly the diameter of a golf ball for easy handling.
- Transfer the tray to the freezer for 1–2 hours, or until the bites are fully set. A quick freeze ensures a firm texture that holds together when you bite into them. The freezer also helps the chocolate develop a slightly glossy sheen.
- Once set, transfer the bites to an airtight container and store them in the refrigerator for up to a week. If you prefer a colder treat, keep them in the freezer for up to a month. When you’re ready to serve, let them sit at room temperature for 5 minutes so the chocolate softens slightly, giving that melt‑in‑your‑mouth effect.
That's it — you did it. But hold on, I've got a few more tricks that'll take this to another level. The next section will reveal insider tips that will help you avoid common pitfalls and elevate the flavor profile even further.
Insider Tricks for Flawless Results
The Temperature Rule Nobody Follows
Chocolate is temperamental; if it’s too hot, it’ll become dull and lose its shine. Keep the chocolate below 65°C (149°F) and stir frequently. I’ve learned that a thermometer is a game‑changer for consistency. This trick ensures every bite looks as good as it tastes.
Why Your Nose Knows Best
Before adding the nuts and coconut, give the mixture a quick sniff. A faint chocolate aroma indicates the right consistency; if it smells overly sweet, let it cool a bit more. The smell is a reliable indicator of texture and flavor balance. Trust your nose, and you’ll avoid over‑sweetened bites.
The 5‑Minute Rest That Changes Everything
After refrigerating the chocolate‑banana mixture, let it rest for 5 minutes before shaping. This short pause allows the chocolate to settle and makes the mixture easier to roll into balls. A friend once skipped this step and ended up with unevenly shaped bites that collapsed during freezing. The rest step is worth the extra time.
Use a Silicone Mat for Easy Removal
Silicone baking mats keep the bites from sticking to the tray, making cleanup a breeze. They also prevent the chocolate from drying out on the parchment. I’ve found that a reusable mat saves money and reduces waste, making it both eco‑friendly and convenient.
Keep the Coconut Toasted
Toasted coconut adds depth and a nutty aroma that fresh coconut can’t match. Toast the flakes in a dry skillet over medium heat for 3–4 minutes, stirring constantly. Don’t let them burn; a light golden hue is all you need. Toasted coconut elevates the entire bite.
Store in a Cool, Dry Place
When storing the bites at room temperature, keep them in a sealed container to prevent moisture absorption. Moisture can cause the chocolate to bloom, giving a white, powdery appearance. If you notice bloomed chocolate, simply place the bites in the fridge for an hour to restore their shine.
Creative Twists and Variations
This recipe is a playground. Here are some of my favorite ways to switch things up:
Mint‑Chocolate Banana Bites
Stir a teaspoon of peppermint extract into the melted chocolate for a refreshing twist. The mint pairs beautifully with dark chocolate, creating a cool aftertaste. This variation is perfect for summer gatherings and adds a pop of green color.
Nutella‑Infused Bites
Replace half the dark chocolate with Nutella for a sweeter, hazelnut‑rich flavor. The result is a creamy, indulgent bite that feels like a chocolate‑banana truffle. Keep the nuts on the side to maintain a crunchy contrast.
Almond‑Coconut Crunch
Swap the walnuts for sliced almonds and increase the coconut flakes to 1/3 cup. Almonds bring a mild, buttery taste that complements the banana’s sweetness. The extra coconut adds a tropical vibe, making the bites feel like a beach snack.
Chocolate‑Covered Banana Chips
Thinly slice bananas and bake them at 180°C (356°F) for 20 minutes until crisp. Dip the chips in melted chocolate, then roll in crushed nuts. This version offers a crunchy texture and a more pronounced chocolate flavor.
Spiced Banana Bites
Add a pinch of cinnamon and a dash of cayenne pepper to the chocolate mixture. The subtle heat balances the sweetness and adds complexity. This spicy version is a great way to surprise guests at a dinner party.
Vegan Protein Bites
Incorporate a tablespoon of vanilla plant‑based protein powder into the chocolate mixture. This adds a protein boost without altering the taste significantly. It’s a smart way to make the bites more filling for post‑workout snacking.
Storing and Bringing It Back to Life
Fridge Storage
Place the bites in an airtight container and store them in the refrigerator for up to a week. The cold environment keeps the chocolate firm and prevents the banana from browning. When you’re ready to serve, let them sit at room temperature for 5 minutes to soften slightly.
Freezer Friendly
For longer storage, keep the bites in the freezer for up to a month. Wrap them individually in parchment paper before freezing to prevent sticking. When you need a quick snack, pop a bite out and let it thaw for 2–3 minutes; it will return to its creamy center.
Best Reheating Method
To revive frozen bites, place them in a microwave on the defrost setting for 10–15 seconds. If the chocolate has hardened, give it a gentle stir to smooth it out. Adding a tiny splash of water before reheating steams the mixture back to perfection, restoring that silky melt.
With these storage tips, you can enjoy these chocolate banana bites anytime, whether it’s a late‑night craving or a pre‑planned dessert for guests. The versatility of this recipe makes it a staple in any kitchen.