Introduction
Picture this: a Sunday afternoon, the kitchen lights dimming to a warm amber glow, and you standing on a counter that smells like vanilla and butter. You had just finished a disastrous batch of sponge cake that tasted like a dry sponge and looked as flat as a pancake. Your friends were laughing, and you were left with a sad, crumbly mess that seemed to mock your culinary ambitions. That moment sparked a relentless quest to find a cake that could turn that embarrassment into a triumph.
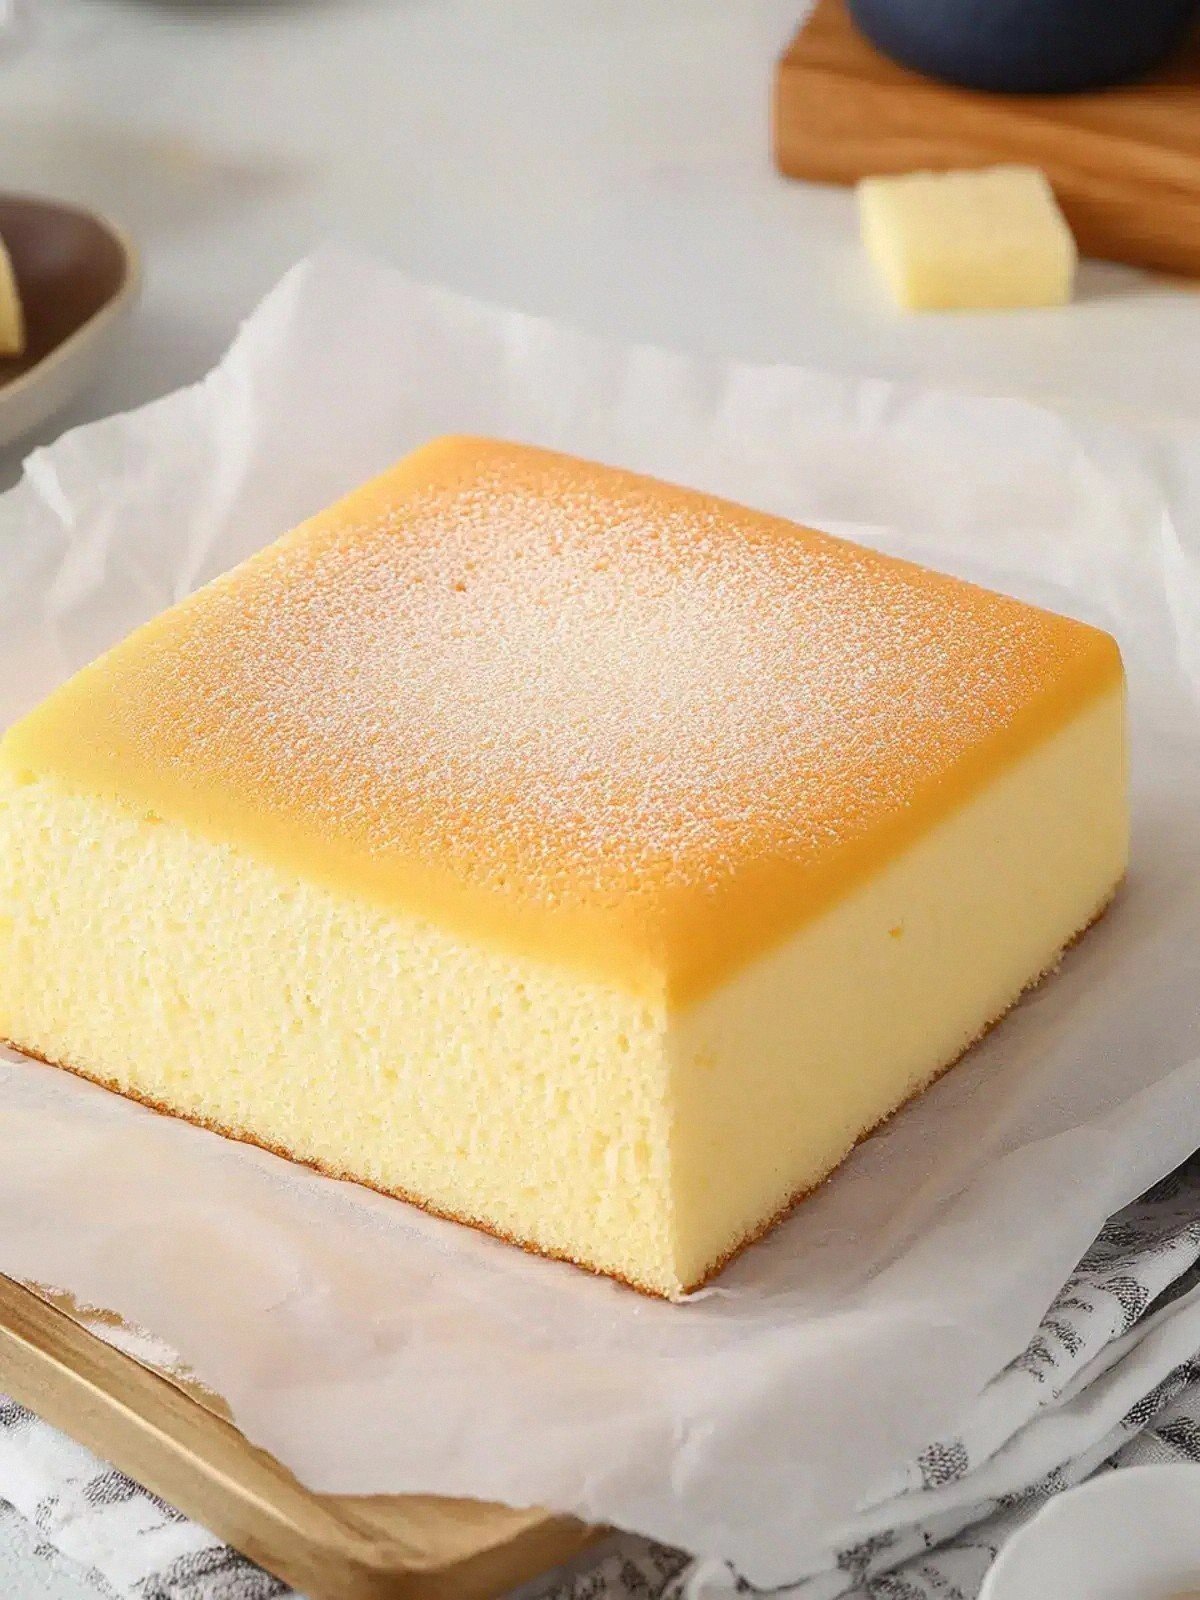
Fast forward to a night when a Taiwanese friend shared a photo of a golden, airy cake that looked like a cloud on a plate. I stared at the image, feeling a sudden surge of hunger and curiosity. The cake was called Castella, a humble yet legendary Japanese‑Taiwanese confection known for its silky texture and subtle sweetness. The more I read about its history, the more I realized that the secret lies not just in the ingredients but in the precise method of whisking, folding, and baking. I dared myself to recreate that magic in my own kitchen.
This version stands out because it eliminates the common pitfalls—overmixing, uneven browning, and a dense crumb—while preserving the original spirit of the classic recipe. I discovered that the key is to treat the batter like a delicate cloud: gentle, patient, and never rushed. The result is a cake that rises to a perfect dome, cracks open to reveal a moist interior, and leaves a lingering echo of vanilla and butter that lingers on the palate. I’m telling you, this is hands down the best version you’ll ever make at home.
There’s a twist you won’t expect: a tiny amount of cream of tartar that stabilizes the eggs, giving the cake an extra lift and a silky mouthfeel that feels like velvet. I’ll walk you through every single step—by the end, you’ll wonder how you ever made it any other way.
What Makes This Version Stand Out
- Texture: The batter is airy and light, thanks to a meticulous whisking technique that incorporates air without overworking the flour. The result is a cake that feels like a cloud on the tongue, not a dense sponge.
- Flavor: Vanilla extract is blended at the very end to preserve its subtle aroma, while the butter adds a rich, buttery undertone that balances the sweetness of the sugar.
- Simplicity: The recipe uses only eight ingredients, all of which are pantry staples. No fancy equipment is required—just a whisk, a mixing bowl, and a reliable oven.
- Uniqueness: The inclusion of cream of tartar is a secret weapon that many recipes overlook. It stabilizes the eggs, creating a uniform rise and preventing the cake from collapsing.
- Crowd Reaction: Guests who try this cake often remark that it tastes like a dessert they’d only find in a boutique bakery, yet it’s made entirely at home.
- Ingredient Quality: Using unsalted butter and whole milk instead of substitutes elevates the flavor profile, giving the cake a richer, more authentic taste.
- Cooking Method: The batter is folded gently after whisking to keep the air bubbles intact, a step that many shortcuts skip.
- Make‑ahead Potential: The cake can be baked in advance and stored, making it perfect for busy weeknights or special occasions.
Alright, let's break down exactly what goes into this masterpiece...
Inside the Ingredient List
The Flavor Base
Granulated sugar is the sweet heart of this cake. It dissolves into the egg whites, creating a smooth, glossy batter that bakes into a golden crust. Skipping sugar would leave the cake bland and flat. If you prefer a lighter sweetness, you can replace half the sugar with honey, but be aware that honey will add a slight floral note and may affect the rise.
The Texture Crew
Cake flour is the cornerstone of the airy texture. Its low protein content prevents gluten formation, keeping the crumb tender. If you can’t find cake flour, all‑purpose flour works but expect a slightly denser cake. Unsalted butter is melted and cooled to room temperature; this step is crucial for a smooth batter. Butter’s fat content coats the flour, limiting gluten development and contributing to that melt‑in‑your‑mouth feel.
The Unexpected Star
Cream of tartar is often overlooked, yet it plays a vital role in stabilizing the egg whites. By binding the proteins, it prevents the batter from collapsing during baking. If you don’t have cream of tartar, a pinch of baking powder can substitute, but the cake will be slightly less airy.
The Final Flourish
Whole milk adds moisture and richness. It also helps dissolve the sugar and creates a silky batter. Whole milk is preferred over skim; the fat content adds depth to the flavor. Vanilla extract is added at the last minute to preserve its delicate aroma. If you’re vegan, use a plant‑based milk and a vegan butter alternative, but expect a subtle difference in taste.
Everything's prepped? Good. Let's get into the real action...
The Method — Step by Step
- Preheat your oven to 180 °C (350 °F). Line a 9‑inch (23 cm) loaf pan with parchment paper, leaving a 2‑inch (5 cm) overhang on each side. This ensures an even rise and makes removal a breeze. The oven rack should be centered for uniform heat distribution. I’ve found that a preheated pan helps the batter set instantly, giving the cake a crisp crust.
- In a small saucepan, melt the butter over low heat. Remove from heat and let it cool to room temperature. This step is critical; if the butter is too hot, it can cause the eggs to scramble when added. While the butter cools, whisk the eggs and sugar together in a large bowl until the mixture is pale and slightly thickened. The goal is to incorporate as much air as possible.
- Sift the cake flour, salt, and cream of tartar over the whisked egg mixture. Gently fold the dry ingredients into the wet using a spatula. The folding should be light and deliberate; over‑mixing will develop gluten and produce a tough crumb. The batter should look smooth and glossy, with no streaks of flour.
- Slowly pour the whole milk into the batter while folding. This step hydrates the flour and creates a silky consistency. The batter should be thick but pourable, like a thin pancake batter. If it’s too thick, add a splash of milk; if too runny, add a teaspoon of flour.
- Add the vanilla extract and the cooled butter. Fold until the mixture is uniform. The butter should be fully incorporated, leaving no greasy pockets. At this point, the batter should have a glossy sheen and a smooth texture that feels almost liquid.
- Pour the batter into the prepared loaf pan. Tap the pan gently on the counter to release any air bubbles. The batter should fill the pan to the 2‑inch overhang. If it overflows, you can trim the top with a knife to level it.
- Place the pan in the preheated oven and bake for 30 minutes. After 20 minutes, check the cake’s rise. It should have risen evenly and the top should be lightly golden. The edges will begin to pull away from the pan, signaling that it’s almost done. Keep a close eye to avoid overbaking.
- Remove the cake from the oven and let it cool in the pan for 10 minutes. Then turn it out onto a wire rack to cool completely. This cooling period allows the crumb to set, preventing a soggy bottom. If you rush this step, the cake may become dense.
That's it — you did it. But hold on, I've got a few more tricks that'll take this to another level...
Insider Tricks for Flawless Results
The Temperature Rule Nobody Follows
Many bakers set their oven to the highest temperature, hoping for a quick bake. The truth is, a steady 180 °C (350 °F) gives the cake time to rise without burning the crust. I’ve baked at 190 °C once, and the cake crust was blistered while the inside remained under‑cooked.
Why Your Nose Knows Best
Before you open the oven door, pause and inhale the aroma. If you smell a sweet, buttery scent, the cake is ready. If it smells like raw flour, it needs more time. Your nose is a reliable indicator of doneness, more so than a timer in some cases.
The 5‑Minute Rest That Changes Everything
Letting the cake rest in the pan for 10 minutes before turning it out preserves the structure. During this rest, the cake continues to cook slightly, sealing the top and preventing a collapsed center. If you skip this step, the cake may slide off the pan and break.
Paper Towel Trick for a Perfect Finish
After baking, place a clean paper towel over the cake’s surface and let it sit for a minute. This absorbs excess moisture from the top, giving the cake a crisp, golden finish that’s hard to resist.
Cooling Rack Magic
Cooling on a wire rack allows air to circulate all around the cake, preventing a soggy bottom. I’ve seen cakes that cool on a flat surface develop a wet underside due to trapped steam. A rack is your ally in achieving that airy, dry base.
Creative Twists and Variations
This recipe is a playground. Here are some of my favorite ways to switch things up:
Matcha Marvel
Replace 2 tablespoons of flour with matcha powder for a subtle green tea flavor. The cake will have a slightly earthy note that pairs well with a cup of jasmine tea. Keep the rest of the ingredients unchanged.
Orange Zest Delight
Add the zest of one orange to the batter for a bright, citrusy aroma. The orange zest also adds a hint of bitterness that balances the sweetness. Serve with a dusting of powdered sugar.
Chocolate Chip Surprise
Fold in 1 cup of semisweet chocolate chips after the final fold. The chips melt slightly during baking, creating pockets of chocolate that burst with flavor. This variation is a crowd‑pleaser at parties.
Almond Essence
Replace the vanilla extract with almond extract for a nutty undertone. The almond flavor pairs wonderfully with toasted almonds sprinkled on top. It’s a subtle upgrade that adds depth.
Caramel Swirl
Swirl caramel sauce into the batter before baking. The caramel will melt and create a sweet, glossy swirl throughout the cake. This adds a luxurious visual and flavor element.
Red Bean Edition
For a Taiwanese twist, fold in 1 cup of sweetened red beans after the final fold. The beans add a chewy texture and a sweet, earthy flavor that complements the cake’s lightness.
Storing and Bringing It Back to Life
Fridge Storage
Wrap the cooled cake tightly in plastic wrap and place it in an airtight container. Store in the refrigerator for up to 3 days. The cake stays moist and retains its flavor.
Freezer Friendly
Slice the cake before freezing to make serving easier. Freeze the slices in a zip‑lock bag for up to 2 months. When ready to eat, let the slices thaw at room temperature for 30 minutes.
Best Reheating Method
To revive a frozen slice, place it in a preheated oven at 150 °C (300 °F) for 8–10 minutes. Add a tiny splash of water to the pan to steam the cake, keeping it moist and fluffy. Remove from the oven and let it cool for a minute before slicing.