Picture this: I’m in the middle of a chaotic Thanksgiving prep, the oven is screaming, the turkey is a ticking time bomb, and my friends are daring each other to create the most outrageous appetizer. I stared at a bowl of plain cheese spread and thought, “What if this could be the centerpiece, the show‑stopper, the edible sculpture that makes everyone gasp?” That moment of desperation birthed the pumpkin‑shaped cheese ball, a creation that turned my kitchen disaster into a triumph. I dared myself to shape cheese into a perfect orange orb, coat it with crunchy nuts, and make it look so festive that even the pumpkins on the porch would feel jealous.
The moment the mixture hit the counter, the air filled with a buttery, cheesy perfume that made my nose do a happy dance. I could hear the faint crackle of the pretzel sticks as they hit the bowl, feel the cool, creamy texture of the cream cheese between my fingertips, and see the vibrant orange hue of paprika flirting with the cheddar’s golden glow. The anticipation was palpable, like waiting for a fireworks show to begin. When I finally sculpted the ball and rolled it in the nut‑crusted coating, the crunch echoed like applause in a silent theater, and the first bite was a symphony of creamy, salty, and slightly sweet notes that sang straight to my taste buds.
Most cheese ball recipes give you a bland, round blob that sits on a platter looking like a bored snowball. This version, however, is hands down the best version you’ll ever make at home because it balances flavor, texture, and visual wow‑factor like a seasoned pro. I’m talking about a cheese ball that not only tastes like a dream but also looks like a pumpkin fresh from the patch, ready to be the star of any autumn gathering. I’ve tried the usual shortcuts—pre‑shredded cheese, store‑bought nuts—and they all fell flat. The secret? A precise blend of spices, a strategic coating technique, and a little patience that turns a simple cheese ball into a festive masterpiece.
Okay, ready for the game‑changer? I’m going to walk you through every single step—down to the exact moment you should feel the ball start to firm up in your hand—so you’ll wonder how you ever made it any other way. I dare you to taste this and not go back for seconds. Let’s dive in and make a pumpkin‑shaped cheese ball that will impress every guest, from picky toddlers to food‑critic friends.
What Makes This Version Stand Out
- Flavor Explosion: The combination of sharp cheddar, creamy cream cheese, and a whisper of garlic and onion powder creates a depth that’s richer than a holiday gravy, making each bite unforgettable.
- Texture Harmony: Silky interior meets a crunchy, nutty exterior, delivering a satisfying contrast that keeps guests reaching for more.
- Simplicity Meets Sophistication: Only nine ingredients, yet the result looks like a culinary masterpiece you’d pay a chef for.
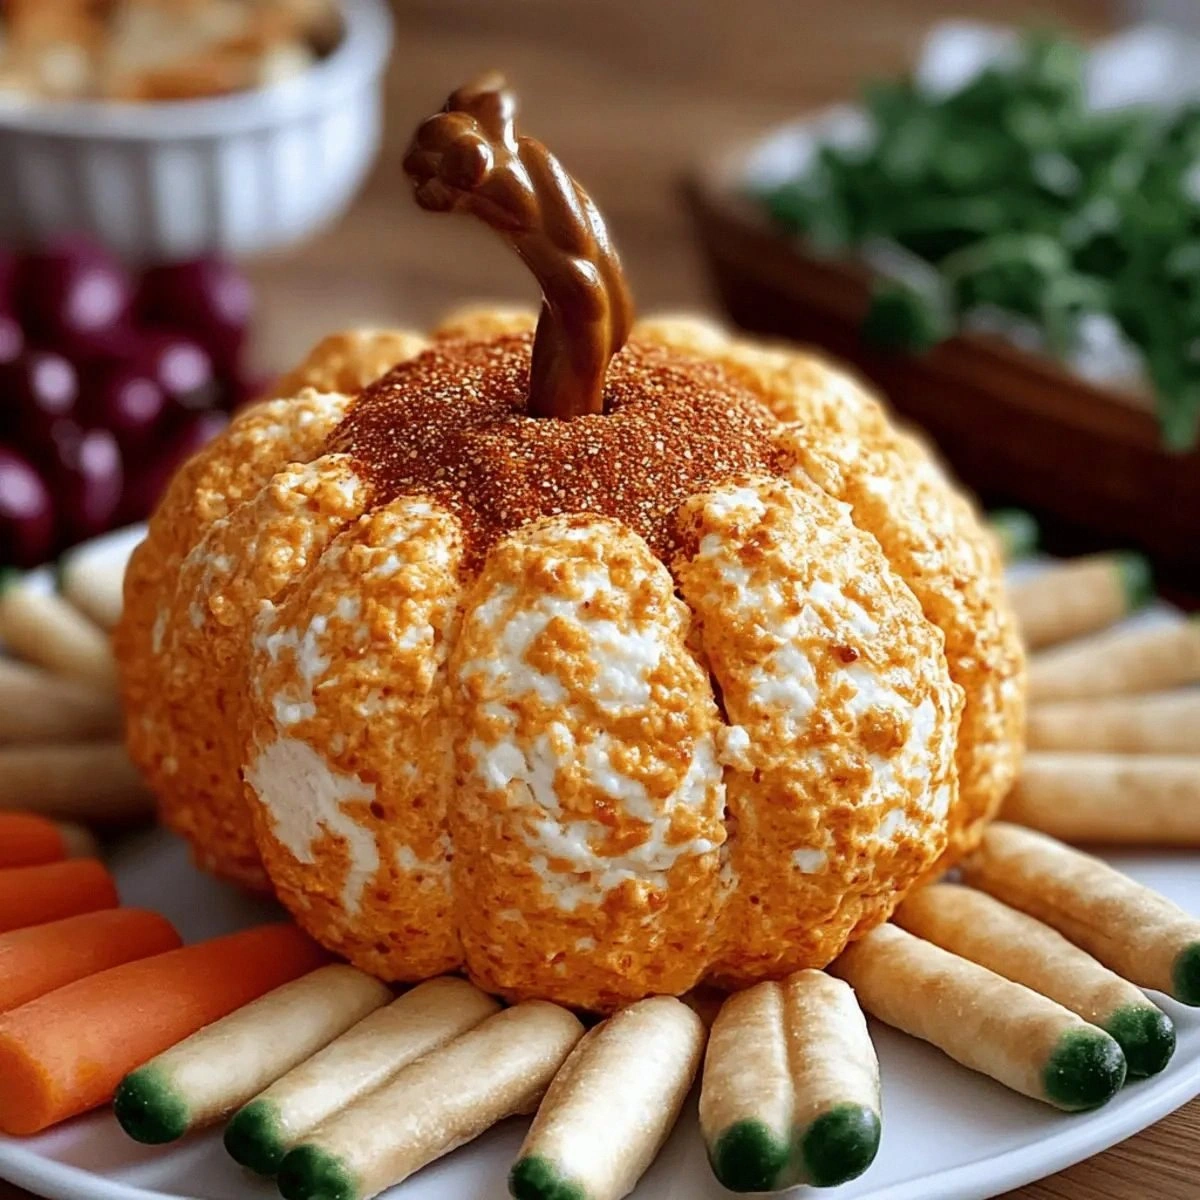
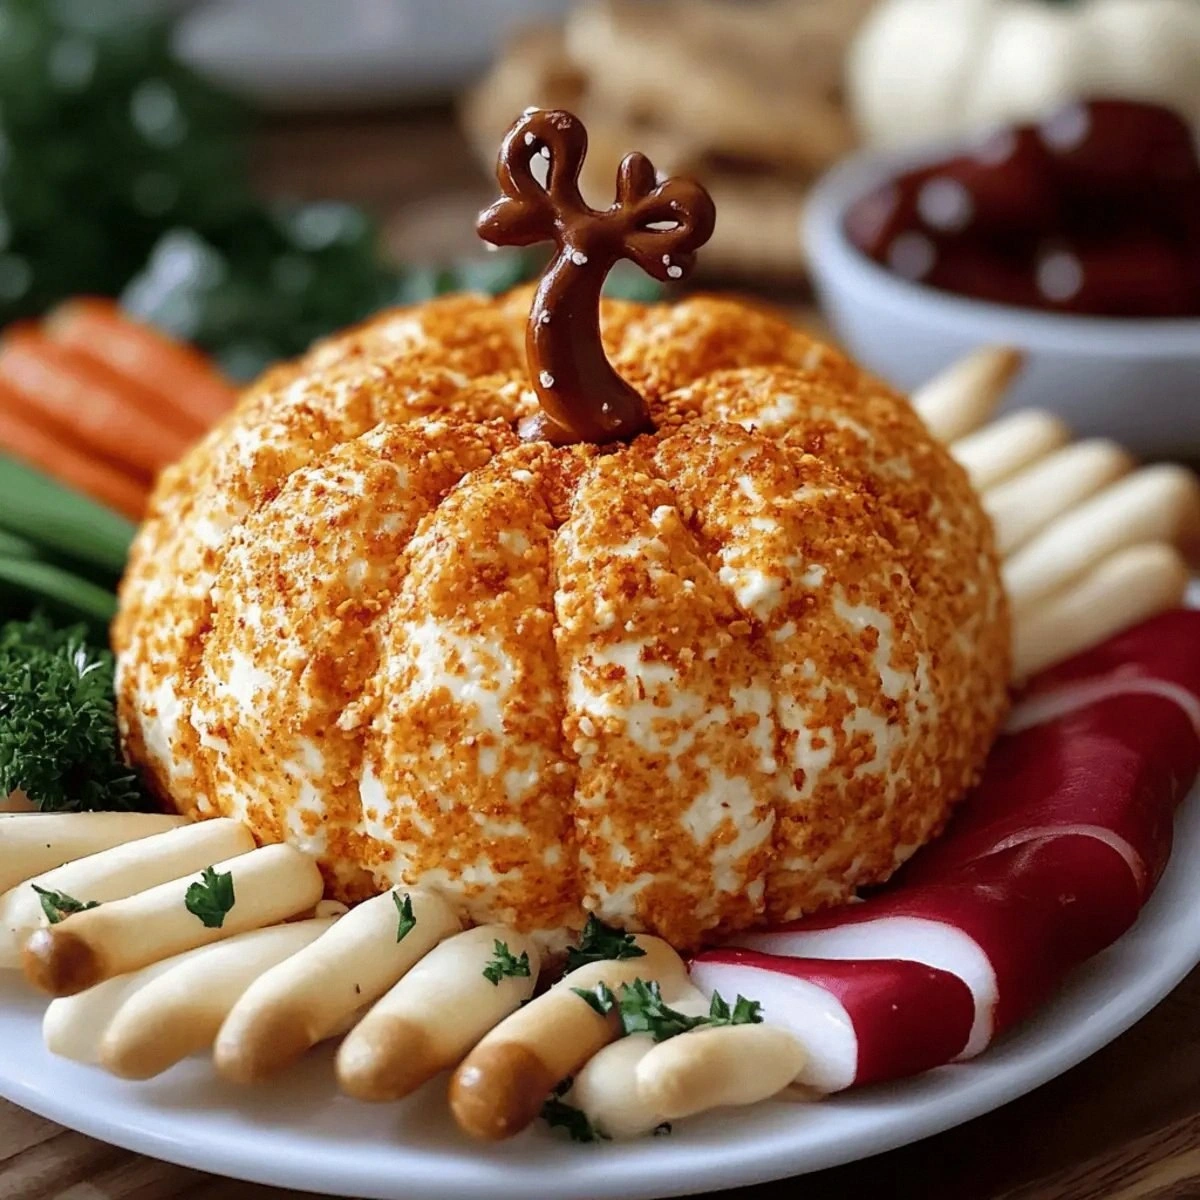
- Visual Wow‑Factor: Shaped like a perfect pumpkin, it becomes a centerpiece that steals the spotlight without any fancy plating tricks.
- Crowd Reaction: Guests often exclaim “What is this?” before they even get a taste, turning your appetizer into a conversation starter.
- Ingredient Quality: Using full‑fat cream cheese and real shredded cheddar ensures a luxurious mouthfeel that low‑fat alternatives can’t match.
- Make‑Ahead Potential: You can prep the cheese mixture a day ahead, shape it, and coat it right before serving for ultimate convenience.
- Seasonal Flexibility: While perfect for October, the technique works year‑round with different coatings, making it a versatile party trick.
Inside the Ingredient List
The Flavor Base
Cream Cheese (8 ounces): This is the backbone of the ball, providing a buttery canvas that holds everything together. If you skimp on the fat content, the texture becomes grainy, like sand in a sandbox. For the creamiest result, choose a brand that’s labeled “full‑fat” and let it sit at room temperature for 20 minutes before mixing. Swap: For a lighter version, you could use Neufchatel, but expect a slightly less decadent mouthfeel.
Shredded Cheddar Cheese (1 cup): The cheddar adds a sharp, tangy bite that cuts through the richness of the cream cheese. Opt for a sharp or extra‑sharp variety; milder cheeses make the flavor flat, like a movie without a soundtrack. If you can’t find shredded, grate a block yourself for a fresher taste and better melt. Buying tip: Look for cheese that’s aged at least 6 months for maximum flavor punch.
Garlic Powder (1 teaspoon) & Onion Powder (1 teaspoon): These dry aromatics infuse the mixture with a subtle depth that feels like a warm hug on a crisp autumn evening. Fresh garlic or onion can be used, but they introduce moisture that can make the ball too soft. A pinch of each is enough to awaken the palate without overwhelming the cheese.
The Texture Crew
Chopped Nuts (1 cup): Nuts bring a crunchy contrast that makes each bite feel like a surprise party in your mouth. I use a mix of toasted pecans and walnuts for a buttery flavor, but almonds or hazelnuts work beautifully too. If you’re allergic, substitute with roasted pumpkin seeds for a similar crunch without the nutty profile.
Pretzel Sticks (to taste): Crushed pretzel sticks add a salty, salty‑sweet snap that mimics the crispness of a pumpkin’s rind. They also help the coating adhere better, preventing the ball from sliding off the platter. For a gluten‑free version, swap with crushed rice crackers.
The Unexpected Star
Paprika (to taste): A dash of smoked paprika gives the exterior a warm, earthy hue that deepens the pumpkin illusion. It also adds a subtle smoky undertone that pairs perfectly with the cheddar. If you love heat, try a pinch of cayenne for a hidden kick.
Salt & Pepper (to taste): These basics are the silent conductors of flavor, ensuring everything sings in harmony. Taste the mixture before shaping; it should be seasoned like a well‑balanced soup—noticeable but not overpowering.
The Final Flourish
All these components work together like a well‑rehearsed orchestra, each instrument playing its part to create a symphony of taste and texture. The key is balance: too much nut and the cheese gets lost; too little spice and the flavor flatlines. Once you’ve mastered this harmony, you’ll never settle for a bland cheese ball again.
Everything's prepped? Good. Let's get into the real action...
The Method — Step by Step
Start by softening the cream cheese. Place the 8‑ounce block in a large mixing bowl and let it sit for about 15 minutes, or microwave it on low for 10 seconds if you’re in a hurry. You’ll know it’s ready when a spoon glides through it like silk, and you can feel the temperature rise in your hand—this is the first secret to a smooth ball.
While the cream cheese softens, grate the cheddar cheese if you haven’t bought it pre‑shredded. The fresh shreds melt into the mixture more evenly, creating a velvety texture. Add the shredded cheddar, garlic powder, onion powder, and a pinch of salt and pepper to the bowl. Stir with a rubber spatula until the mixture is uniform; it should look like a pale orange paste that clings to the sides of the bowl.
Once the mixture is smooth, fold in the chopped nuts and crushed pretzel sticks. This is the moment where the crunch is introduced, and you’ll feel the mixture become slightly grainier—don’t worry, that’s the texture we want. Sprinkle in the smoked paprika, give it one last stir, and taste. Adjust salt and pepper if needed; remember, the coating will add more flavor later.
Now comes the shaping. Lightly dampen your hands with cold water (or a quick spray of cooking spray) to prevent sticking. Scoop out a generous portion—about the size of a baseball—and roll it between your palms, shaping it into a perfect sphere. Then, using your thumb, press a shallow indentation on top to mimic a pumpkin’s stem cavity. This step is pure magic; the ball should feel firm yet yielding, like a ripe peach.
Prepare the coating station: spread the remaining crushed pretzel sticks, extra chopped nuts, and a drizzle of melted butter on a large plate. The butter helps the coating adhere and adds a glossy finish. Roll the shaped cheese ball in the mixture, pressing gently to ensure an even crust. The coating should cling like a second skin, giving the ball a rustic, pumpkin‑like texture.
Place the coated ball on a parchment‑lined baking sheet and refrigerate for at least 30 minutes. This chilling step solidifies the cheese, allowing the coating to set and preventing it from crumbling when sliced. While you wait, pre‑heat the oven to 350°F (175°C) in case you want to give the ball a quick warm‑up before serving—just 5 minutes in the oven will melt the interior slightly, creating a oozy surprise.
When you’re ready to serve, transfer the chilled pumpkin to a decorative platter. For an extra visual punch, drizzle a thin line of honey or maple syrup across the top, then sprinkle a few whole pretzel sticks as “stem vines.” This final flourish not only looks gorgeous but adds a sweet‑salty contrast that will have guests reaching for a second bite.
That’s it — you did it. But hold on, I’ve got a few more tricks that’ll take this to another level, like a secret glaze or a daring spice twist that will make your pumpkin ball the talk of the party for weeks to come.
Insider Tricks for Flawless Results
The Temperature Rule Nobody Follows
Never shape the cheese ball when the mixture is too warm; the fats will melt and the ball will lose its shape. I always chill the mixture for at least 15 minutes after mixing. This small pause makes the cheese firm enough to hold its shape, like clay that’s just the right stiffness for sculpting.
Why Your Nose Knows Best
Before you taste, give the mixture a whiff. If you catch a faint buttery aroma with a hint of nut, you’re on the right track. If it smells flat, add a pinch more garlic powder or a dash of smoked paprika. Your nose is the ultimate flavor detector.
The 5‑Minute Rest That Changes Everything
After coating, let the ball rest for exactly five minutes on the counter before refrigerating. This allows the butter in the coating to set, creating a glossy, crack‑resistant crust. Skipping this step is like skipping the “let it rest” part of a bread recipe—your final product will be less cohesive.
Secret Sweet‑Salty Drizzle
A quick drizzle of honey or maple syrup right before serving adds a glossy finish and a subtle sweet contrast that makes the salty cheese pop. It’s the culinary equivalent of adding a bow to a gift—unexpected but delightful.
Pre‑Slice for Party Ease
If you’re serving a crowd, pre‑slice the ball into wedges while it’s still chilled. The slices hold together like perfect pumpkin slices, making it easy for guests to grab without a mess. Just cover the platter with foil to keep the cheese from drying out.
Creative Twists and Variations
This recipe is a playground. Here are some of my favorite ways to switch things up:
Spicy Jalapeño Surprise
Finely dice two jalapeños and fold them into the cheese mixture. The heat sneaks through the creamy interior, perfect for guests who love a little kick. Top with a sprinkle of crushed red pepper for extra drama.
Herb‑Infused Garden
Swap the smoked paprika for fresh chopped rosemary and thyme. The herbaceous notes turn the cheese ball into a springtime delight, and you can garnish with a sprig of rosemary to mimic a pumpkin’s leaf.
Sweet Apple Cider Glaze
Replace the honey drizzle with a reduction of apple cider and brown sugar. The caramelized glaze adds a sweet‑tart layer that pairs beautifully with the cheddar’s sharpness.
Cheesy Bacon Bomb
Stir in crumbled cooked bacon and a dash of maple syrup into the mixture. The smoky, sweet bacon pieces create pockets of flavor that explode when you bite into them.
Vegan Velvet
Use a plant‑based cream cheese and nutritional yeast in place of cheddar. The texture stays rich, and the nutritional yeast adds a cheesy umami flavor without dairy.
Mini Pumpkin Bites
Instead of one large ball, portion the mixture into a muffin tin, shape each into a mini pumpkin, and bake for 10 minutes. These bite‑size treats are perfect for cocktail parties.
Storing and Bringing It Back to Life
Fridge Storage
Wrap the cheese ball tightly in plastic wrap or store it in an airtight container. It will keep fresh for up to 5 days. The coating may soften a bit, but a quick re‑roll in fresh nuts restores the crunch.
Freezer Friendly
For longer storage, freeze the uncoated cheese mixture in a sealed bag for up to 2 months. When you’re ready, thaw in the refrigerator overnight, shape, coat, and chill as usual.
Best Reheating Method
To revive the ball, place it on a baking sheet, add a tiny splash of water (about a teaspoon) around the base, and heat at 300°F for 5‑7 minutes. The steam re‑hydrates the interior while the coating crisps up again, delivering that fresh‑out‑of‑the‑fridge crunch.