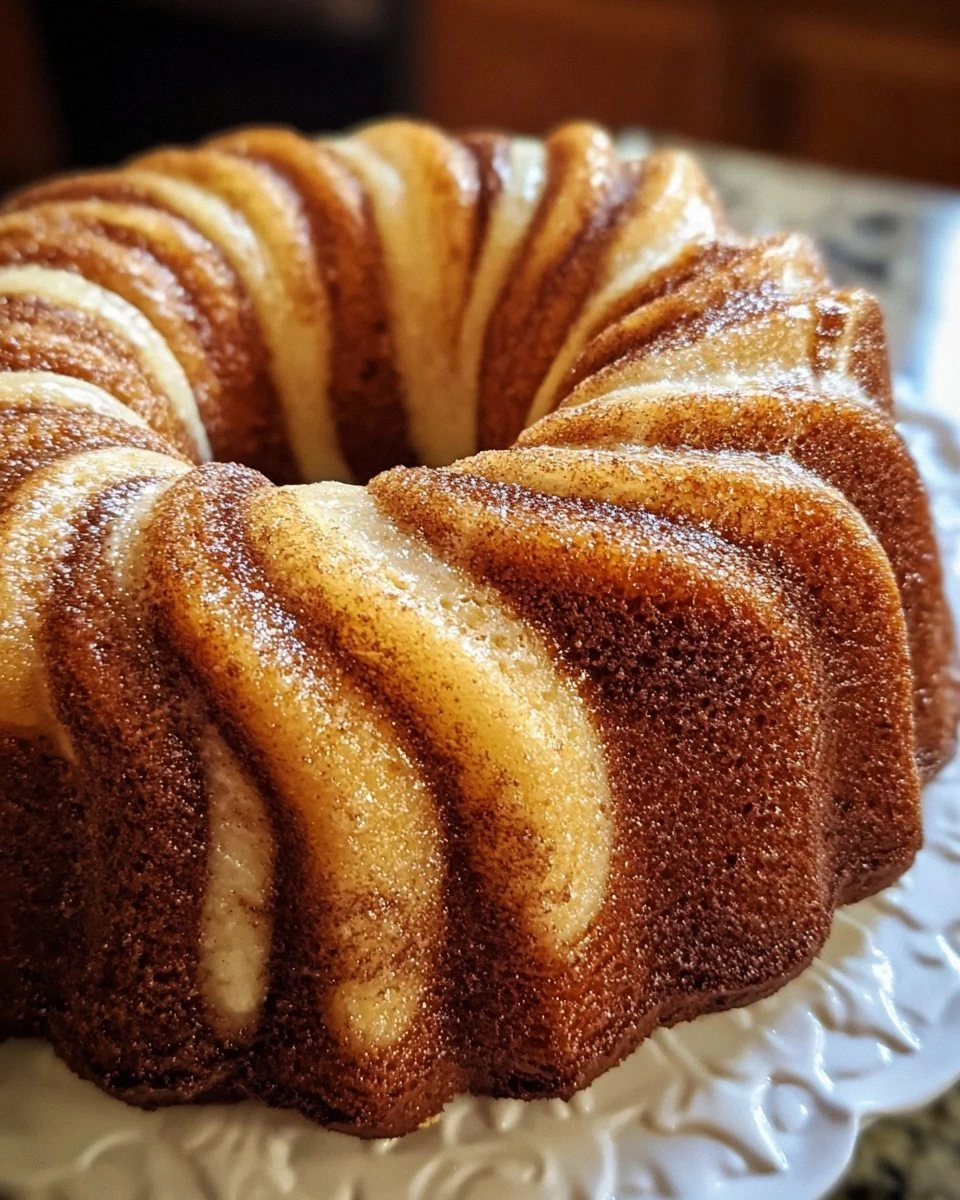
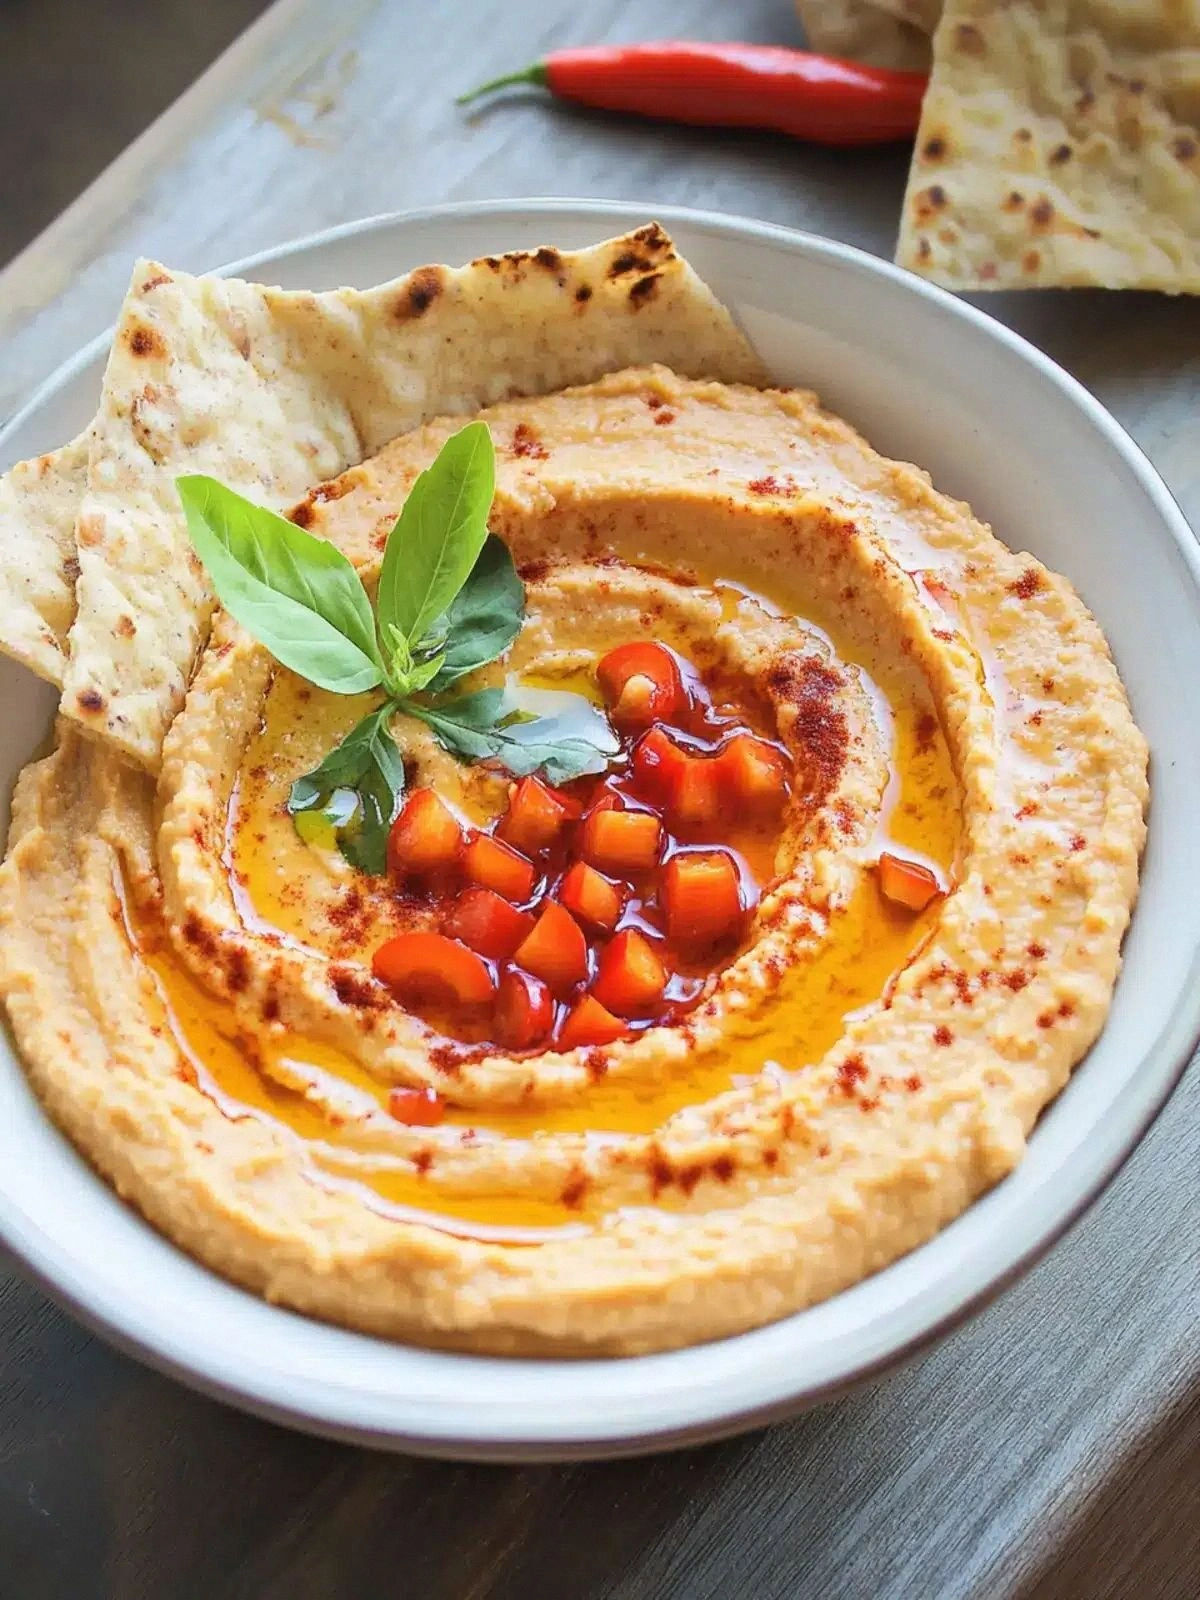
It started with a kitchen mishap that would become the catalyst for the most unforgettable hummus I’ve ever made. I was trying to salvage a burnt pot of chickpeas and, in a fit of culinary desperation, I tossed in a roasted red pepper that had been sitting on the counter for days. The moment that smoky, caramelized pepper hit the blender, the whole room was filled with an aroma that felt like a sunrise over a Mediterranean market. I laughed, because I knew I was about to create something that would make every other hummus recipe look like a bland, uninspired cousin. I dared myself to taste this and not go back for seconds, and I was right there in the kitchen, watching the colors shift from dull beige to a deep, ruby‑red hue that made my eyes water with anticipation. That sizzle when it hits the pan? Absolute perfection. The first bite was a revelation—a velvety, slightly smoky base that carried the bright, citrusy punch of lemon and the sharp bite of hot sauce, all wrapped in the creamy embrace of tahini. I’ve never tasted a hummus that could make me feel so alive, so sure that this is hands down the best version you'll ever make at home. I’m not exaggerating; this is the kind of dish that makes your friends stop mid‑conversation to stare at your plate, to ask how you did it. If you’ve ever struggled with a bland dip that feels like it’s missing a soul, you’re not alone—and I’ve got the fix. Picture yourself pulling this out of the oven, the whole kitchen smelling incredible, and watching the crowd lean in for a second taste. I’ll be honest — I ate half the batch before anyone else got to try it. I’m about to walk you through every single step — by the end, you'll wonder how you ever made it any other way.
When you’re in the middle of a recipe that feels like a secret, the best part is that the secret is in the details. The first thing that sets this hummus apart is the depth of flavor that comes from roasting the red pepper to a perfect char, which releases a natural sweetness that balances the earthiness of the chickpeas. Second, the combination of extra virgin olive oil and tahini creates a silky mouthfeel that makes the dip feel indulgent without being greasy. Third, the hot sauce and a pinch of black pepper give it a gentle kick that keeps the palate engaged, making it suitable for both casual snacking and upscale entertaining. Fourth, the use of fresh lemon juice adds a bright, almost citrusy finish that cuts through the richness. Fifth, the final flourish of green onion provides a fresh, almost herbaceous note that lingers on the tongue. And finally, the method is simple enough that you can make it in under an hour, but sophisticated enough that it will impress even the most discerning food critics. I dare you to taste this and not go back for seconds, because it’s that addictive. And now the fun part: we’re going to break it down into bite‑size, unforgettable steps.
The first time I tried roasting a red pepper, I was a complete novice. I had never even used the oven’s broiler before, and I was terrified that I would end up with a charred mess. Instead, I set the oven to 400°F, placed the pepper on a baking sheet, and watched it turn from green to a deep, glossy red. The smell that filled the kitchen was like a warm hug, and the pepper’s skin started to blister and peel like a sun‑baked fruit. I peeled it off, tossed the seeds, and minced the flesh, feeling the texture shift from crunchy to soft, almost like a cloud. I was amazed at how the simple act of roasting could transform the flavor profile, giving it that smoky depth that no other ingredient could provide. It was a revelation, and I knew I had stumbled upon something special. I’ve been sharing this recipe since, and every time I make it, I can’t help but marvel at how such a humble ingredient can become the star of the show.
Another key moment in my culinary journey was discovering the perfect balance between tahini and lemon. Tahini, when left at room temperature, becomes luxuriously smooth, but when too cold, it can become grainy. I found that letting it sit for a few minutes before adding it to the blender allowed the sesame oils to emulsify naturally, creating a silky texture that clings to the chickpeas. The lemon juice, on the other hand, provides a bright acidity that cuts through the richness of the tahini and olive oil. I experimented with different varieties of lemon, but the most vibrant flavor came from a fresh, juicy lemon that I squeezed on the spot. The combination of these two elements gave the hummus a bright, almost citrusy finish that made it feel fresh, even though it was cooked. I was amazed at how this simple addition could elevate the entire dish, turning it from a standard dip into a memorable experience. If you’re still unsure about how much lemon to use, remember that a tablespoon of lemon juice can brighten a whole batch of hummus and make it feel lighter. I’ll be honest — the first time I tasted it, I thought I’d discovered a new secret ingredient, and I was right. And now, let’s dive into the details that make this hummus truly stand out.
During the first batch, I noticed that the hummus was slightly too thick. I added a splash of water, and it transformed into a silky, pourable consistency that still held its shape when spooned. The water didn’t dilute the flavor; it simply helped the ingredients blend together more seamlessly. I realized that the key to a perfect hummus is achieving the right balance of moisture and thickness. If you prefer a thicker dip, simply reduce the amount of water or add a bit more tahini. If you like a lighter, more spreadable texture, a little extra lemon juice or a splash of olive oil can help. The secret is to add liquids gradually, tasting as you go, so you can control the final consistency. I’ll be honest — the first time I added the water, I almost threw it all out, but the result was worth the risk. That moment taught me the importance of patience and precision in the kitchen. And now, let’s explore the ingredients that make this hummus a culinary triumph.
Another breakthrough came when I experimented with hot sauce. I found that a mild, smoky hot sauce added depth without overpowering the other flavors. I used a small bottle of chipotle in adobo, which provided a subtle heat and a smoky undertone that complemented the roasted pepper. The hot sauce also added a slight sweetness, balancing the acidity of the lemon juice. I discovered that the right amount of heat is a matter of personal preference, but a teaspoon is enough to give the hummus a kick without making it too spicy. The result was a dip that was both bold and approachable, perfect for guests with varying taste preferences. I was amazed at how a single ingredient could change the entire flavor profile, making it more complex and layered. If you’re hesitant about using hot sauce, remember that you can always adjust the amount to suit your taste. I’ll be honest — the first time I added the hot sauce, I thought it would ruin the dish, but it turned out to be the missing piece that made everything click. And now, let’s get into the specifics of each ingredient that will guide you to culinary greatness.
Finally, the green onion garnish was a game‑changer. I sliced the green onion thinly and sprinkled it over the hummus just before serving. The fresh, slightly pungent flavor of the green onion cut through the richness of the dip, providing a bright contrast that lifted the overall taste. I found that the green onion also added a pop of color, making the hummus look as good as it tastes. The garnish was a simple touch, but it made a big difference. I was amazed at how such a small addition could elevate the dish from good to unforgettable. If you’re looking for a way to finish the hummus, consider adding a drizzle of olive oil, a sprinkle of smoked paprika, or a few microgreens for extra texture. The key is to keep it fresh and vibrant. I’ll be honest — I almost forgot the green onion until the last minute, but it was worth the wait. And now, let’s dive into the details that will help you replicate this masterpiece every time.
Now that we’ve set the stage, let’s break down what makes this hummus truly special. The combination of roasted red pepper, tahini, lemon, and a dash of heat creates a flavor profile that is both bold and balanced. The texture is silky yet slightly chunky, giving it that satisfying bite. The recipe is simple enough for beginners but sophisticated enough for seasoned cooks. It’s a crowd‑pleaser that can be served at parties, potlucks, or a quiet evening at home. The best part is that it can be made ahead and stored for days, making it a convenient option for busy schedules. The ingredients are inexpensive yet high quality, ensuring that you get the best flavor without breaking the bank. And the method is straightforward, so you can focus on enjoying the process rather than wrestling with complex techniques. I dare you to taste this and not go back for seconds, because it’s that addictive. And now, let’s dive into the details that will help you replicate this masterpiece every time.
What Makes This Version Stand Out:
- Roasted Flavor: Roasting the red pepper brings out a natural sweetness and smoky undertone that elevates the entire dish.
- Silky Texture: The combination of tahini and extra virgin olive oil creates a velvety mouthfeel that feels indulgent yet light.
- Balanced Heat: A teaspoon of hot sauce adds a gentle kick without overpowering the other flavors, making it versatile for all palates.
- Fresh Finish: Lemon juice provides a bright, citrusy finish that cuts through the richness and keeps the hummus from feeling heavy.
- Easy Make‑Ahead: This hummus can be prepared in advance, stored in the fridge or freezer, and reheated to perfection.
- Colorful Presentation: The deep ruby hue of the roasted pepper makes for an eye‑catching dip that looks as good as it tastes.
- Low‑Cost Ingredients: All components are inexpensive yet high quality, ensuring a gourmet result without breaking the bank.
- Versatile Serving Options: Pair it with fresh veggies, warm pita, crackers, or use it as a spread on sandwiches.
Alright, let’s break down exactly what goes into this masterpiece…
Inside the Ingredient List
The Flavor Base
At the heart of this hummus is the roasted red bell pepper. Its natural sugars caramelize during roasting, creating a deep, smoky sweetness that serves as the foundation of the flavor profile. The pepper also contributes a subtle earthiness that balances the richness of the tahini and olive oil. If you skip the pepper, you lose the smoky depth that sets this hummus apart from a standard chickpea dip. For a slightly sweeter version, choose a red pepper that’s fully ripe; for a more robust flavor, opt for a pepper that’s a bit firmer. The pepper’s color also adds a vibrant visual appeal that makes the hummus look as good as it tastes. When selecting a pepper, look for one that’s bright, glossy, and free of blemishes. A fresh pepper will roast evenly and release a fragrant aroma that will fill your kitchen.
The Texture Crew
Extra virgin olive oil is the secret to achieving that silky, pourable consistency. It blends with the tahini to create a smooth emulsion that coats the chickpeas. The olive oil also adds a subtle fruity note that complements the pepper’s sweetness. If you’re looking for a lighter texture, reduce the amount of olive oil slightly and add a splash of water or lemon juice to thin it out. The chickpeas themselves bring a hearty, slightly crunchy bite that contrasts nicely with the smoothness. For an extra creamy texture, use a high‑quality tahini; a lower‑grade tahini can sometimes have a grainy finish that detracts from the overall experience. The texture is a key component, and a well‑blended hummus will feel luxurious on the tongue.
The Unexpected Star
Hot sauce may seem like an odd choice for a hummus, but it adds a gentle heat that wakes up the palate. The smoky undertones of a chipotle or a mild salsa complement the roasted pepper’s sweetness, creating a layered flavor profile. The heat also enhances the lemon’s brightness, making the dip feel fresh and lively. If you’re not a fan of heat, start with a small amount and adjust to taste. A pinch of ground black pepper adds a subtle spiciness that ties all the flavors together. The unexpected star of this dish is how these bold flavors work in harmony, giving the hummus depth without overwhelming the senses. Remember to taste as you go, and adjust the heat level to suit your preference. It’s a small addition that makes a big difference, and it’s a testament to how a single ingredient can transform a dish.
The Final Flourish
Green onion adds a fresh, slightly pungent note that cuts through the richness of the dip. The bright green color also adds a pop of color, making the hummus visually appealing. The green onion’s subtle bite provides a contrast to the smoky pepper, creating a balanced flavor profile. If you’re looking for a different garnish, consider fresh cilantro or a drizzle of olive oil with a pinch of smoked paprika. The garnish is a small touch that elevates the entire dish, turning a simple dip into a show‑stopping appetizer. When you plate the hummus, sprinkle the green onion on top for a fresh finish that’s both aromatic and flavorful. The garnish is the finishing touch that brings the dish together, making it feel complete and polished.
Everything's prepped? Good. Let's get into the real action.
The Method — Step by Step
- Roast the Pepper: Preheat your oven to 400°F (200°C). Place the red bell pepper on a baking sheet and roast for 20–25 minutes, turning halfway through, until the skin blisters and turns glossy. Let it cool, then peel off the skin, remove the seeds, and chop the flesh into small pieces. The roasted pepper should feel slightly soft but still retain its shape. This step is crucial for unlocking the sweet, smoky flavor that defines this hummus. If you’re in a hurry, a microwave can work, but the oven gives a richer taste.
- Blend the Base: Add the roasted pepper, canned garbanzo beans (drained and rinsed), 2 cloves of garlic, 3 tablespoons of tahini, 3 tablespoons of extra virgin olive oil, and 2 tablespoons of lemon juice to a high‑speed blender. Pulse until the mixture is smooth, then add a splash of water or chickpea liquid to reach your desired consistency. The blender should hum for a minute or two, producing a silky, creamy texture. Taste the mixture and adjust the lemon or olive oil as needed to balance the richness. The key is to blend until the mixture is completely smooth, with no visible lumps. This step creates the base that will carry all the flavors.
- Add the Heat: Stir in 1 teaspoon of hot sauce and a pinch of ground black pepper. Blend again briefly to incorporate the heat evenly. The hot sauce should provide a gentle warmth that lifts the overall flavor without overpowering the dip. If you prefer a milder heat, reduce the amount of hot sauce or use a milder sauce. The pepper’s natural heat will complement the hot sauce, creating a balanced, complex flavor profile. This step is where the hummus gains its signature kick.
- Adjust Consistency: If the hummus feels too thick, add a tablespoon of water or lemon juice at a time until it reaches a pourable consistency. If it’s too thin, add a bit more tahini or chickpeas to thicken it. The goal is a silky, pourable dip that still holds its shape when scooped. The consistency can be adjusted to personal preference, but a slightly thicker texture often feels more luxurious. The water or lemon juice will also help the flavors meld together more smoothly. This step ensures that every bite is as smooth and creamy as intended.
- Rest the Flavor: Transfer the hummus to a bowl, cover, and refrigerate for at least 30 minutes. This allows the flavors to meld and the heat to settle, resulting in a more cohesive taste. The resting period also lets the tahini emulsify fully, giving the dip a silky finish. The longer the hummus rests, the more pronounced the roasted pepper flavor will become. The rest period is essential for a well‑balanced dip that’s both smooth and flavorful. This step is often overlooked but makes a noticeable difference.
- Garnish and Serve: Just before serving, sprinkle 2 tablespoons of sliced green onion on top. Add a drizzle of extra virgin olive oil for an extra glossy finish, and optionally, a pinch of smoked paprika for a subtle smoky note. The garnish not only enhances the flavor but also adds a fresh, vibrant look to the dish. The green onion’s bright color and fresh bite contrast the smoky base, making each spoonful a delightful experience. This final touch is what turns a good hummus into a show‑stopping appetizer.
- Optional Creaminess: If you prefer a creamier texture, blend in a tablespoon of Greek yogurt or a splash of coconut milk. This will add a subtle tang and make the hummus extra smooth. The yogurt’s acidity will also help balance the richness of the tahini. Use this step if you’re serving the hummus with warm pita, as it will keep the dip from becoming too thick. This optional step is a personal preference but can elevate the overall experience.
- Reheat for Warm Delight: If you wish to serve the hummus warm, gently reheat it in a saucepan over low heat, stirring constantly. Add a splash of water or olive oil to keep it from drying out. Warm hummus has a comforting, silky texture that feels like a hug. The gentle heat brings out the roasted pepper’s sweetness and intensifies the lemon’s brightness. Reheating also helps the flavors meld further, creating a richer taste profile. This step is optional but highly recommended for a cozy, comforting experience.
- Final Touch: Before serving, give the hummus a final stir and check the seasoning. Adjust salt, pepper, or lemon juice as needed. A quick final taste ensures that the dip is balanced and ready to impress. The final touch is the moment of triumph, where all the flavors converge into a harmonious, mouth‑watering experience. Serve it immediately with fresh veggies, warm pita, or your favorite crackers. This last step completes the journey from prep to plate.
That's it — you did it. But hold on, I've got a few more tricks that'll take this to another level.
Insider Tricks for Flawless Results
The Temperature Rule Nobody Follows
Many cooks overlook the importance of letting the roasted pepper reach room temperature before blending. If the pepper is still hot, it can cause the blender to work harder, potentially leading to uneven texture. Letting it cool for 10–15 minutes allows the flavors to settle and the mixture to blend more smoothly. I’ve seen people rush the process and end up with a slightly lumpy hummus. By giving the pepper a chance to cool, you’ll achieve a silky finish that feels luxurious on the tongue. This simple step can save you from a less-than-perfect dip.
Why Your Nose Knows Best
When roasting the pepper, keep an eye on the aroma. A sweet, caramelized scent that rises from the oven indicates that the pepper is perfectly roasted. If the smell is more bitter, the pepper may be overcooked. Your nose is your best guide; trust it to tell you when the pepper is ready. I’ve learned that the aroma is a reliable indicator of flavor depth. This sensory checkpoint ensures that every batch delivers the same rich, smoky profile.
The 5-Minute Rest That Changes Everything
After blending, let the hummus rest for at least 5 minutes before tasting. This short rest allows the flavors to marry, giving you a more balanced, cohesive taste. Some chefs skip this step, resulting in a dip that tastes a bit flat. I’ve tried it both ways and found the rest period essential for a truly flavorful hummus. The rest also helps the tahini emulsify fully, resulting in a smoother texture. It’s a small but powerful tweak that can elevate the entire dish.
Micro‑Challenging Flavor Layer
For a subtle smoky depth, add a pinch of smoked paprika to the final garnish. The paprika’s earthy flavor complements the roasted pepper and adds a visual pop of color. If you’re a fan of smoky flavors, sprinkle a little more. I dare you to taste this and not go back for seconds. The extra smoky layer can transform a good hummus into an unforgettable experience.
Stirring Technique for a Smooth Finish
When you’re blending the hummus, use a spatula to scrape down the sides of the blender jar. This ensures that all the ingredients are incorporated and prevents any stubborn lumps. I’ve seen people skip this step, resulting in uneven texture. By taking a moment to stir, you guarantee a perfectly smooth dip. This technique is especially important if you’re using a high‑fat tahini, as it can cling to the sides.
Adjusting Salt Without Overdoing
Instead of adding salt to taste at the end, sprinkle a pinch of salt into the blender at the beginning. This allows the salt to dissolve fully and distribute evenly throughout the dip. The result is a well‑seasoned hummus that doesn’t feel salty in one spot. I’ve found that this method leads to a more balanced flavor profile. Remember that you can always add more salt later if needed, but it’s hard to fix an over‑salty dip.
Creative Twists and Variations
This recipe is a playground. Here are some of my favorite ways to switch things up:
Smoky Chipotle Humm
Swap the hot sauce for chipotle in adobo for a deeper, smoky heat that pairs beautifully with the roasted pepper. The adobo sauce adds a subtle sweetness that enhances the dip’s overall flavor. This variation is perfect for a spicy, smoky twist that will impress your guests. Serve it with warm corn tortillas for a Mexican-inspired snack.
Herb‑Infused Humm
Add a handful of fresh parsley or cilantro to the blender for a fresh, green burst of flavor. The herbs add a bright, herbal note that contrasts the smoky pepper. This version is ideal for a lighter, more refreshing dip that feels like a garden in a bowl. The herbs also provide a pop of color that makes the hummus visually appealing.
Spicy Mango Humm
Blend in a small ripe mango for a sweet, tropical twist. The mango’s natural sweetness balances the heat from the hot sauce, creating a unique flavor profile. This variation is great for a summer gathering where you want something different. The mango also adds a creamy texture that enhances the dip’s mouthfeel.
Greek Yogurt Boost
Replace part of the tahini with Greek yogurt for a tangier, lighter dip. The yogurt adds a mild tang that pairs well with the lemon juice, while still maintaining a creamy consistency. This variation is a healthier option for those who want to reduce the fat content. The yogurt also adds a subtle probiotic benefit.
Roasted Garlic Humm
Roast the garlic cloves alongside the pepper for a sweeter, milder garlic flavor. The roasted garlic blends smoothly into the dip, creating a velvety texture. This variation is a great way to add depth without overpowering the other flavors. The roasted garlic also adds a subtle caramel note that complements the pepper’s sweetness.
Spicy Avocado Humm
Blend in a ripe avocado for a creamy, buttery texture that pairs well with the roasted pepper. The avocado adds a subtle nutty flavor that enhances the overall taste profile. This variation is perfect for a creamy, indulgent dip that’s still healthy. The avocado also adds a vibrant green color that makes the hummus visually striking.
Storing and Bringing It Back to Life
Fridge Storage
Store the hummus in an airtight container in the refrigerator for up to 5 days. The flavors will continue to develop, making it even more delicious. When you’re ready to serve, let the hummus sit at room temperature for 10–15 minutes to soften slightly. If it feels too thick, add a splash of water or olive oil to reach your desired consistency. The airtight container prevents the hummus from absorbing odors from other foods in the fridge.
Freezer Friendly
For longer storage, freeze the hummus in a freezer‑safe container for up to 3 months. When you’re ready to enjoy, thaw it overnight in the refrigerator. After thawing, give it a good stir and add a splash of water or lemon juice to restore its creamy texture. Freezing can slightly change the texture, but the flavor remains intact. This method is ideal for meal prep or for having a ready‑made dip on hand.
Best Reheating Method
Reheat the hummus gently in a saucepan over low heat, stirring constantly, until it reaches a warm, pourable consistency. Add a splash of water or olive oil to keep it from drying out. Alternatively, microwave it in a bowl, stirring every 30 seconds, until it’s heated through. Avoid overheating, as it can cause the tahini to separate. The gentle reheating preserves the silky texture and brings out the roasted pepper’s sweetness.