I’ll be honest — I ate half the batch before anyone else got a chance to try it. It all started on a rainy Tuesday when my roommate challenged me to “make something that actually crunches like a fresh‑fried chip but doesn’t require a deep‑fat bath.” I stared at the sad, soggy wings I’d rescued from the freezer, and the kitchen was filled with the low‑hum of the dishwasher and the faint smell of burnt toast from the neighbor’s apartment. I was determined to turn that disappointment into a triumph, and after a few frantic YouTube rewinds, I discovered the secret weapon: a dry rub that creates a crust so crisp it shatters like thin ice under a spoon.
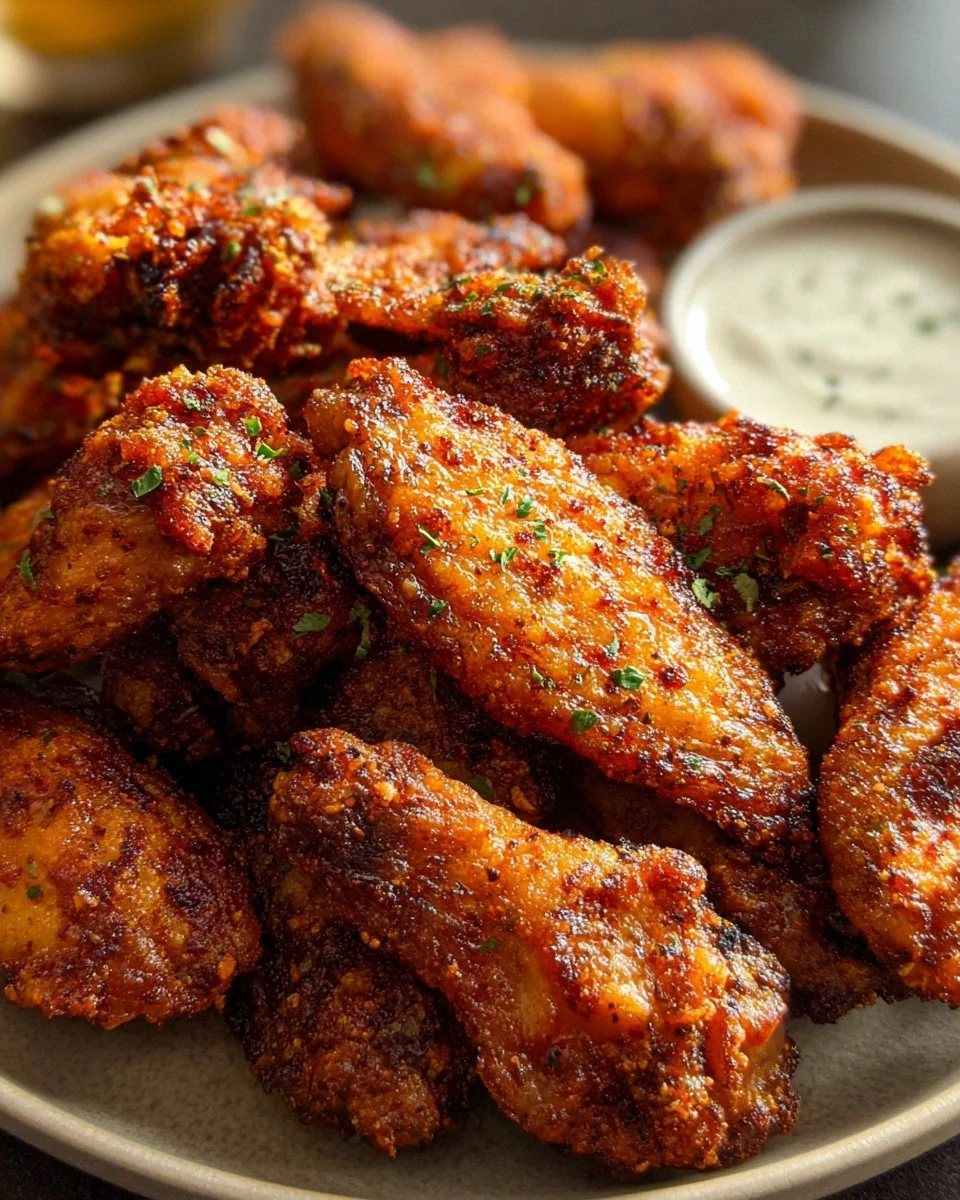
Picture yourself pulling a tray of golden‑brown wings out of the oven, the whole kitchen smelling like a backyard barbecue mixed with a hint of smoked paprika and caramelized onion. The skin crackles as you lift the wings, releasing a puff of aromatic steam that hits your nose like a warm hug. You take that first bite, and the crunch is immediate, followed by a burst of smoky, slightly sweet, and just‑right‑spicy flavor that dances across your palate. The meat stays juicy because the rub forms a protective barrier, locking in the natural juices while the exterior turns into a crunchy masterpiece. That moment, when you hear that unmistakable “crack” and taste the flavor explosion, is pure culinary bliss.
Most recipes get this completely wrong. They either drown the wings in sauce, resulting in soggy skin, or they rely on a deep‑fat fry that leaves you with greasy fingers and a guilty conscience. This version stands out because it uses a clever combination of baking powder and a balanced dry rub that creates that coveted “dry‑fried” texture without the oil bath. The technique is simple, the ingredients are pantry‑friendly, and the result is a wing that could easily win a competition at a sports bar. I dare you to taste this and not go back for seconds; the addictive crunch will have you reaching for the next piece before you even finish the first.
Let me walk you through every single step — by the end, you’ll wonder how you ever made it any other way. Okay, ready for the game‑changer? The secret isn’t a mysterious spice blend; it’s the addition of a modest amount of baking powder that raises the pH of the skin, making it crispier than any traditional oven‑baked wing you’ve ever tried. And now the fun part: we’ll dive into the why’s and how’s, sprinkle in a few hacks, and end with some creative twists that will keep you coming back for more. Stay with me here — this is worth it.
What Makes This Version Stand Out
- Texture: The baking powder creates a micro‑crust that shatters like thin ice, delivering a crunch that rivals deep‑fried wings without the oil.
- Flavor Depth: A blend of smoked paprika, garlic, and a whisper of cayenne builds layers of smoky, sweet, and spicy notes that linger long after the last bite.
- Simplicity: All ingredients are pantry staples; no need for exotic spices or special equipment beyond a sturdy baking sheet.
- Healthier Choice: By baking instead of frying, you cut the fat content in half while still achieving that irresistible crunch.
- Crowd Reaction: These wings have become the unofficial starter at my game nights, often disappearing faster than the chips.
- Ingredient Quality: Using fresh, high‑quality chicken wings and kosher salt ensures the rub adheres perfectly and seasons evenly.
- Cooking Method: The high‑heat, convection‑friendly oven creates an even, golden crust without the need to flip constantly.
- Make‑Ahead Potential: You can prep the rub and coat the wings up to 12 hours in advance, letting the flavors meld for an even better result.
Inside the Ingredient List
The Flavor Base
Smoked paprika is the heart of the flavor profile. Its deep, wood‑smoked notes give the wings that classic BBQ vibe without needing a grill. If you skip it, you’ll lose the subtle sweetness and smoky undertone that makes each bite feel like a backyard feast. A good swap is regular sweet paprika plus a pinch of liquid smoke, but the authentic smoked version is worth the extra trip to the spice aisle.
Garlic powder and onion powder work together like a dynamic duo, delivering savory depth that penetrates the meat during the bake. They’re both dehydrated, so they dissolve into the rub and cling to the skin, creating a uniform flavor coat. Missing either will make the wings taste flat; think of them as the background singers that let the lead spices shine.
The Texture Crew
Baking powder is the unsung hero here. It raises the pH of the chicken skin, breaking down proteins and allowing the surface to become extra porous. When exposed to high heat, this results in a crisp, airy crust that feels like you’ve just pulled a perfect French fry out of a fryer. If you’re allergic to aluminum‑based powders, opt for a double‑acting, aluminum‑free version for the same effect.
Kosher salt isn’t just a seasoning; it draws out moisture from the skin, helping the rub adhere and the crust form. A pinch too much can make the wings overly salty, but the right amount balances the spices and enhances the natural chicken flavor. If you’re watching sodium, you can reduce it slightly, but expect a milder crunch.
The Unexpected Star
A tiny dash of brown sugar might seem out of place on a “dry” wing, but it caramelizes during baking, adding a subtle sweetness that rounds out the heat from the cayenne. This sweet‑savory contrast is what makes the wings unforgettable. If you prefer a completely sugar‑free version, swap it for a pinch of coconut sugar or simply omit it; the crunch will remain, though the flavor will be a shade less complex.
The Final Flourish
A drizzle of olive oil before tossing the wings in the rub helps the spices stick and adds a glossy finish that makes the wings look restaurant‑ready. It also contributes a faint fruitiness that complements the smoky paprika. For a richer mouthfeel, you could use melted butter, but that adds extra saturated fat and can cause the rub to clump if not mixed well.
Everything's prepped? Good. Let’s get into the real action…
The Method — Step by Step
Start by preheating your oven to 425°F (220°C) with a convection setting if you have one. While the oven heats, line a large rimmed baking sheet with foil and place a wire rack on top; this allows air to circulate around each wing, ensuring an even crisp. The heat will be intense, so make sure the oven is fully preheated before you slide the tray in — this is the moment of truth.
Pat the chicken wings dry with paper towels, then place them on a cooling rack set over a sheet pan for 15 minutes. This extra drying step removes surface moisture that would steam the skin instead of crisping it. I dare you to skip this and see how the texture suffers; trust me, the difference is night and day.
In a large bowl, whisk together 2 tablespoons of baking powder, 1 tablespoon kosher salt, 1 teaspoon black pepper, 1 tablespoon smoked paprika, 1 teaspoon garlic powder, 1 teaspoon onion powder, ½ teaspoon cayenne pepper, 1 teaspoon dried thyme, and 1 teaspoon brown sugar. The mixture should look like a speckled sandstorm ready to coat the wings.
Drizzle 1 tablespoon of olive oil over the wings and toss to coat lightly. The oil acts like a glue, helping the dry rub cling to every crevice. Once coated, sprinkle the spice blend over the wings, tossing vigorously until each piece is uniformly covered. The rub should cling like a fine dust, not a wet paste.
Arrange the wings on the wire rack in a single layer, making sure they don’t touch. Overcrowding will trap steam and prevent the skin from crisping. If you have a second rack, feel free to use it, but keep the top rack a few inches below the heating element to avoid burning.
Slide the sheet pan into the oven and bake for 25 minutes. After 25 minutes, flip each wing using tongs and bake for another 15‑20 minutes, or until the skin is a deep golden‑brown and the edges start pulling away from the meat. You’ll hear a faint crackle as the heat intensifies — that’s the sound of flavor forming.
When the wings are done, remove them from the oven and let them rest on the rack for 5 minutes. This resting period lets the juices redistribute, ensuring each bite stays moist inside while the exterior stays crunchy. While they rest, the residual heat continues to firm up the crust — a subtle but essential step.
Finally, toss the wings with a pinch of fresh herbs (like chopped parsley or cilantro) for a pop of color and a hint of freshness. Serve immediately with your favorite dipping sauce — ranch, blue cheese, or a simple squeeze of lemon works wonders. That first bite? Pure magic.
That’s it — you did it. But hold on, I’ve got a few more tricks that’ll take this to another level. The next section reveals insider secrets that seasoned chefs use to guarantee flawless results every single time. Ready to become the wing‑master of your crew?
Insider Tricks for Flawless Results
The Temperature Rule Nobody Follows
Most home cooks bake at 375°F and wonder why the wings are limp. The secret is to crank the heat up to 425°F (or even 450°F for a short burst) to create that rapid Maillard reaction that locks in moisture while forming a crunchy crust. If you’re using a conventional oven without convection, add a pre‑heat “blast” of 10 minutes at 475°F, then lower to 425°F for the actual bake. This two‑stage approach guarantees that the skin will pop like popcorn.
Why Your Nose Knows Best
Your sense of smell is a more reliable timer than any kitchen clock. When the wings are about 20 minutes into the bake, you’ll start to smell a sweet, smoky aroma that signals the crust is forming. If the scent turns acrid, lower the temperature immediately. Trust your nose — it’s the ultimate doneness detector.
The 5‑Minute Rest That Changes Everything
After the wings emerge from the oven, let them sit for exactly five minutes before serving. This short rest allows the internal juices to settle, preventing them from spilling out the moment you bite. Skipping this step is a common rookie mistake that leads to dry meat and a soggy crust.
Flip‑Once, Not Every Two Minutes
A friend tried flipping the wings every few minutes to achieve an even color, and the result was a mushy texture that never crisped. The key is to flip only once, halfway through the cooking time. This gives each side enough uninterrupted heat to develop that coveted crunch.
Seasoning the Rack
If you line your wire rack with a light spray of non‑stick cooking spray, the wings won’t stick, and you’ll preserve every crumb of the dry rub. It also makes cleanup a breeze. I once tried a silicone mat, but it trapped steam and ruined the crispiness — stick to a lightly oiled rack.
Creative Twists and Variations
This recipe is a playground. Here are some of my favorite ways to switch things up:
Maple‑Chipotle Fusion
Swap half the smoked paprika for chipotle powder and add 1 tablespoon of pure maple syrup to the olive oil before coating. The result is a sweet‑smoky wing with a subtle caramel glaze that pairs perfectly with a cold beer. Ideal for fall evenings.
Herb‑Infused Lemon Zest
Add the zest of one lemon and a tablespoon of dried oregano to the dry rub. The citrus brightens the smoky base, while oregano adds a Mediterranean flair. Serve with a side of tzatziki for a fresh contrast.
Asian Five‑Spice Kick
Replace the thyme and paprika with 1 teaspoon of Chinese five‑spice powder and a dash of sesame oil in the oil drizzle. Finish with a sprinkle of toasted sesame seeds and a drizzle of soy‑ginger glaze after baking. This version brings an umami punch that’s perfect for game‑day munching.
Buffalo‑Style Heat
Omit the smoked paprika and increase the cayenne to 1 teaspoon. After baking, toss the wings in a mixture of melted butter and hot sauce (1:1 ratio). The classic buffalo tang meets the crispiness of the dry rub, creating a hybrid that satisfies both purists and adventurers.
Sweet‑And‑Savory Pineapple
Add 2 tablespoons of finely diced dried pineapple and a pinch of brown sugar to the rub. The pineapple caramelizes during baking, delivering tiny bursts of tropical sweetness that contrast beautifully with the heat. Great for summer barbecues.
Storing and Bringing It Back to Life
Fridge Storage
Place cooled wings in an airtight container lined with a paper towel to absorb excess moisture. They’ll stay crisp for up to 3 days, though the texture may soften slightly. Re‑crisp in a preheated 400°F oven for 5‑7 minutes before serving.
Freezer Friendly
Arrange the wings in a single layer on a baking sheet and freeze until solid (about 2 hours). Transfer them to a zip‑top bag, label, and store for up to 2 months. When ready, bake from frozen at 425°F for 25‑30 minutes, adding a splash of water to the pan to generate steam that revives the crust.
Best Reheating Method
To bring wings back to life, preheat your oven to 425°F, place the wings on a wire rack, and spray lightly with a mist of water. The water creates a brief steam burst that prevents the meat from drying while the high heat restores the crunch. In just 8‑10 minutes, you’ll have wings that taste as fresh as the day they were made.