If you've ever struggled with leftovers, you're not alone — and I've got the fix. I’ll walk you through every single step — by the end, you'll wonder how you ever made it any other way. The trick is simple: keep the turkey tender, create a sauce that’s rich yet not heavy, and use a crust that’s both quick to assemble and deliciously flaky. The result? A pot pie that feels like a warm hug, with each bite delivering a burst of comforting flavors that dance on your palate. And if you’re still skeptical, just remember the moment your fork meets the crust: it should crack with a satisfying snap, revealing steam that curls around the filling like a fragrant cloud. Ready to dive in? Let’s get started.
What Makes This Version Stand Out
- Flavor Depth: The sauce is built on a roux of butter and flour, then enriched with broth and milk, creating a velvety base that clings to every morsel. The addition of Italian seasoning gives a subtle herbal lift that elevates the dish beyond ordinary comfort food. The result is a savory, umami‑rich filling that feels like a hearty stew wrapped in pastry.
- Texture Contrast: The pie crust is buttery and flaky, while the filling is silky and slightly thick, providing a delightful mouthfeel that never feels cloying. The carrots and celery add a gentle crunch that keeps each bite interesting, and the peas bring a pop of color and a burst of sweet freshness.
- Ingredient Quality: Using leftover turkey that was cooked to perfection preserves the natural juices, preventing the filling from becoming dry. The frozen pie crusts are pre‑baked, so they’re ready to go straight into the oven, saving time and ensuring a consistent bake.
- Time Efficiency: From prep to finish, this pot pie takes less than an hour, making it ideal for a quick weekday dinner after a long day. The use of pre‑cooked turkey and frozen crusts eliminates the need for roasting or baking from scratch.
- Crowd Appeal: The dish is a crowd‑pleaser, offering familiar comfort flavors with a twist that keeps everyone satisfied. The balanced seasoning and the crisp crust make it a dish that both kids and adults will love.
- Make‑Ahead Potential: You can assemble the pie ahead of time, refrigerate it, and bake it later without compromising texture or flavor. This flexibility makes it perfect for busy families or for those who love to prep meals in advance.
- Seasonal Versatility: While it’s a nod to Thanksgiving leftovers, the recipe can be adapted to any time of year by swapping turkey for chicken or adding seasonal vegetables. The core technique remains the same, making it a versatile staple in your culinary repertoire.
Alright, let's break down exactly what goes into this masterpiece...
Inside the Ingredient List
The Flavor Base
Butter is the backbone of the sauce, providing richness and a silky texture that coats the vegetables and turkey. The 3 tablespoons of butter are melted until just golden, which brings out a nutty aroma that sets the foundation for the rest of the dish. The flour, added next, forms a roux that thickens the sauce without giving it a raw flour taste. This step is crucial; a properly cooked roux will give the pot pie its signature smooth, velvety consistency.
The Texture Crew
Carrots and celery, each half a cup, add crunch and a subtle sweetness that balances the savory turkey. The diced onion, about one medium, releases a sweet, caramelized flavor when sautéed, creating a base that feels comforting. Garlic cloves, two in number, bring a punch of aroma that permeates the filling. Together, these vegetables form the textural backbone of the pie, ensuring each bite is both hearty and flavorful.
The Unexpected Star
Frozen peas, half a cup, add a pop of color and a sweet burst that contrasts beautifully with the savory broth. The peas also contribute a subtle sweetness that lifts the overall flavor profile. Because they’re frozen, they stay firm during baking, preventing the filling from turning mushy. This small but mighty ingredient is the secret to a pot pie that feels fresh and vibrant.
The Final Flourish
The flaky sea salt is sprinkled on top just before serving, adding a finishing touch of crunch that breaks the buttery crust. The 7-ounce frozen pie crusts are pre‑baked, which means they’re ready to go straight into the oven, ensuring a crisp, golden top. The egg, beaten, is brushed on the crust to give it a beautiful shine and a slightly golden color. Finally, the Italian seasoning and a touch of kosher salt and pepper bring the entire dish together with a subtle, herby note that rounds out the flavor.
Everything's prepped? Good. Let's get into the real action...
The Method — Step by Step
Heat a large skillet over medium heat and add the 3 tablespoons of butter. Let it melt until it turns a light golden hue; this will give the sauce a nutty aroma that’s essential for depth. Once the butter is melted, add the finely diced onion, carrot, and celery. Cook, stirring frequently, until the vegetables soften and begin to caramelize, about 5 minutes. The smell should be rich and inviting, setting the stage for the rest of the dish.
Add the minced garlic to the skillet and sauté for an additional 30 seconds until fragrant. Be careful not to burn the garlic, as it will taste bitter. This short burst of garlic will infuse the entire pot pie with a warm, aromatic base that complements the turkey and broth. Stir the mixture to combine the flavors evenly.
Stir in the 1/4 cup all‑purpose flour to create a roux. Cook the flour for 1-2 minutes, stirring constantly, until it turns a light brown color, which indicates that the raw flour taste has been cooked out. This step thickens the sauce and gives it a silky consistency. The roux should feel smooth and glossy, not gritty.
Whisk in the 3/4 cup broth and 1 cup milk, ensuring a smooth blend. Bring the mixture to a gentle simmer, stirring constantly. As it simmers, it will thicken into a luscious gravy that coats the vegetables. The sauce should be thick enough to coat the back of a spoon without dripping off too quickly.
Add the 3 cups of leftover turkey, 1/2 cup peas, and 2 teaspoons Italian seasoning to the skillet. Stir until the turkey is evenly coated with the sauce and the peas are warmed through. This is the moment the filling really starts to come alive; the turkey’s natural juices mingle with the broth, creating a savory, hearty base.
Season the mixture with 1/2 teaspoon kosher salt and 1 teaspoon ground black pepper. Taste and adjust if needed; the salt should enhance the flavors without overpowering them. The pepper adds a gentle heat that balances the richness of the butter and the sweetness of the vegetables.
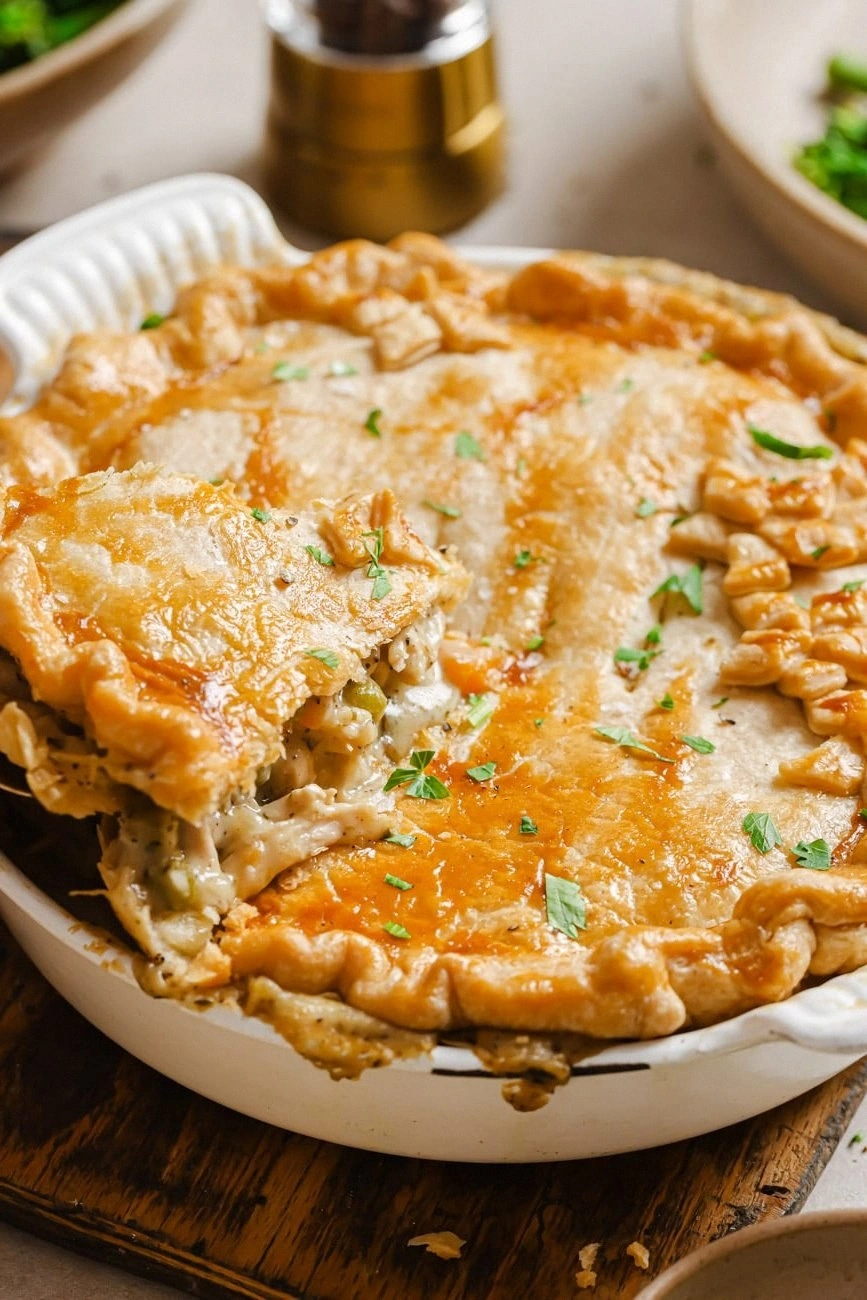
Transfer the filling into a 9-inch pie dish, spreading it evenly. Lay the first frozen pie crust over the filling, pressing down gently to seal the edges. The crust should fit snugly around the edges of the dish, preventing steam from escaping.
Cut slits in the top crust to allow steam to escape during baking. This simple step ensures the crust remains crisp and prevents it from becoming soggy. Use a pastry brush to lightly brush the crust with the beaten egg for a glossy, golden finish.
Bake in a preheated oven at 375°F (190°C) for 25-30 minutes, or until the crust is golden brown and the filling is bubbling. The aroma that fills the kitchen at this point is irresistible. Keep an eye on the crust; if it starts to brown too quickly, tent it loosely with foil.
Once baked, remove the pie from the oven and let it rest for 10 minutes. This resting period allows the filling to set, making it easier to cut clean slices. Sprinkle flaky sea salt over the top before serving to add a subtle crunch and a burst of flavor.
Serve hot, straight from the oven, and watch as the steam curls around the filling like a fragrant cloud. The first bite should feel warm, comforting, and utterly satisfying. This pot pie is the kind of dish that turns leftovers into a celebration, and you’ll want to keep making it for weeks to come.
That's it — you did it. But hold on, I've got a few more tricks that'll take this to another level...
Insider Tricks for Flawless Results
The Temperature Rule Nobody Follows
Many people bake at a high temperature, hoping for a crisp crust, but this often leads to a dry filling. Instead, bake at 375°F (190°C) and let the pie bake slowly; this allows the crust to rise evenly and the filling to develop a silky texture. I’ve tried baking at 400°F, and the result was a crust that was too dark while the filling remained runny. By sticking to 375°F, you get a balanced bake that preserves moisture and flavor.
Why Your Nose Knows Best
Your sense of smell is your best judge of doneness. When the pot pie starts to steam, the aroma of butter, garlic, and turkey will fill the kitchen. If the filling is too watery, you’ll notice a faint, almost sour scent from the broth. The moment you smell the sweet, caramelized onion notes, you know the pie is ready.
The 5-Minute Rest That Changes Everything
Letting the pie rest for 10 minutes after baking is essential. During this time, the filling continues to thicken, making it easier to slice. If you cut straight away, you’ll get a mess of sauce that spills everywhere. The rest period also allows the crust to set, giving a clean edge that’s a delight to cut.
Using Frozen Pie Crusts for a Quick Fix
Frozen pie crusts are a game‑changer for busy weeknights. They’re pre‑baked, so you don’t need to worry about undercooking or overcooking the crust. Just lay them on the filling, seal the edges, and bake. If you’re worried about the crust being too soggy, brush it with beaten egg and bake until golden.
The Secret of a Golden Crust
Brushing the crust with beaten egg before baking gives it a beautiful shine and helps it brown evenly. If you’re vegan or prefer a lighter crust, you can use a splash of milk or a vegan egg substitute. The key is to ensure the crust is coated lightly; too much liquid will cause it to become soggy.
Creative Twists and Variations
This recipe is a playground. Here are some of my favorite ways to switch things up:
Turkey & Cranberry Swirl
Stir in a handful of cranberry sauce with the peas for a sweet‑savory twist. The cranberry adds a tartness that cuts through the richness of the turkey. It’s a nod to the classic Thanksgiving flavor profile while keeping the pot pie comforting.
Chicken & Mushroom Medley
Swap the turkey for shredded chicken and add sliced mushrooms. The earthy flavor of mushrooms complements the chicken, creating a dish that feels both hearty and refined. The mushrooms also add a subtle umami depth that enhances the broth.
Vegetarian Delight
Replace the turkey with a mixture of roasted butternut squash and chickpeas. Add a splash of vegetable broth and a pinch of smoked paprika for depth. This version keeps the comforting texture while offering a plant‑based twist.
Spicy Southwest Pot Pie
Add a teaspoon of chipotle powder and diced jalapeños for heat. The smoky spice pairs wonderfully with the creamy sauce. Finish with a sprinkle of cilantro for a fresh finish.
Cheesy Pumpkin Pot Pie
Incorporate half a cup of pumpkin puree and a tablespoon of cream cheese into the sauce. The pumpkin adds a subtle sweetness and a velvety texture. The cream cheese brings a creamy richness that elevates the filling.
Herb‑Infused Crust
Mix fresh rosemary and thyme into the crust dough before sealing the edges. The herbs will release their aroma during baking, adding a fragrant layer of flavor. This twist transforms the crust into a fragrant, herbaceous base.
Storing and Bringing It Back to Life
Fridge Storage
Let the pot pie cool completely, then cover tightly with plastic wrap or aluminum foil. Store it in the refrigerator for up to 3 days. When you’re ready to eat, reheat in the oven at 350°F (175°C) for 15-20 minutes until heated through. The crust may soften slightly, but the filling will remain silky.
Freezer Friendly
Wrap the cooled pie tightly in foil, then place it in a freezer‑safe container or freezer bag. It will keep for up to 2 months. To thaw, leave it in the refrigerator overnight. When reheating, bake at 350°F (175°C) for 25-30 minutes, or until the crust is crisp and the filling is hot.
Best Reheating Method
The best way to bring the pot pie back to life is to reheat it in the oven, which preserves the crisp crust and creamy filling. Add a splash of water to the bottom of the dish to keep the filling from drying out. Cover with foil for the first 10 minutes, then remove the foil to allow the crust to brown.