I'll confess something right up front: I used to think veggie patties were sad, flavorless hockey pucks that health nuts pretended to enjoy while secretly wishing for a cheeseburger. That changed one rainy Tuesday when my best friend dared me to create a quinoa patty that didn't suck. Challenge accepted, buddy. I spent the next three weeks in quinoa-patty purgatory, testing twenty-three variations until my neighbors started avoiding me at the mailbox. But then something magical happened in my tiny kitchen at 2:37 AM — the perfect combination of crispy edges, tender centers, and a flavor bomb that made my taste buds do a happy dance. The aroma of toasted quinoa, caramelized vegetables, and warm spices filled the air like a cozy blanket, and I knew I'd finally cracked the code. These aren't your typical health-food-store patties that fall apart at the slightest provocation or taste like cardboard's sad cousin. No, these beauties have the audacity to be both genuinely nutritious and ridiculously addictive. The secret lies in the texture play — that satisfying crunch giving way to a soft, almost creamy interior packed with vegetables that actually taste like themselves instead of some mysterious mush. I dare you to taste these and not immediately go back for seconds, maybe thirds, possibly hiding the rest from your family members who will undoubtedly try to steal them. Picture yourself pulling these golden discs from the pan, the sizzle as they hit the oil, the way your kitchen transforms into the best vegetarian restaurant in town. Let me walk you through every single step — by the end, you'll wonder how you ever made it any other way.
Here's what separates these quinoa veggie patties from every other recipe floating around the internet: they don't fall apart when you flip them, they don't require a culinary degree to execute, and they don't taste like punishment for ordering the healthy option. Most recipes get the binding completely wrong, leaving you with a crumbly mess that ends up as expensive bird food scattered across your stovetop. Others rely on so much breading that you might as well call them bread patties with a side of vegetables. This version strikes the perfect balance — enough binding to hold everything together without turning into a doorstop, plenty of vegetables to keep things interesting, and a spice blend that makes people ask for your secret ingredient list. The texture is where these really shine, with crispy edges that shatter like thin ice under your fork, revealing a tender interior packed with colorful vegetables and nutty quinoa. The flavor profile hits all the notes: savory from the soy sauce and garlic, warm from the cumin and paprika, fresh from the vegetables, and satisfying from the protein-packed quinoa and chickpeas. Plus, they freeze beautifully, making them the ultimate meal-prep hero for busy weeks when you need something healthy but don't want to resort to yet another sad desk salad.
The real game-changer happened when I discovered the importance of properly preparing each component — squeezing every last drop of water from the zucchini so the patties don't steam instead of crisp, toasting the quinoa for that nutty depth, and using just enough binding to hold everything together without turning them into dense bricks. Most recipes rush through these crucial steps, but taking those extra few minutes transforms good patties into legendary ones that will have even devoted carnivores asking for the recipe. The seasoning blend evolved over countless iterations, each spice chosen for its ability to enhance rather than mask the natural flavors of the vegetables. The result is a patty that's confident in its vegetable identity, not trying to pretend it's a beef burger but celebrating its plant-based goodness with every bite. These aren't just for vegetarians — they're for anyone who appreciates food that happens to be both healthy and incredibly delicious.
What started as a dare has become my most-requested recipe, the one friends text me about at midnight because they're craving something satisfying but don't want to derail their healthy eating streak. They're perfect for meal prep, quick weeknight dinners, party appetizers, or those days when you want comfort food without the food coma. Kids love them dipped in ketchup, adults appreciate their sophisticated flavor profile, and everyone enjoys that satisfying crunch followed by the soft, flavorful interior. The best part? They're completely customizable based on what vegetables you have lurking in your crisper drawer, making them the ultimate clean-out-the-fridge recipe that somehow always tastes intentional and delicious. Stay with me here — this is worth it.
What Makes This Version Stand Out
Crunch Factor: These patties achieve the impossible — they're crispy on the outside without being greasy, thanks to a light coating of oil and the right pan temperature. The quinoa itself provides tiny pops of texture, while the vegetables maintain just enough bite to keep things interesting. The edges caramelize beautifully, creating those addictive crispy bits that make it impossible to eat just one.
No-Fail Binding: While other recipes leave you with a frustrating crumbly mess, this version uses the perfect ratio of egg (or flax egg), breadcrumbs, and mashed chickpeas to create patties that hold together beautifully. They flip without falling apart, transport without crumbling, and maintain their shape even when reheated. The binding agents enhance rather than dull the flavors, acting as supporting actors rather than stealing the show.
Flavor Explosion: Most veggie patties taste like someone waved a spice bottle over them from across the room. Not these bad boys. Every component is seasoned, from the toasted quinoa to the sautéed vegetables, building layers of flavor that complement rather than compete. The soy sauce adds umami depth, the spices provide warmth and complexity, and the fresh vegetables keep everything bright and lively.
Texture Paradise: The contrast between the crispy exterior and tender interior will make your mouth do a happy dance. The vegetables provide varied textures — soft carrots, slight crunch from bell peppers, creamy chickpeas, and those delightful quinoa pearls that pop between your teeth. It's like a party in your mouth where everyone's invited and they all get along famously.
Make-Ahead Marvel: These patties are meal-prep champions, holding up beautifully in both the fridge and freezer. They reheat like a dream, maintaining their texture and flavor even days later. Make a double batch on Sunday, and you'll have delicious, healthy meals ready faster than you can say "takeout."
Veggie-Packed Goodness: Each patty is loaded with a rainbow of vegetables, making them as nutritious as they are delicious. They're an easy way to sneak more vegetables into picky eaters' diets without any complaints. The variety ensures you're getting a broad spectrum of vitamins and minerals, making these patties a nutritional powerhouse disguised as comfort food.
Pantry-Friendly: All ingredients are readily available at any grocery store, with plenty of substitution options if you're missing something. No specialty health food store trips required, no expensive superfoods that you'll use once and then forget in your cupboard. Just good, honest ingredients that work together beautifully.
Crowd-Pleasing Versatility: Serve them as appetizers with dipping sauce, stuff them into buns for burgers, crumble them over salads, or eat them straight from the pan standing at your kitchen counter (no judgment). They work for breakfast with eggs, lunch with a side salad, or dinner with roasted vegetables. Everyone from toddlers to grandparents finds something to love about these adaptable patties.
Inside the Ingredient List
The Flavor Base
Quinoa forms the hearty foundation of these patties, providing protein and that satisfying texture that makes them feel substantial rather than like a side dish masquerading as a main. When properly toasted before cooking, it develops a nutty depth that forms the backbone of the entire flavor profile. The key is cooking it until the grains separate into individual pearls rather than turning into mush — nobody wants a quinoa paste patty. If quinoa isn't your thing, bulgur wheat makes an excellent substitute with a slightly chewier texture and nuttier flavor that plays beautifully with the vegetables. The ratio matters here: too much quinoa and your patties become dense and heavy, too little and they fall apart like a house of cards in a windstorm.
The Texture Crew
Vegetables bring both flavor and varied textures to the party, each one chosen for its specific contribution to the final product. Zucchini adds moisture and a subtle sweetness, but the crucial step is squeezing out every last drop of water — I mean really going to town on it with a clean kitchen towel until you think you've squeezed enough, then squeezing more. This prevents soggy patties that steam instead of crisp, turning that beautiful golden color we're after. Carrots provide natural sweetness and vibrant color, while their slight crunch even after cooking keeps the texture interesting. Bell peppers add fresh crunch and a pop of color that makes these patties as beautiful as they are delicious. The combination creates a medley of textures that keeps each bite exciting rather than monotonous.
The Binding Agents
Chickpeas aren't just here for their protein — when lightly mashed, they create a creamy binding element that holds everything together without making the patties heavy. Don't go overboard with the mashing; you want some texture remaining, not hummus. The egg (or flax egg for vegan friends) provides the glue that keeps everything cohesive, while breadcrumbs absorb excess moisture and add structure. If you're gluten-free, almond flour or crushed rice crackers work beautifully, adding their own subtle flavors to the mix. The ratio of binding agents to vegetables is crucial — too much and you get dense, heavy patties that sit in your stomach like rocks, too little and they disintegrate at the first touch of a spatula.
The Flavor Amplifiers
Soy sauce might seem out of place here, but it's the umami bomb that makes these patties taste more complex than their ingredients suggest. It seasons every component without being obviously salty, creating depth that makes people ask for your secret ingredient. The spice blend — garlic powder, onion powder, cumin, and paprika — was carefully calibrated over multiple tests to enhance rather than mask the vegetable flavors. Each spice plays a specific role: garlic and onion for savory depth, cumin for warmth and earthiness, paprika for subtle sweetness and beautiful color. Fresh garlic and onion can work, but the powdered versions distribute more evenly and don't add excess moisture that could compromise the texture.
Everything's prepped? Good. Let's get into the real action...
The Method — Step by Step
- Start by cooking your quinoa if you haven't already — combine 1/2 cup dry quinoa with 1 cup water in a small saucepan, bring to a boil, then reduce to a simmer, cover, and cook for 15 minutes until the water is absorbed and the grains are tender. While it's still warm, fluff it with a fork and let it cool completely — warm quinoa will cook the egg prematurely and create a scrambled mess instead of a beautiful binder. Spread it on a plate to speed up the cooling process, stirring occasionally to release steam and prevent clumping. The quinoa should be separate grains, not mushy — think of it like tiny pasta that should maintain its integrity. Once cool, you'll have about 1 cup of perfectly cooked quinoa ready to anchor your patties with its nutty goodness.
- While the quinoa cools, tackle the vegetables with purpose — wash and grate your zucchini, then grab a clean kitchen towel and squeeze like your life depends on it. I mean really go to town, twisting the towel until no more water drips out. You'll be amazed how much liquid comes out of what seemed like a dry vegetable — it's like a magic trick but less fun because your forearms will be burning. Grate the carrots using the large holes of your box grater for texture that holds up during cooking rather than disappearing into mush. Dice the bell pepper into small, even pieces — about 1/4 inch — so they distribute evenly and cook through without remaining crunchy. Finely slice the green onions, using both white and green parts for maximum flavor and visual appeal.
- Drain and rinse your chickpeas, then give them a light mash in a medium bowl using a fork or potato masher. You want about half of them broken down into a chunky paste, with the rest maintaining some texture for interest. Think of it like making a very rustic hummus with personality — some smooth, some chunky, all delicious. The mashed portion will act as glue, while the whole chickpeas provide pops of texture that make each bite interesting rather than uniform. Season them lightly with salt and pepper at this stage to build flavor from the ground up rather than trying to fix everything at the end.
- In a large bowl, combine all your prepared ingredients — the cooled quinoa, squeezed-dry zucchini, grated carrots, diced bell pepper, green onions, and mashed chickpeas. Add the breadcrumbs, egg (or flax egg), soy sauce, and all the seasonings. Now comes the fun part: get your hands in there and mix everything together like you're making meatballs for someone you love. Squish and squeeze until everything is evenly distributed, but don't overmix — you want it combined, not paste-like. The mixture should hold together when squeezed but not be so wet that it oozes through your fingers. If it seems too wet, add more breadcrumbs a tablespoon at a time; if too dry, a splash of water or an extra teaspoon of soy sauce will bring it together.
- Shape the mixture into 8-10 patties, depending on how large you like them. I use a 1/3 cup measure for consistent sizing, pressing the mixture firmly into the cup, then turning it out and flattening slightly into a disc about 3/4 inch thick. They should be sturdy enough to hold their shape but not so dense that they become hockey pucks. Place them on a plate or baking sheet lined with parchment paper — this prevents sticking and makes cleanup easier. If you have time, let them rest for 10 minutes to firm up, which helps prevent breaking during cooking.
- Heat the olive oil in a large skillet over medium heat — you want it hot enough that a bit of the mixture sizzles immediately when added, but not so hot that the oil smokes and burns. Swirl to coat the pan evenly, creating a thin film that will help achieve that gorgeous golden crust we're after. Working in batches to avoid overcrowding (which steams rather than fries), carefully place 4-5 patties in the pan. Don't move them for the first 3-4 minutes — this allows a proper crust to form, which not only adds flavor but also prevents sticking. You'll know they're ready to flip when the edges start looking golden and the patties release easily from the pan.
- Cook the patties for 4-5 minutes per side, adjusting the heat as needed to maintain steady browning without burning. The first side usually takes slightly longer — resist the urge to peek too early or you'll leave half your patty stuck to the pan. When flipping, use a thin, flexible spatula and commit to the motion — hesitate and you'll break them apart. The second side cooks faster since the patty is already heated through, so watch closely during the final minutes. You're looking for deep golden-brown color with darker edges that provide that satisfying crunch when you bite into them.
- Transfer cooked patties to a wire rack set over a baking sheet — this prevents the bottoms from getting soggy while you finish the remaining batch. Keep them warm in a low oven if needed, but they're best served within 30 minutes of cooking when that crunch factor is at its peak. If you're making a large batch for a party, you can keep them warm for up to an hour without significant quality loss, but honestly, they're usually gone long before then. The kitchen should smell incredible at this point — toasty quinoa, caramelized vegetables, and warm spices creating an aroma that makes it impossible not to sample one straight from the rack.
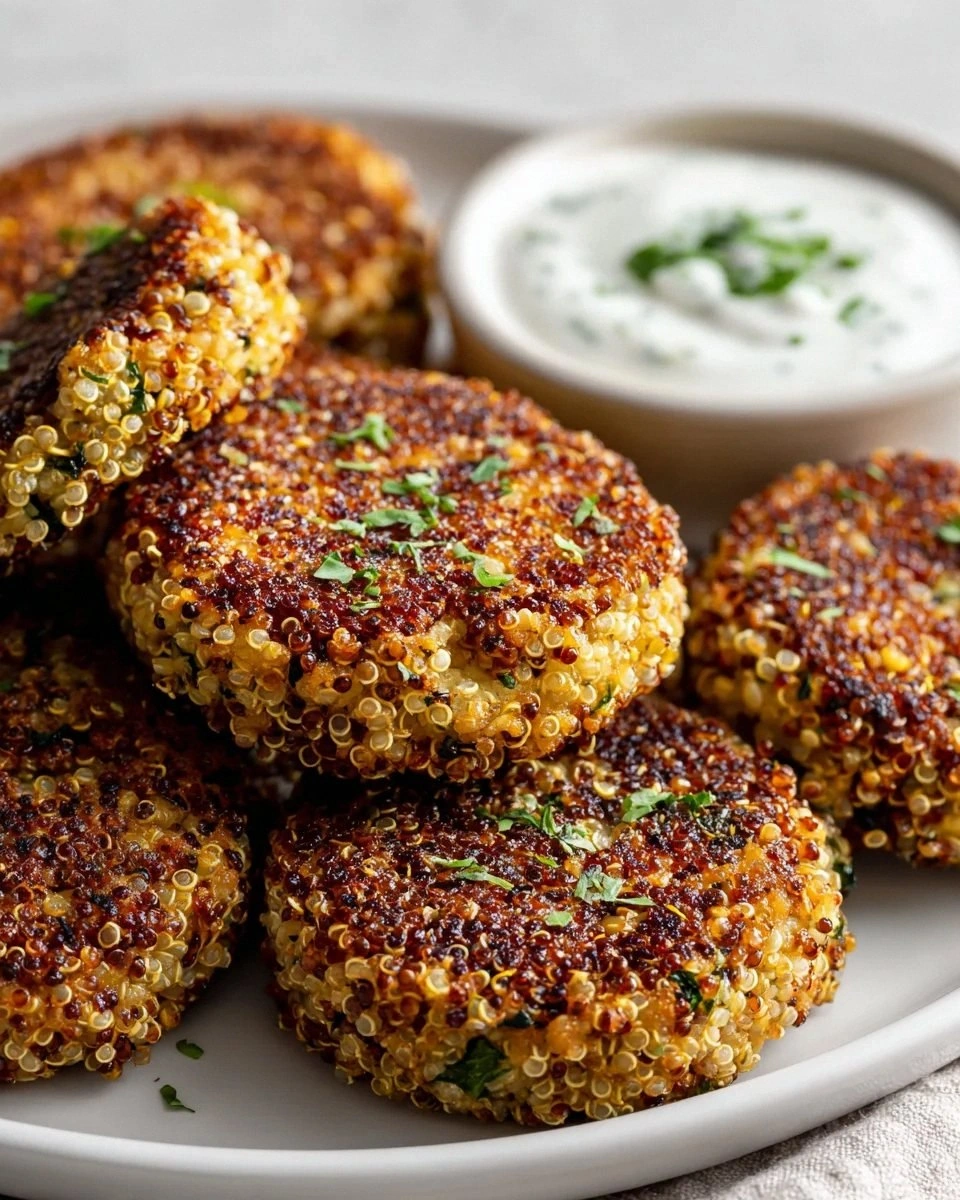
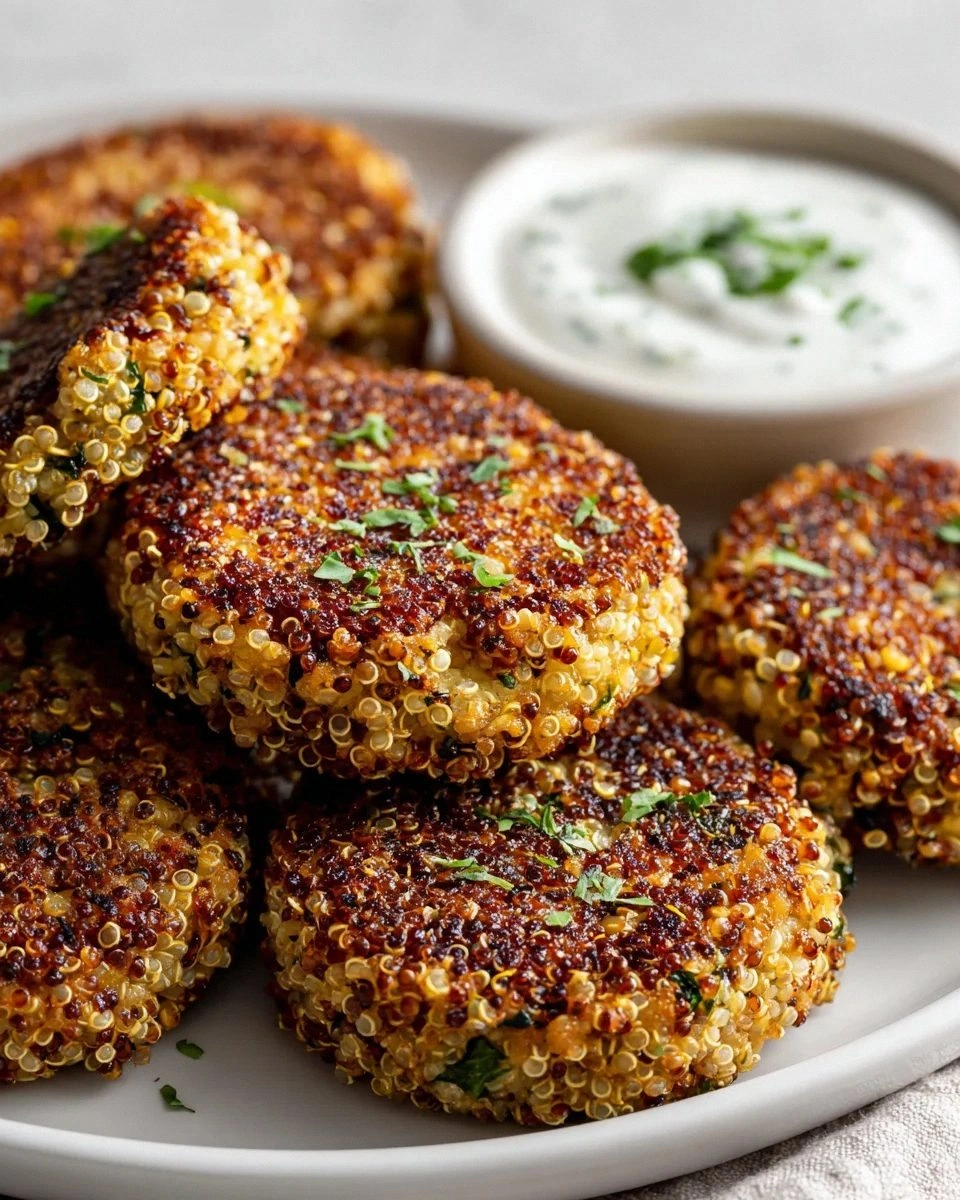
- Serve these beauties hot, warm, or even at room temperature — they're incredibly versatile and hold up well. I love them with a dollop of Greek yogurt mixed with lemon and herbs, or tucked into pita with hummus and crunchy vegetables. They're fantastic on top of salad greens with tahini dressing, or simply on their own with a squeeze of lemon. The crispy edges give way to a tender, flavorful interior packed with vegetables that actually taste like themselves rather than some mysterious mush. That first bite — the crunch, the burst of flavors, the satisfaction of knowing you're eating something genuinely good for you — is pure magic.
That's it — you did it. But hold on, I've got a few more tricks that'll take this to another level...
Insider Tricks for Flawless Results
The Temperature Rule Nobody Follows
Here's the thing that separates amateur patty makers from the pros: temperature control throughout the entire process. Start with cold quinoa — hot quinoa will partially cook the egg, creating scrambled egg bits instead of a smooth binder. Your vegetables should be room temperature, not straight from the fridge, so they incorporate evenly. When cooking, the oil should shimmer but not smoke — if it's too cool, the patties absorb oil and become greasy; too hot and the outside burns before the inside heats through. Test by dropping a tiny bit of the mixture in — it should sizzle immediately but not violently. A friend tried rushing this step once and ended up with patties that were burnt outside and cold inside — let's just say it didn't end well for anyone involved.
Why Your Nose Knows Best
Trust your senses throughout this process — they know more than any timer. When toasting quinoa, it's done when you smell a nutty aroma that makes you want to eat it straight from the pan. While cooking patties, the sound should be a gentle sizzle, not angry popping, indicating the proper oil temperature. The smell should be toasty and savory, not sharp or burnt. When they're perfectly done, the edges will be deeply golden and the kitchen will smell like you want to bottle the aroma. I once had a batch that looked perfect but smelled flat — turns out I'd forgotten the garlic powder. Your nose caught what your eyes missed, saving you from bland disappointment.
The 5-Minute Rest That Changes Everything
After shaping your patties, let them rest for five minutes before cooking — this isn't just busy work, it's crucial for success. The breadcrumbs absorb moisture, the egg sets slightly, and everything firms up so they hold together better during cooking. It's like letting a steak come to room temperature before searing — a small step that makes a huge difference. During this time, heat your pan properly so it's ready when you are. Those five minutes also give you a chance to clean up your workspace, because nobody wants to face a disaster zone after enjoying their delicious patties. Plus, anticipation makes everything taste better — you've waited this long, what's another five minutes for perfection?
The Flip Technique That Prevents Disasters
Here's where most people go wrong — they try to flip too early, breaking their beautiful patties apart in a moment of impatience. The key is waiting until the underside is properly golden and the patty releases easily from the pan. Test by sliding your spatula under gently — if it resists, give it another minute. When ready, slide the spatula all the way under with confidence, supporting the entire patty, then flip in one smooth motion. Hesitation or partial flipping leads to breakage and heartbreak. If you're nervous, practice with one patty first to get the feel for when it's ready. Remember: the pan is hot, the oil is doing its job, and your patty wants to be flipped — you just need to trust the process.
Creative Twists and Variations
This recipe is a playground. Here are some of my favorite ways to switch things up:
Mediterranean Magic
Swap the cumin for oregano and add crumbled feta, chopped olives, and sun-dried tomatoes. The saltiness of the feta and olives means you can reduce the soy sauce slightly. These pair beautifully with tzatziki for dipping and transport you straight to a Greek island, even if you're eating them at your desk on a Tuesday. The key is using good quality olives — those rubbery canned ones have no place here. Add a pinch of lemon zest to brighten everything up and make the Mediterranean flavors sing.
Spicy Southwest
Add a minced chipotle pepper in adobo sauce, swap the paprika for smoked chipotle powder, and throw in some corn kernels and black beans. The smoky heat builds slowly, making these dangerously addictive. Serve with avocado crema to cool things down, or embrace the heat and serve with extra hot sauce for those who like to live dangerously. Cilantro haters can use parsley, but honestly, the cilantro really makes these taste like you're eating at the best food truck in Austin.
Asian-Inspired Umami
Replace the soy sauce with tamari and add grated ginger, sesame oil, and chopped water chestnuts for crunch. These have an almost meaty umami quality that satisfies even hardcore carnivores. Serve with a quick sauce of mayo, sriracha, and lime juice — it's like the best parts of a banh mi in patty form. The water chestnuts are non-negotiable here; they provide that surprising crunch that makes people ask what your secret ingredient is.
Thanksgiving Anytime
Add dried cranberries, chopped pecans, sage, and thyme for a patty that tastes like the best parts of Thanksgiving stuffing. These are incredible with cranberry sauce or gravy, making them perfect for when you want those comfort food flavors without the food coma. The pecans toast as the patties cook, adding incredible depth and making your kitchen smell like the holidays. They're particularly good cold the next day, sliced onto salads for a lunch that makes coworkers jealous.
Green Goddess
Pack in chopped spinach, kale, and fresh herbs like parsley, dill, and chives. These turn a vibrant green and taste like springtime in patty form. Kids who won't touch green vegetables devour these, especially when served with ranch dressing for dipping. The key is chopping the greens finely so they distribute evenly and don't create tough, stringy bits. Add extra breadcrumbs if the mixture seems too wet from all the vegetables.
Breakfast of Champions
Add crumbled breakfast sausage (or vegetarian sausage), cheddar cheese, and a pinch of maple syrup. These are incredible topped with a fried egg and make the ultimate breakfast sandwich on an English muffin. The slight sweetness from the maple plays beautifully with the savory elements, creating that perfect breakfast balance. They're substantial enough to fuel you through a busy morning without weighing you down like traditional breakfast meats.
Storing and Bringing It Back to Life
Fridge Storage
Cooked patties keep beautifully in the refrigerator for up to 5 days — longer than most leftovers, making them perfect for meal prep. Store them in an airtight container with parchment paper between layers to prevent sticking. Don't stack them while warm or you'll create condensation that ruins the crispy exterior. For best results, let them cool completely before refrigerating, though I'll admit I've never waited that long when I know there are delicious patties calling my name. They actually improve in flavor after a day as the spices meld and deepen.
Freezer Friendly
These patties are freezer superstars, maintaining their texture and flavor for up to 3 months. Freeze them in a single layer on a baking sheet first, then transfer to freezer bags once solid — this prevents them from freezing into one giant patty block that requires an ice pick to separate. Label with the date because while they're still safe after 3 months, the quality starts to decline. For ultimate convenience, freeze them with small squares of parchment paper between each patty so you can grab exactly how many you need without defrosting the whole batch.
Best Reheating Method
The oven is your friend for reheating — 350°F for 10-12 minutes restores them to near-fresh glory, especially if you place them on a wire rack so hot air circulates underneath. The microwave works in a pinch but sacrifices the crispy exterior, turning them soft and sad. If you must microwave, do it for just 30-45 seconds to warm through, then finish in a hot dry pan for 1-2 minutes per side to revive the crunch. For frozen patties, defrost overnight in the fridge or use the microwave's defrost setting, then reheat in the oven. Add a tiny splash of water before reheating — it creates steam that helps them heat through without drying out, bringing them back to life like veggie patty zombies, but in a good way.