I’ll never forget the night I tried to make a classic campfire s’mores in my tiny apartment kitchen. The marshmallows turned into a sticky mess, the chocolate melted into a greasy puddle, and the graham crackers? They were soggy as a Sunday morning newspaper. I stared at the disaster and thought, “There has to be a better way.” That moment sparked a culinary quest that led me to the ultimate handheld version of this beloved treat—one that fits perfectly in your palm, bakes to a golden perfection, and never leaves a crumb‑laden kitchen floor. I dared myself to create something that would make even the most die‑hard s’mores purist say, “I’m sold.”
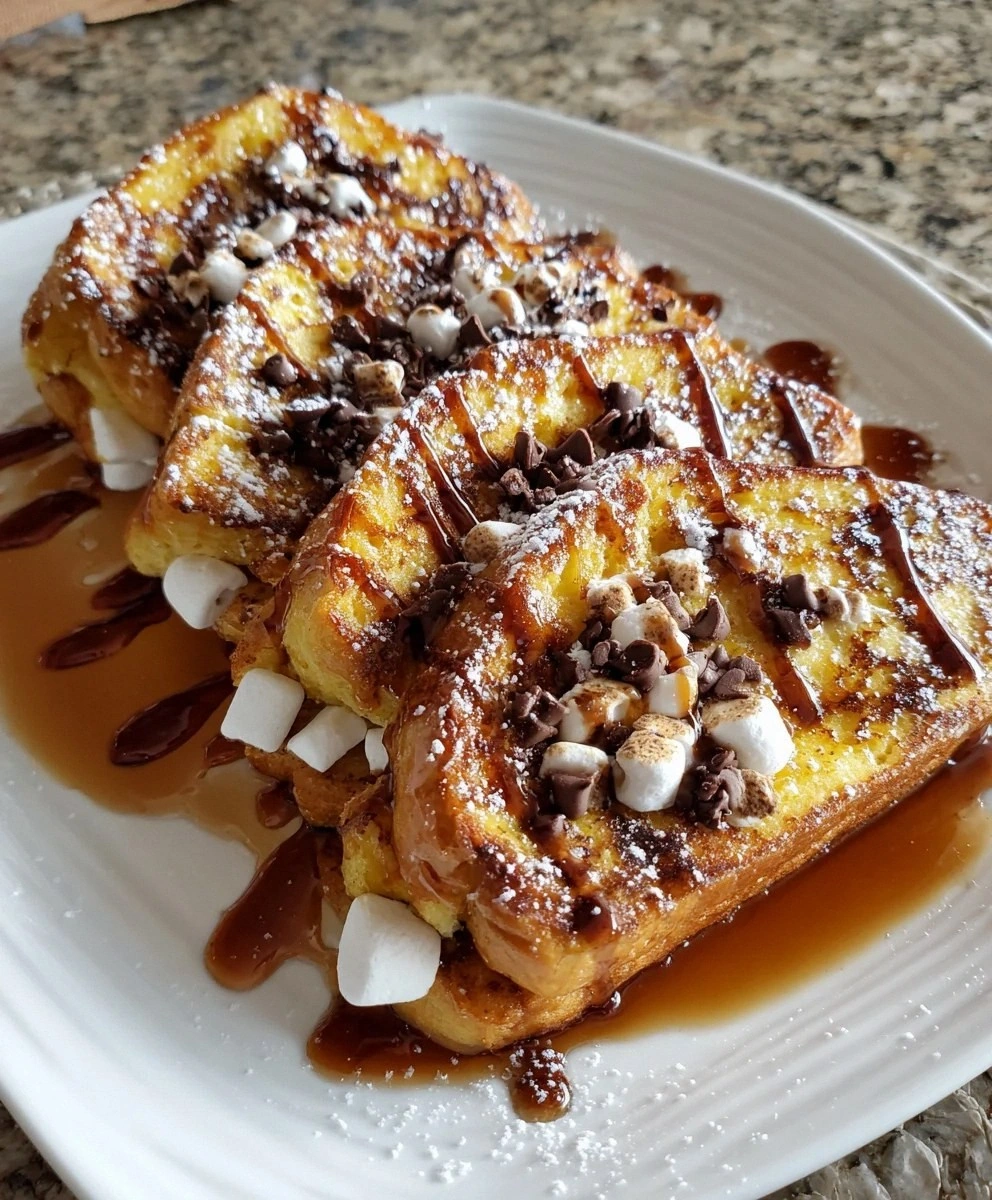
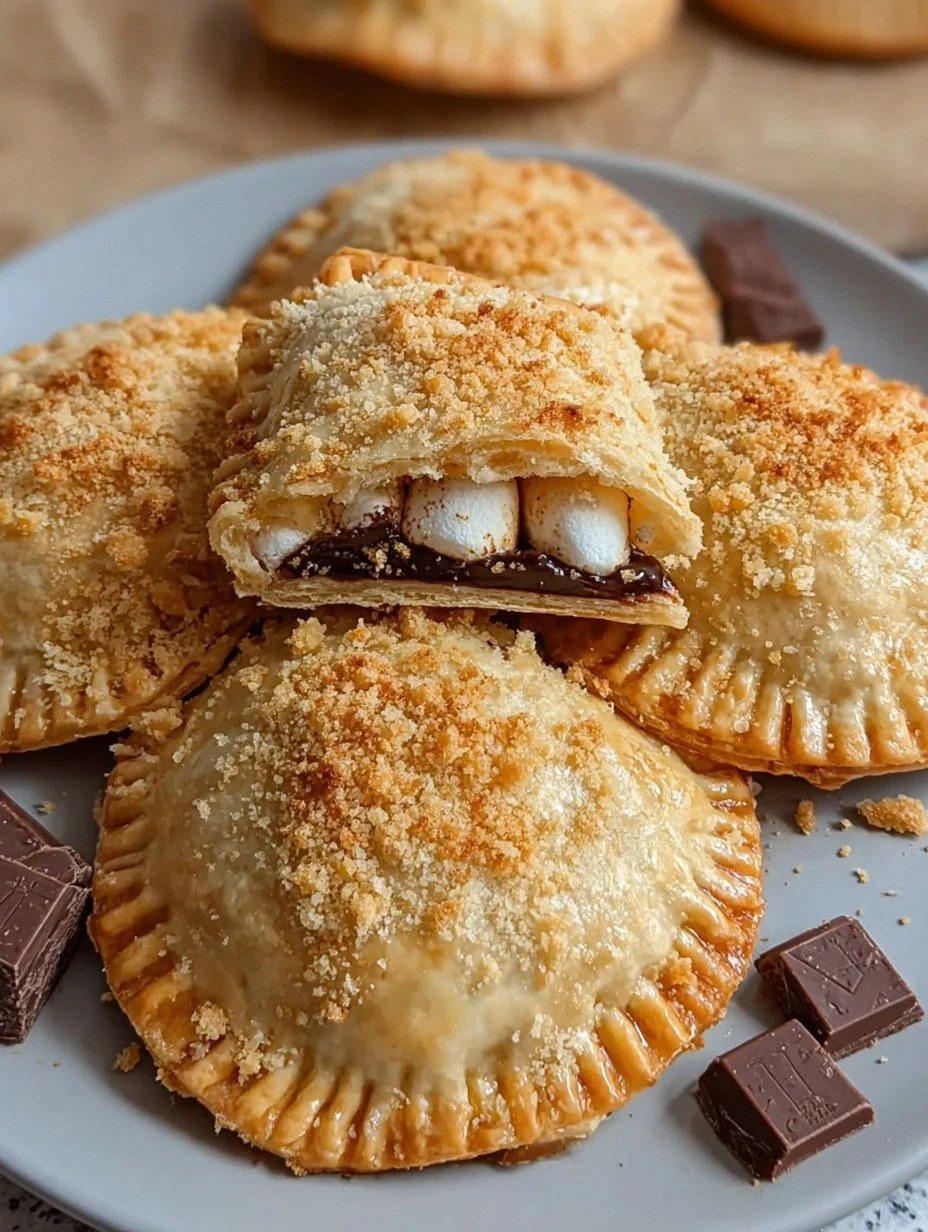
Picture this: the oven humming softly, a tray of buttery, flaky pockets waiting patiently, the air filling with the sweet aroma of toasted marshmallow and melting chocolate. You hear the faint crackle of butter brushing the tops, feel the warmth radiating from the hot metal, and see the edges of each pie turn a gorgeous amber, like sunrise on a crisp autumn morning. When you finally bite into one, the crust shatters with a satisfying snap, the chocolate stretches like velvet, and the marshmallow clouds melt on your tongue, leaving a lingering caramel kiss. It’s an orchestra of textures and flavors that makes your taste buds do a happy dance.
Why does this version stand out from every other s’mores recipe you’ve seen online? First, it uses refrigerated pie dough—a shortcut that guarantees a buttery, flaky crust without the hassle of kneading and chilling homemade pastry. Second, the filling is a perfectly balanced trio of chocolate, mini marshmallows, and crushed graham crackers, each component staying distinct yet harmonizing beautifully. Third, the technique of brushing a thin layer of melted butter on top before baking gives the crust an irresistible glossy finish that looks as good as it tastes. Most recipes either skip the crust altogether or end up with a soggy mess; this one nails the texture every single time.
And here’s the kicker: I’m going to reveal a secret ingredient that most people overlook—a splash of water used only to seal the edges. It sounds trivial, but that tiny dab acts like culinary superglue, ensuring none of that precious molten chocolate leaks out. Trust me, you’ll thank me when you pull the tray out of the oven and see perfectly sealed, golden‑brown hand pies ready to be devoured. I dare you to taste this and not go back for seconds. Let me walk you through every single step — by the end, you’ll wonder how you ever made it any other way.
What Makes This Version Stand Out
- Flavor Explosion: The combination of rich chocolate, airy marshmallows, and crunchy graham crackers creates a layered taste that mimics the classic campfire experience but with a refined, bakery‑quality finish.
- Texture Triumph: A flaky, buttery crust gives way to a gooey interior; the contrast is as satisfying as biting into a perfectly toasted baguette.
- Speedy Simplicity: Using refrigerated pie dough cuts prep time in half, making this recipe doable even on a weekday night.
- Unique Presentation: Hand pies are portable, mess‑free, and look elegant on a serving platter—ideal for parties, picnics, or a cozy movie night.
- Crowd‑Pleaser Factor: Whether you’re feeding kids or adults, the familiar s’mores flavors win hearts instantly; I’ve seen entire tables disappear in minutes.
- Ingredient Quality: By choosing premium chocolate and fresh mini marshmallows, you elevate a humble snack into a gourmet treat.
- One‑Pan Efficiency: All the magic happens on a single baking sheet, meaning cleanup is a breeze—no more scrubbing melted chocolate off the stovetop.
- Make‑Ahead Magic: These pies freeze beautifully; just reheat and you have an instant dessert that tastes fresh‑baked.
Inside the Ingredient List
The Flavor Base
The star of any s’mores is, of course, the chocolate. I recommend using two high‑quality chocolate bars—milk for classic sweetness or dark for a sophisticated bite. The chocolate melts into a glossy river that binds the marshmallows and graham crumbs together. If you skip this and use a cheap chocolate chip, you’ll end up with a grainy, waxy texture that ruins the whole experience. Pro tip: break the bars into small chunks before folding them into the filling; this ensures even melting.
The Texture Crew
Miniature marshmallows are the unsung heroes here. Their tiny size means they melt quickly yet retain a fluffy texture, giving you that cloud‑like bite without the need to chop large marshmallows into uneven pieces. Crushed graham crackers add the signature crunch and a hint of honey‑brown sweetness that balances the chocolate’s richness. If you omit the graham crumbs, the filling becomes a one‑dimensional chocolate‑marshmallow puddle—delicious, but missing that essential snap.
The Unexpected Star
Refrigerated pie dough might look like a shortcut, but it’s a game‑changer. The dough is already laminated with butter, so when it bakes, it puffs up into a light, flaky crust that rivals any homemade pastry. Using this dough saves you from the labor‑intensive process of making pastry from scratch, yet you still get that buttery, golden finish. If you try to substitute with pre‑made puff pastry, you’ll notice a denser texture that doesn’t hold the filling as well.
The Final Flourish
A quick brush of melted salted butter on the tops before baking adds a glossy sheen and a subtle savory note that cuts through the sweetness. A splash of water—just a tablespoon—helps seal the edges, acting like culinary glue to keep the molten chocolate inside. Optional dips of chocolate syrup and marshmallow cream elevate the experience, turning each bite into a dip‑and‑savor adventure. If you’re watching calories, feel free to skip the dips; the pies are already decadently satisfying.
Everything's prepped? Good. Let's get into the real action…
The Method — Step by Step
- Preheat and Prep: Preheat your oven to 375°F (190°C). While the oven warms, line a baking sheet with parchment paper. This step ensures even heat distribution and prevents sticking. I like to set a timer for 5 minutes so I don’t forget about the oven—this is the moment of truth.
- Roll Out the Dough: Unroll the refrigerated pie dough onto a lightly floured surface. Using a 4‑inch round cutter (or a cup), cut out circles—aim for about 12 circles for a batch of eight pies (each pie uses two circles). Place the circles on the prepared sheet; they should be spaced about an inch apart. Kitchen Hack: Chill the cut circles for 10 minutes; colder dough seals better and puffs up higher.
- Make the Filling: In a large bowl, combine the chocolate bar chunks, miniature marshmallows, and 1 cup of crushed graham crackers. Toss gently until everything is evenly coated. The chocolate should be in small bite‑size pieces so it melts uniformly. If you hear a faint crackle as you stir, that’s the chocolate snapping—a good sign.
- Spoon the Filling: Place about a tablespoon of the mixture onto the center of each dough circle. Be careful not to overfill; the edges need room to seal. The filling should sit just below the rim, leaving a thin border of dough visible. This is where the magic happens—too much and the pies will burst; too little and they’ll be dry.
- Seal the Pies: Brush the edge of each bottom circle with a dab of water using a pastry brush. Top each with a second dough circle, pressing gently to seal. Use the tip of a fork to crimp the edges for a decorative finish and extra security. Watch Out: If you skip the water seal, the filling will leak during baking, creating a greasy mess on your tray.
- Butter and Sprinkle: Melt 2 tablespoons of salted butter and brush the tops of each pie generously. This creates a golden, glossy finish that shatters like thin ice when you bite. Then, sprinkle the remaining crushed graham crackers over the tops for extra crunch and visual appeal. The aroma at this point is already intoxicating—trust me, you’re almost there.
- Bake to Perfection: Slide the sheet into the preheated oven. Bake for 18‑22 minutes, or until the crust is a deep golden‑brown and the chocolate inside is bubbling. You’ll know they’re ready when the edges start pulling away from the parchment and a faint caramel scent fills the kitchen. Resist the urge to open the oven too early; the steam inside is essential for that flaky lift.
- Cool, Dip, and Serve: Remove the pies and let them rest on a wire rack for 5 minutes. This short cooling period lets the filling set just enough to avoid a molten spill. Serve warm with optional chocolate syrup and marshmallow cream on the side for dipping. That sizzle when it hits the pan? Absolute perfection. And now the fun part—watch your guests dive in.
That's it — you did it. But hold on, I've got a few more tricks that'll take this to another level…
Insider Tricks for Flawless Results
The Temperature Rule Nobody Follows
Never bake these pies at a temperature lower than 375°F. A hotter oven creates steam quickly, which lifts the crust and ensures the chocolate melts without seeping out. I once tried a low‑and‑slow 325°F bake; the result was a soggy bottom and a pale crust that looked like a sad pancake. Stick to the recommended heat and you’ll get that coveted puff.
Why Your Nose Knows Best
Your sense of smell is the ultimate doneness gauge. When the pies are about 2 minutes from finishing, you’ll catch a buttery, caramel‑sweet scent wafting from the oven. If you’re still smelling raw dough, give them another minute. Trust the nose over the timer—this trick saved me from under‑baked disasters more than once.
The 5‑Minute Rest That Changes Everything
Allow the pies to rest for exactly five minutes after baking. This brief pause lets the interior settle, turning the molten chocolate into a silky, slightly firm filling that doesn’t ooze everywhere. Skipping this step is like cutting a cake too soon; you end up with a messy plate and a disappointed palate.
Butter Brush Magic
For a truly glossy finish, melt the butter with a pinch of sea salt and brush it on while the pies are still hot. The butter seeps into the crust, creating a subtle sheen that catches the light beautifully. A friend once tried using olive oil instead—let’s just say the flavor was… off‑track.
Freezer‑Friendly Folding
If you want to make a big batch ahead of time, assemble the pies, brush with butter, and freeze them on the tray before baking. When you’re ready, add an extra 5 minutes to the bake time. This method preserves the flaky texture and eliminates the need for a last‑minute prep frenzy.
Creative Twists and Variations
This recipe is a playground. Here are some of my favorite ways to switch things up:
Nutty Delight
Add a tablespoon of chopped toasted pecans to the filling. The nuts introduce a buttery crunch that pairs beautifully with the chocolate, turning the classic s’more into a sophisticated dessert.
Peppermint Twist
Stir in a pinch of crushed peppermint candy into the chocolate mixture. The cool mint bursts against the sweet marshmallow, making it perfect for holiday gatherings.
Caramel Swirl
Drizzle a thin ribbon of caramel sauce over the chocolate before adding the marshmallows. The caramel adds a buttery depth that feels like a caramel apple in pastry form.
Fruit Fusion
Mix in a handful of dried cranberries or chopped apricots for a tangy contrast. The dried fruit’s chewiness balances the gooey interior and adds a pop of color.
Vegan Version
Swap the butter for coconut oil, use dairy‑free chocolate, and choose vegan mini marshmallows. The result is just as indulgent, and it’s perfect for guests with dietary restrictions.
Storing and Bringing It Back to Life
Fridge Storage
Place cooled hand pies in an airtight container lined with parchment paper. They’ll stay fresh for up to three days. Reheat in a 350°F oven for 8‑10 minutes; the crust will revive its crispness.
Freezer Friendly
Arrange unbaked pies on a tray, freeze solid, then transfer to a zip‑top bag. They keep for up to two months. When ready, bake from frozen, adding an extra 5‑7 minutes to the bake time.
Best Reheating Method
For a quick revive, preheat a skillet over medium heat, add a splash of water, and cover the pies for 2‑3 minutes. The steam restores the interior’s gooeyness while the bottom crisps up. No microwave here; you don’t want a soggy crust.