Picture this: a quiet Sunday afternoon, the kitchen light flickering softly, and a pot on the stove that smells like destiny. I was halfway through a recipe I’d found online, when the timer clicked and the aroma of browned beef hit me like a punchline. My friend dared me to finish it and taste it before I could even finish the next step. That dare, that unexpected burst of flavor, was the spark that turned a mediocre chili into a culinary revelation.
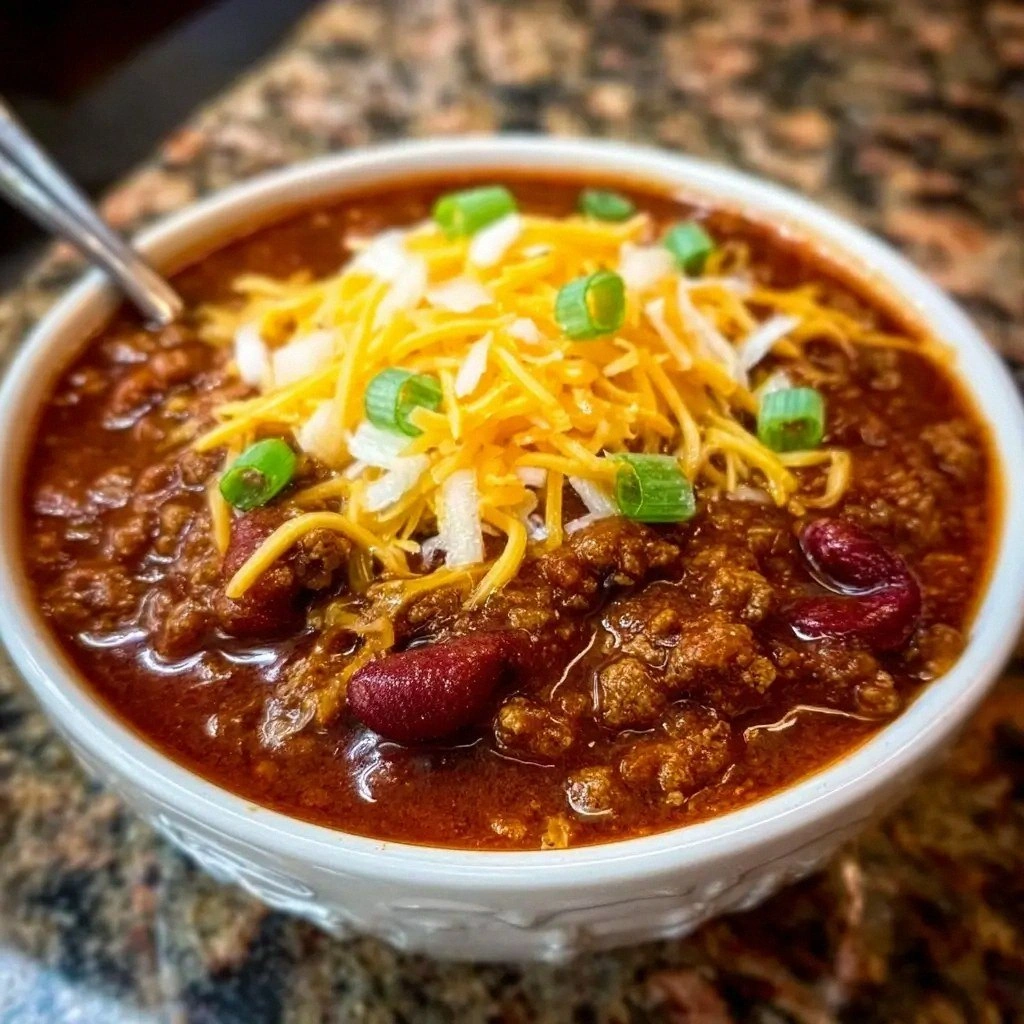
The first thing you notice is the deep, almost hypnotic color of the pot—rich burgundy, speckled with flecks of black beans and bright orange tomato chunks. The sizzling sound is a rhythmic drumbeat, the scent of cumin and smoked paprika rising like a fragrant cloud. Your fingers feel the heat of the pot, the gentle hum of the stove, and the anticipation of that first spoonful. When you taste it, the chili is a harmonious orchestra: the savory beef, the tangy tomatoes, the subtle heat of cayenne, and a whisper of sweetness from brown sugar. It’s a texture that’s simultaneously thick and silky, with beans that pop like tiny, soft fireworks.
What makes this version stand out from every other chili recipe you’ve tried? It’s not just the ingredients; it’s the technique, the layering of flavors, and the balance of heat and depth. I’ve spent years tweaking this recipe, and the result is a dish that’s hands down the best version you’ll ever make at home. It’s the kind of chili that makes you pause, savor, and then come back for seconds. I dare you to taste this and not go back for seconds.
And there’s a twist you won’t expect: a touch of dark chocolate that melts into the sauce, adding an earthy richness that elevates every bite. That secret ingredient turns ordinary chili into a gourmet experience. Let me walk you through every single step—by the end, you’ll wonder how you ever made it any other way.
What Makes This Version Stand Out
- Flavor Depth: Layers of spices—cumin, smoked paprika, oregano—create a complex profile that unfolds with each bite.
- Texture Balance: The combination of ground beef and beans offers a satisfying chew, while the tomatoes provide a silky base.
- Heat Control: Cayenne and chili powder are calibrated to give just the right kick without overpowering the dish.
- Versatility: The recipe adapts seamlessly to vegetarian or keto variations, keeping the core flavor intact.
- Make‑Ahead Friendly: The chili tastes even better the next day, making it ideal for meal prep and busy weeknights.
- Crowd‑Pleaser: Whether at a family dinner or a backyard barbecue, this chili earns rave reviews and lingering compliments.
- Ingredient Quality: Using fresh, high‑quality produce and lean meats elevates the entire dish.
- Time Efficiency: From prep to finish, the total time is under an hour, yet the flavor feels like a slow‑cooked masterpiece.
Alright, let's break down exactly what goes into this masterpiece…
Inside the Ingredient List
The Flavor Base
Ground beef is the heart of this chili, but choose 85% lean to keep the sauce juicy without excess fat. Diced onion and minced garlic form the aromatic foundation; they caramelize slightly, adding sweetness that balances the acidity of tomatoes. A diced bell pepper contributes color, crunch, and a subtle peppery note. Together, these ingredients create a savory canvas that absorbs every spice.
If you’re vegetarian, substitute the beef with a hearty lentil blend or textured vegetable protein. The texture changes, but the flavor profile stays intact because the spices dominate. Skipping the bell pepper will thin the sauce slightly and reduce the overall vibrancy, so keep it for maximum impact.
The Texture Crew
Kidney beans and black beans are the protein-packed, fiber-rich stars that give chili its heartiness. Drain and rinse them to reduce sodium and improve mouthfeel. The beans absorb the tomato base, becoming silky and smooth while still offering a satisfying bite. If you prefer a thicker consistency, use half the beans and add a splash of tomato paste.
The beef broth adds depth and helps the sauce simmer into a cohesive, velvety mixture. A cup of broth is enough to meld the beans and meat without diluting the flavors. If you’re watching sodium, opt for low‑sodium broth or add a pinch of salt later.
The Unexpected Star
Dark chocolate—yes, chocolate—may sound odd, but a tablespoon of 70% cacao melts into the chili, adding a subtle bitterness that balances the sweetness of tomatoes and brown sugar. This technique, borrowed from mole sauces, gives the chili a luxurious, almost velvety finish. If you’re averse to chocolate, you can omit it; the chili will still shine, but the depth will be slightly less complex.
A splash of Worcestershire sauce introduces umami, enhancing the beef flavor and giving the chili a richer, more robust taste. Brown sugar, on the other hand, counteracts the acidity of the tomatoes, creating a smooth, rounded finish. Together, these ingredients elevate the chili from simple to unforgettable.
The Final Flourish
Olive oil and butter are used sparingly to sauté the aromatics, ensuring they don’t stick and burn. Olive oil provides a fruity undertone, while butter adds a silky mouthfeel. A pinch of cayenne pepper is optional but recommended for those who enjoy a subtle heat. Salt and black pepper finish the seasoning, but taste as you go to avoid over‑salting.
For the optional toppings—cheddar, sour cream, green onions, cilantro, avocado, and lime wedges—choose what resonates with your palate. Each topping adds a new layer of flavor, texture, and visual appeal, turning the chili from a simple dish into a personalized masterpiece.
Everything's prepped? Good. Let's get into the real action…
The Method — Step by Step
- Heat a large Dutch oven over medium‑high heat. Add 2 tablespoons of olive oil and 1 tablespoon of butter. Let the butter melt, then add the diced onion and bell pepper. Sauté until the vegetables soften and the onion turns translucent, about 5 minutes. The aroma should be warm and inviting.
- Stir in 3 cloves of minced garlic and cook for 30 seconds until fragrant. Be careful not to burn the garlic; a slight golden color signals readiness. This step builds the aromatic foundation that will permeate the entire pot.
- Add 2 pounds of ground beef, breaking it up with a wooden spoon. Cook until the meat is browned all over, about 8 minutes. Drain excess fat if you’re aiming for a leaner chili; the remaining oil will keep the sauce from drying out.
- Season the meat with 3 tablespoons of chili powder, 1 tablespoon of ground cumin, 1 teaspoon of smoked paprika, 1 teaspoon of oregano, 1 teaspoon of salt, and 1/2 teaspoon of black pepper. Stir to coat the meat evenly. The spices should toast slightly, releasing their essential oils.
- Pour in 2 cans of diced tomatoes (28 ounces each) and 1 can of tomato sauce. Stir until the mixture is well combined. The tomatoes should start to bubble gently, creating a fragrant steam.
- Add 1 cup of beef broth, 1 tablespoon of Worcestershire sauce, 1 tablespoon of brown sugar, and 1/4 teaspoon of cayenne pepper. Bring the mixture to a simmer, then reduce heat to low. Cover the pot and let it cook for 20 minutes, stirring occasionally. This slow simmer allows the flavors to meld into a harmonious whole.
- In the meantime, rinse 1 can of kidney beans and 1 can of black beans. Drain them and set aside. These beans will add body and protein to the chili.
- After the initial simmer, stir in the beans. Add a tablespoon of dark chocolate, letting it melt into the sauce. The chocolate should dissolve completely, leaving no visible shards. This step is the secret that gives the chili its signature depth.
- Simmer uncovered for an additional 15 minutes, stirring every 5 minutes to prevent sticking. The sauce should thicken, and the edges of the pot will begin to pull away slightly. At this point, the chili is ready for a final taste test.
- Adjust seasoning as needed—add more salt, pepper, or cayenne to suit your palate. Ladle the chili into bowls, and top with shredded cheddar, sour cream, chopped green onions, cilantro, avocado slices, or a squeeze of lime. Serve immediately with cornbread or tortilla chips.
That's it — you did it. But hold on, I've got a few more tricks that'll take this to another level.
Insider Tricks for Flawless Results
The Temperature Rule Nobody Follows
Many people cook chili on high heat, but that can cause the sauce to evaporate too quickly, leading to a dry texture. The secret is to simmer on low heat for the majority of the cooking time. This gentle heat allows the spices to infuse the meat and beans without losing moisture. I’ve found that a low simmer of 20 to 30 minutes brings out the best flavor.
Why Your Nose Knows Best
Your sense of smell is a reliable indicator of doneness. When the chili reaches the right balance, the aroma should be a warm, spicy, and slightly sweet bouquet. If it smells more like raw tomatoes, give it a few more minutes. If it’s too strong, a splash of broth can mellow it out.
The 5-Minute Rest That Changes Everything
Letting the chili rest for 5 minutes after cooking allows the flavors to settle and the sauce to thicken slightly. This pause also gives the beans a chance to absorb the surrounding sauce, creating a more cohesive texture. I always recommend a quick rest before serving.
Layering Spices for Depth
Add spices in stages: first the aromatics (cumin, paprika, oregano), then the heat (cayenne, chili powder). This technique ensures each spice releases its full flavor profile. Skipping the layering can result in a flat, one‑dimensional chili.
Using Fresh vs. Canned Tomatoes
While canned tomatoes are convenient, fresh tomatoes can elevate the taste. Use ripe, juicy tomatoes, peeled and diced, for a brighter, cleaner flavor. If you prefer canned, choose no‑salt or low‑sodium varieties to maintain control over the seasoning.
Creative Twists and Variations
This recipe is a playground. Here are some of my favorite ways to switch things up:
Smoky Chipotle Chili
Add a diced chipotle pepper in adobo sauce for a smoky heat that complements the beef. The adobo sauce also adds a tangy depth. This version is perfect for those who love a deeper, smoky flavor profile.
Vegetarian Lentil Chili
Replace the ground beef with a hearty mix of lentils and diced zucchini. The lentils absorb the spices beautifully, creating a protein‑rich, meatless chili. Serve with a dollop of Greek yogurt for added creaminess.
Low‑Carb Keto Chili
Omit the beans and add extra diced tomatoes and a splash of tomato paste. Use a ground turkey or beef substitute to keep the protein high. This version keeps carbs low while maintaining the rich flavor.
Mexican Street‑Taco Chili
Serve the chili in warm corn tortillas and top with fresh cilantro, diced onions, and a squeeze of lime. Add a spoonful of guacamole for a creamy contrast. This variation turns the dish into a street‑style taco feast.
Chocolate‑Infused Chili
Increase the chocolate to 2 tablespoons for a more pronounced mole flavor. Add a pinch of cinnamon to deepen the warmth. This version is a bold, adventurous take on classic chili.
Breakfast Chili
Serve the chili over a fried egg, with a side of toasted English muffin. The runny yolk adds a rich, velvety texture that pairs beautifully with the spicy sauce. This twist turns chili into a hearty breakfast.
Storing and Bringing It Back to Life
Fridge Storage
Cool the chili to room temperature, then transfer it to an airtight container. Store in the refrigerator for up to 5 days. The flavors deepen as the chili sits, making it even more delicious.
Freezer Friendly
Divide the chili into 1‑cup portions and place them in freezer‑safe containers or zip‑lock bags. Freeze for up to 3 months. Thaw overnight in the refrigerator before reheating.
Best Reheating Method
Reheat the chili over medium heat, adding a splash of water or broth to restore moisture. Stir until hot and bubbly. The tiny splash of liquid helps the sauce regain its silky texture.
Add a tiny splash of water before reheating — it steams back to perfection.