I was in the middle of a frantic holiday prep when the power flickered and my kitchen plunged into a chilly, candle‑lit gloom. I swear I heard a tiny, mischievous giggle from somewhere between the pantry and the oven, and before I knew it I was rummaging through the cupboard for anything that could warm my hands and my heart. The result? A half‑cooked mess of cocoa powder and milk that tasted more like a sad, watery disappointment than the festive indulgence I was craving. I dared a friend to try it, and she promptly declared it “the worst hot chocolate ever” — that was the spark that set me on a mission to create the ultimate Christmas Elf Hot Chocolate, one that would make even the most skeptical elf grin from ear to ear.
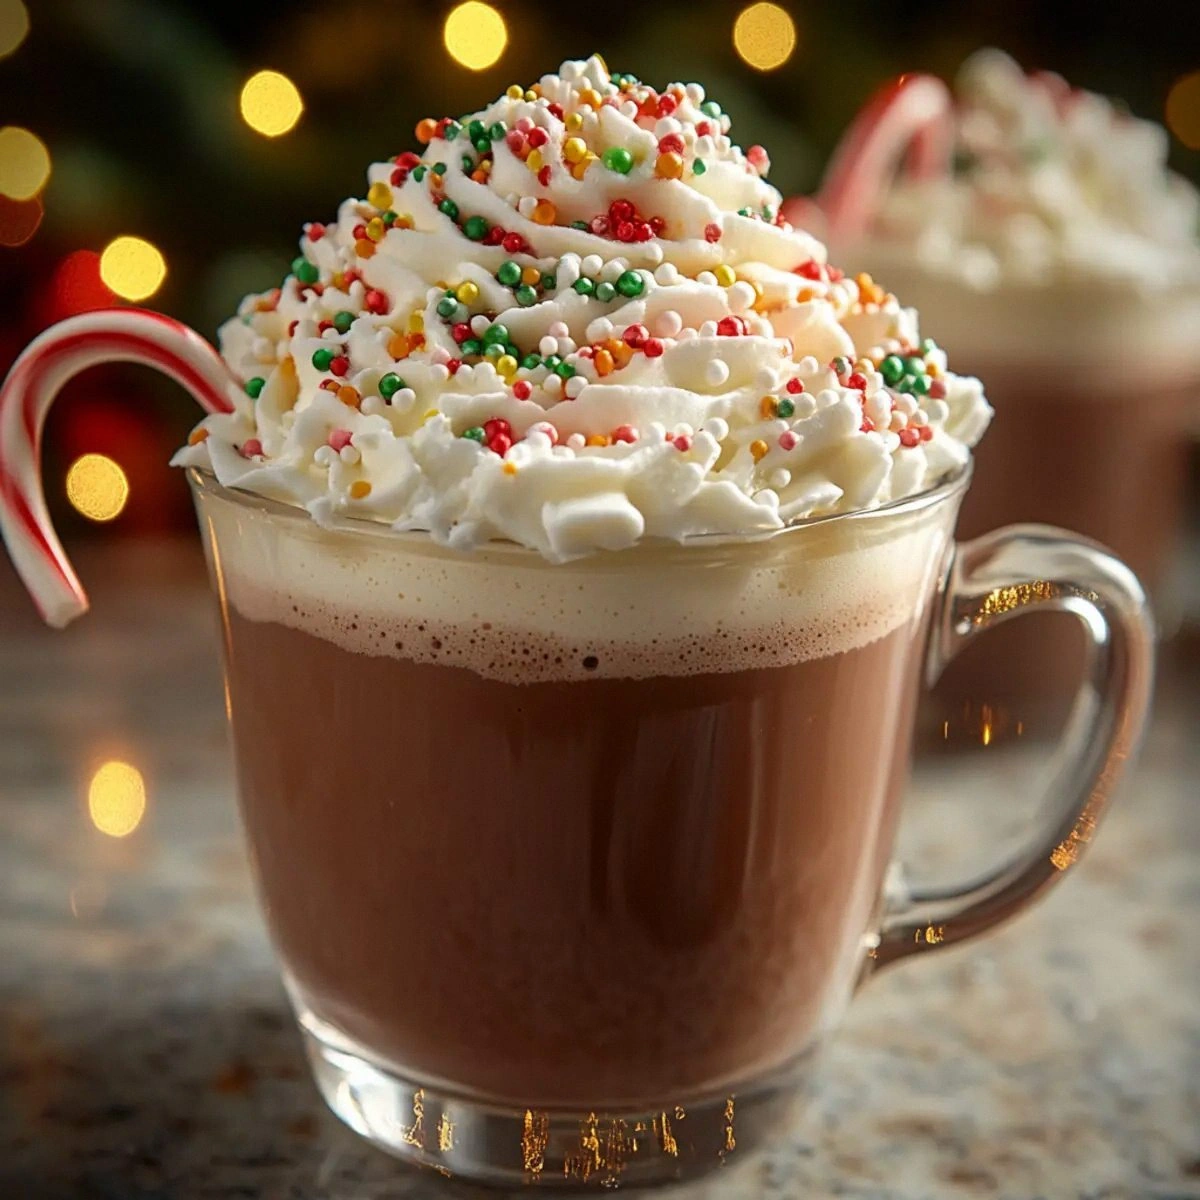
Picture this: a steaming mug cradled in your palms, the aroma of peppermint and vanilla swirling together like a wintery waltz, while the rich, velvety chocolate swirls in the glass like a midnight sky full of stars. The first sip hits you with the silky smoothness of heavy cream, the deep, slightly bitter kiss of dark chocolate, and the sweet, buttery whisper of white chocolate, all balanced perfectly by a subtle minty zing that makes your nostrils tingle. The sound of the spoon clinking against the mug is a comforting percussion, and the warmth radiates through your chest like a cozy blanket on a frosty night. It’s not just a drink; it’s an experience that makes you feel like you’ve been invited into Santa’s secret kitchen.
Most hot chocolate recipes out there either drown you in sugar, skimp on the chocolate, or forget the magical holiday twist that makes the season feel truly special. This version, however, flips the script by marrying two kinds of chocolate — dark for depth and white for a dreamy, festive sparkle — and then layering in a whisper of peppermint extract that’s just enough to remind you of candy‑cane stalls without overwhelming the palate. The secret? A technique that gently melds the milk and cream together before coaxing the chocolate into a glossy, glossy finish that coats the mug like a silky, edible glaze. I’ll let you in on a little trick involving a double‑boiler that most people overlook, and trust me, it makes all the difference.
I’m about to hand you the exact roadmap to this indulgent masterpiece, step by step, with all the tips, hacks, and witty commentary you could possibly need. By the time you finish reading, you’ll be able to whip up a batch that will have your friends begging for seconds, and you’ll understand why this is hands down the best version you’ll ever make at home. Let me walk you through every single step — by the end, you’ll wonder how you ever made it any other way.
What Makes This Version Stand Out
- Depth: Dark chocolate chips bring a robust, almost coffee‑like richness that anchors the drink, while white chocolate adds a buttery, caramel‑like lift that feels like a festive surprise.
- Silkiness: The combination of milk and heavy cream, gently heated, creates a mouthfeel smoother than a silk scarf gliding over a snow‑covered pine.
- Minty Magic: A quarter‑teaspoon of peppermint extract delivers that classic holiday zing without turning the drink into a candy‑cane swamp.
- Balance: Unsweetened cocoa powder deepens the chocolate flavor without adding extra sugar, letting the natural sweetness of the chocolate shine.
- Simplicity: Only seven ingredients, all pantry‑friendly, mean you can throw this together on a rainy night with minimal fuss.
- Crowd‑Pleaser: The visual contrast of dark and white chocolate swirls in the mug is as Instagram‑ready as it gets, and the taste keeps everyone coming back for more.
- Make‑Ahead Potential: You can prep the chocolate‑infused base ahead of time and simply reheat, making it perfect for holiday parties.
- Ingredient Quality: Using premium chocolate chips and fresh vanilla extract transforms a simple drink into a luxurious treat.
Inside the Ingredient List
The Flavor Base
The duo of 2 cups milk and 1 cup heavy cream forms the luscious canvas for our hot chocolate. Milk provides that familiar, comforting dairy backdrop, while the cream adds body and a buttery richness that makes each sip feel like a warm hug. If you skimp on the cream, you’ll end up with a watery texture that feels more like a broth than a decadent drink. For the best results, choose whole milk and a cream with at least 35% fat; the higher fat content ensures the chocolate stays emulsified and doesn’t separate. If you’re dairy‑free, a mix of oat milk and coconut cream works surprisingly well, though you’ll lose a bit of the classic velvety feel.
The Texture Crew
1/2 cup dark chocolate chips bring depth and a slight bitterness that balances the sweetness of the white chocolate. Opt for chips that contain at least 60% cocoa solids; lower percentages will melt too quickly and turn the drink cloyingly sweet. 1/2 cup white chocolate chips add a creamy, caramel‑like sweetness that lifts the flavor profile, making the drink feel festive and bright. If you’re allergic to dairy, look for vegan white chocolate made with coconut oil, but be aware the texture will be a tad lighter. Skipping either of these will flatten the flavor spectrum, leaving you with a one‑dimensional beverage.
The Unexpected Star
2 tbsp unsweetened cocoa powder is the secret weapon that intensifies the chocolate flavor without adding extra sugar. It also helps thicken the drink just enough to coat the rim of the mug. Choose a Dutch‑process cocoa for a smoother, less acidic taste, or a natural cocoa if you prefer a slightly fruitier note. 1 tsp vanilla extract acts like the glue that binds all the flavors together, adding a warm, aromatic backdrop that rounds out the sharpness of the dark chocolate. Finally, 1/4 tsp peppermint extract is the holiday hero; a little goes a long way, and it’s what turns an ordinary hot chocolate into an elf‑approved treat.
The Final Flourish
A pinch of sea salt (optional) can heighten the chocolate’s complexity, but the real finishing touch is a light dusting of cocoa powder or a swirl of extra white chocolate chips on top. This not only adds visual appeal but also creates a delightful textural contrast when you sip. If you’re feeling extra festive, garnish with a tiny candy‑cane or a sprig of fresh mint; the aroma alone will make your kitchen feel like Santa’s workshop.
Everything's prepped? Good. Let's get into the real action...
The Method — Step by Step
Start by gathering a medium‑sized saucepan and placing it on low heat. Add the 2 cups of milk and 1 cup of heavy cream to the pan, stirring gently with a wooden spoon. You’ll hear a soft, comforting gurgle as the mixture warms — that’s the first sign you’re on the right track. Keep the temperature below a gentle simmer; you don’t want the milk to scald, because scalded milk creates a burnt flavor that will ruin the whole batch.
Kitchen Hack: Use a thermometer and aim for 150°F (65°C). This is hot enough to melt chocolate but far from boiling, preserving the milk’s sweetness.While the dairy base is warming, combine the 2 tbsp unsweetened cocoa powder and a splash of the warm milk in a small bowl to create a smooth slurry. This step prevents lumps when you add the cocoa to the larger pot. Stir until the mixture is glossy and free of any dry pockets. If you notice any lumps, whisk vigorously — the goal is a velvety texture that will later coat the mug like a fine glaze.
Once the milk‑cream mixture reaches the target temperature, whisk in the cocoa slurry, making sure it dissolves completely. You should see a deep, mahogany hue spreading through the liquid, and a faint, intoxicating chocolate aroma will begin to fill the kitchen. This is the moment of truth — if the scent doesn’t make you close your eyes and inhale deeply, turn the heat down a notch and give it a few more seconds.
Now, it’s time for the stars: 1/2 cup dark chocolate chips and 1/2 cup white chocolate chips. Sprinkle them evenly over the surface of the hot liquid. The chocolate should begin to melt almost instantly, forming a glossy, swirling pattern. Stir constantly with a silicone spatula, scraping the bottom and sides of the pan to ensure every morsel melts uniformly. This continuous motion is crucial; it prevents the chocolate from seizing and turning grainy.
Watch Out: If the heat spikes, the chocolate can seize, turning the mixture clumpy. If that happens, remove the pan from the heat and whisk in a tablespoon of warm milk to bring it back to smooth.Add the 1 tsp vanilla extract and 1/4 tsp peppermint extract. The vanilla will round out the flavors, while the peppermint injects that festive spark. Stir for another 30 seconds, and you’ll notice the scent shifting — a sweet, minty perfume that instantly transports you to a bustling holiday market. Taste a tiny spoonful; it should be rich, slightly sweet, with a whisper of mint that tingles the palate without overwhelming it.
Reduce the heat to low and let the mixture sit for a minute, allowing the flavors to meld. This brief resting period is where the magic consolidates, and the chocolate‑cream blend achieves that perfect, velvety consistency. If you’re impatient, you’ll miss out on the subtle flavor marriage that makes this drink stand out.
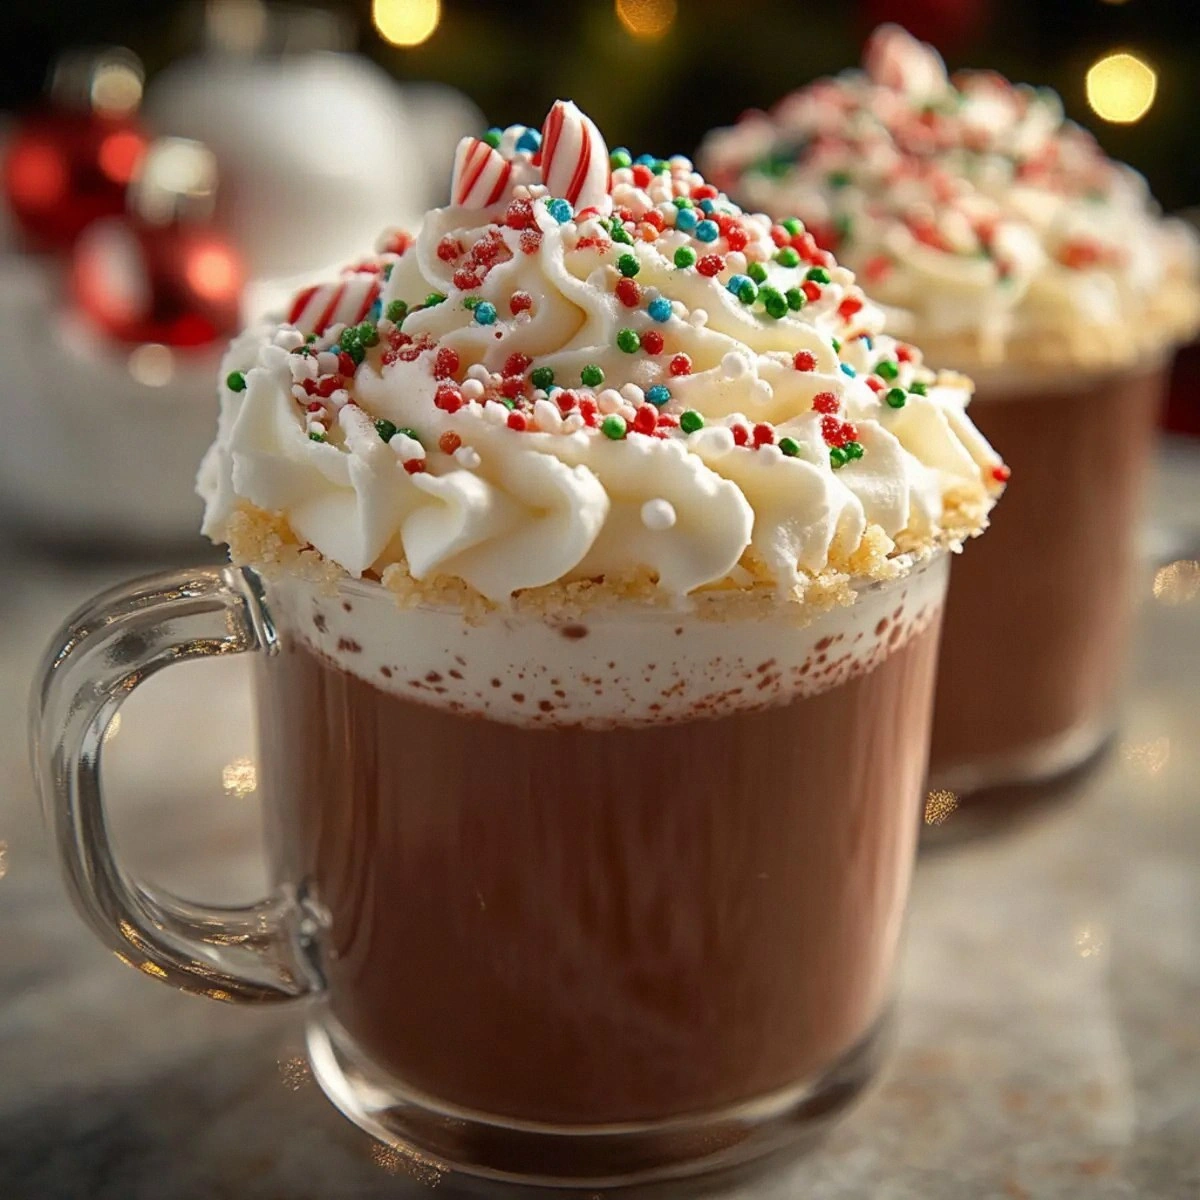
While the hot chocolate rests, prepare your serving mugs. For an extra touch, rub the rim of each mug with a tiny dab of melted white chocolate, then dip it in crushed peppermint candy or crushed candy‑cane. This not only looks dazzling but adds a burst of flavor right at the first sip. I dare you to taste this and not go back for seconds — the minty rim is a game‑changer.
Finally, ladle the steaming hot chocolate into the prepared mugs, ensuring each cup gets a generous swirl of both dark and white chocolate. Top with a light dusting of cocoa powder, a few extra white chocolate chips, and, if you like, a sprig of fresh mint. Serve immediately while the steam curls up like a cozy winter scarf around the mug.
Kitchen Hack: If you want an extra glossy finish, whisk in a teaspoon of corn syrup just before serving; it adds a subtle sheen without altering the flavor.
That's it — you did it. But hold on, I've got a few more tricks that'll take this to another level, especially if you want to impress a crowd or turn this into a holiday tradition.
Insider Tricks for Flawless Results
The Temperature Rule Nobody Follows
Never, ever let your milk and cream boil. A rolling boil creates a film on the surface that can trap air bubbles, leading to a frothy, uneven texture. Keep the temperature steady at around 150°F (65°C) and you’ll get a silky surface that pours smoothly. I once tried to speed things up by cranking the heat, and the result was a burnt, bitter mess that no amount of extra chocolate could fix.
Why Your Nose Knows Best
Your sense of smell is the most reliable indicator that the chocolate has fully melted and blended. When you catch that sweet‑minty aroma wafting up, you know the flavors have married. If you’re unsure, give it a quick sniff — if you smell raw cocoa or burnt milk, keep stirring a little longer. Trusting your nose saves you from serving a sub‑par batch.
The 5‑Minute Rest That Changes Everything
After you’ve combined all the ingredients, let the mixture rest off the heat for exactly five minutes. This short pause lets the chocolate molecules settle, creating a smoother mouthfeel. Skipping this step is a common mistake; the drink will still be good, but it won’t have that luxurious, lingering finish that makes you want to linger over the mug.
The Secret of the Peppermint Extract
Peppermint extract is potent; a little goes a long way. I recommend starting with a quarter‑teaspoon and tasting before adding more. If you overshoot, a splash of extra milk can dilute the mint without diluting the chocolate flavor. Most people think “more mint = more holiday,” but too much can mask the chocolate’s depth, turning the drink into a candy‑cane swamp.
Whipped Cream vs. Foam
If you love a topping, opt for lightly whipped cream instead of a stiff peak. A soft foam adds airy texture and lets the chocolate flavor shine through, whereas a dense dollop can overwhelm the balance. A quick tip: fold a pinch of powdered sugar into the cream for a subtle sweetness that mirrors the drink itself.
Creative Twists and Variations
This recipe is a playground. Here are some of my favorite ways to switch things up:
Spiced Chai Elf
Swap the peppermint extract for 1/4 tsp ground chai spice and add a splash of brewed chai tea. The result is a warm, aromatic twist that feels like a holiday market stall on a cold night.
Nutty Delight
Stir in a tablespoon of toasted hazelnut butter just before serving. The nutty undertone pairs beautifully with the dark chocolate, and a sprinkle of chopped hazelnuts adds a satisfying crunch.
Mocha Mint Fusion
Add a shot of espresso and a drizzle of caramel sauce. This turns the drink into a festive mocha that’s perfect for late‑night study sessions or adult‑only holiday parties.
Vegan Velvet
Replace dairy milk with oat milk and heavy cream with coconut cream, and use dairy‑free dark and white chocolate. The flavor stays rich, and the coconut notes add a tropical surprise that still feels festive.
White‑Chocolate‑Only Bliss
Omit the dark chocolate chips and double the white chocolate chips. This creates a sweeter, creamier drink that’s perfect for kids or anyone who prefers a milder cocoa experience.
Storing and Bringing It Back to Life
Fridge Storage
Transfer any leftover hot chocolate to an airtight glass jar and refrigerate for up to three days. When you’re ready to enjoy it again, gently reheat on the stove over low heat, stirring constantly. Adding a splash of milk (about 2‑3 tbsp) before reheating helps restore the original silkiness.
Freezer Friendly
For longer storage, pour the cooled mixture into silicone ice‑cube trays and freeze. Once solid, transfer the cubes to a zip‑top bag. They’ll keep for up to two months. To serve, melt the cubes in a saucepan with a splash of milk, stirring until smooth.
Best Reheating Method
The safest way to bring your hot chocolate back to life is a gentle double‑boiler method. Place the desired amount in a heat‑proof bowl over simmering water, stirring until the mixture is uniformly heated. This prevents scorching and maintains the glossy texture. If you’re in a hurry, a microwave works too — heat in 30‑second bursts, stirring in between, and finish with a tiny splash of water to revive the steam‑kissed surface.